
1. On the Top Menu, select Account/Login.
2. From the dropdown Menu, select My Account.

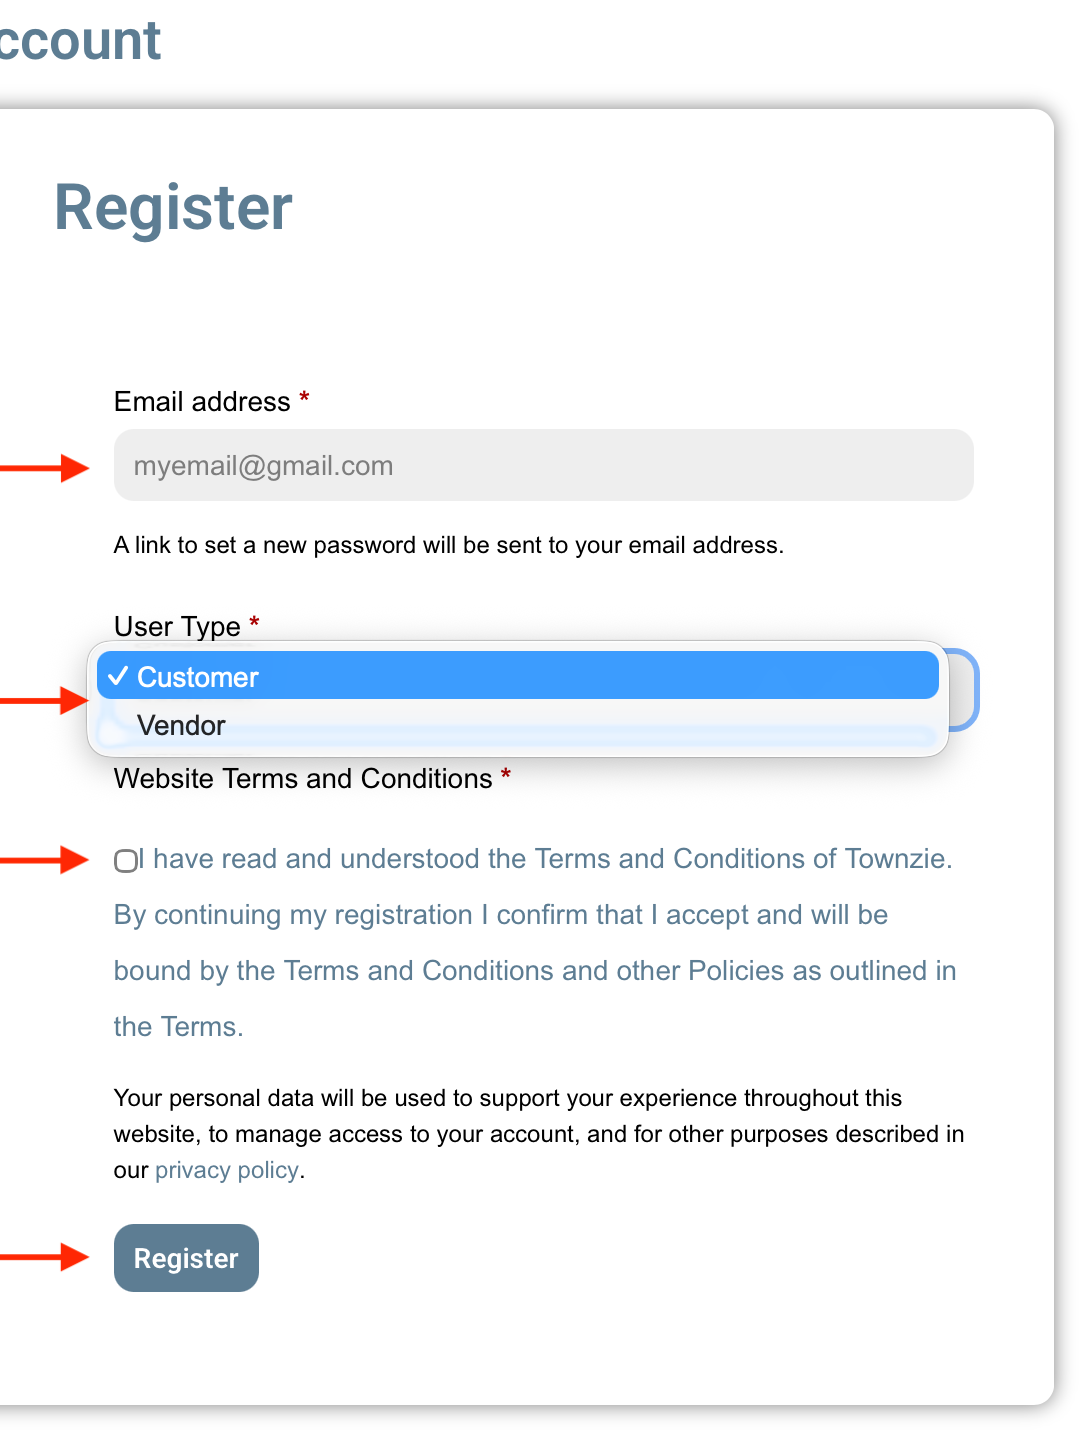
3. Complete the Register Form on the right:
– Add the email address where you wish to receive your communications from Townzie.
– Select the User Type:
– If you will make use of the website to plan your next trip, you will select “Customer”.
– If you would like to add a Listing and be able to manage the listing, then you will select “Vendor”. Once you select this option, more form fields will open that you will need to complete.
4. Tick the “Terms and Conditions” box after you have read through them.
5. Click on the Register button at the bottom of the form.
6. Your account should now be open, and you will be redirected to the My Account page.

If you registered as a Customer:
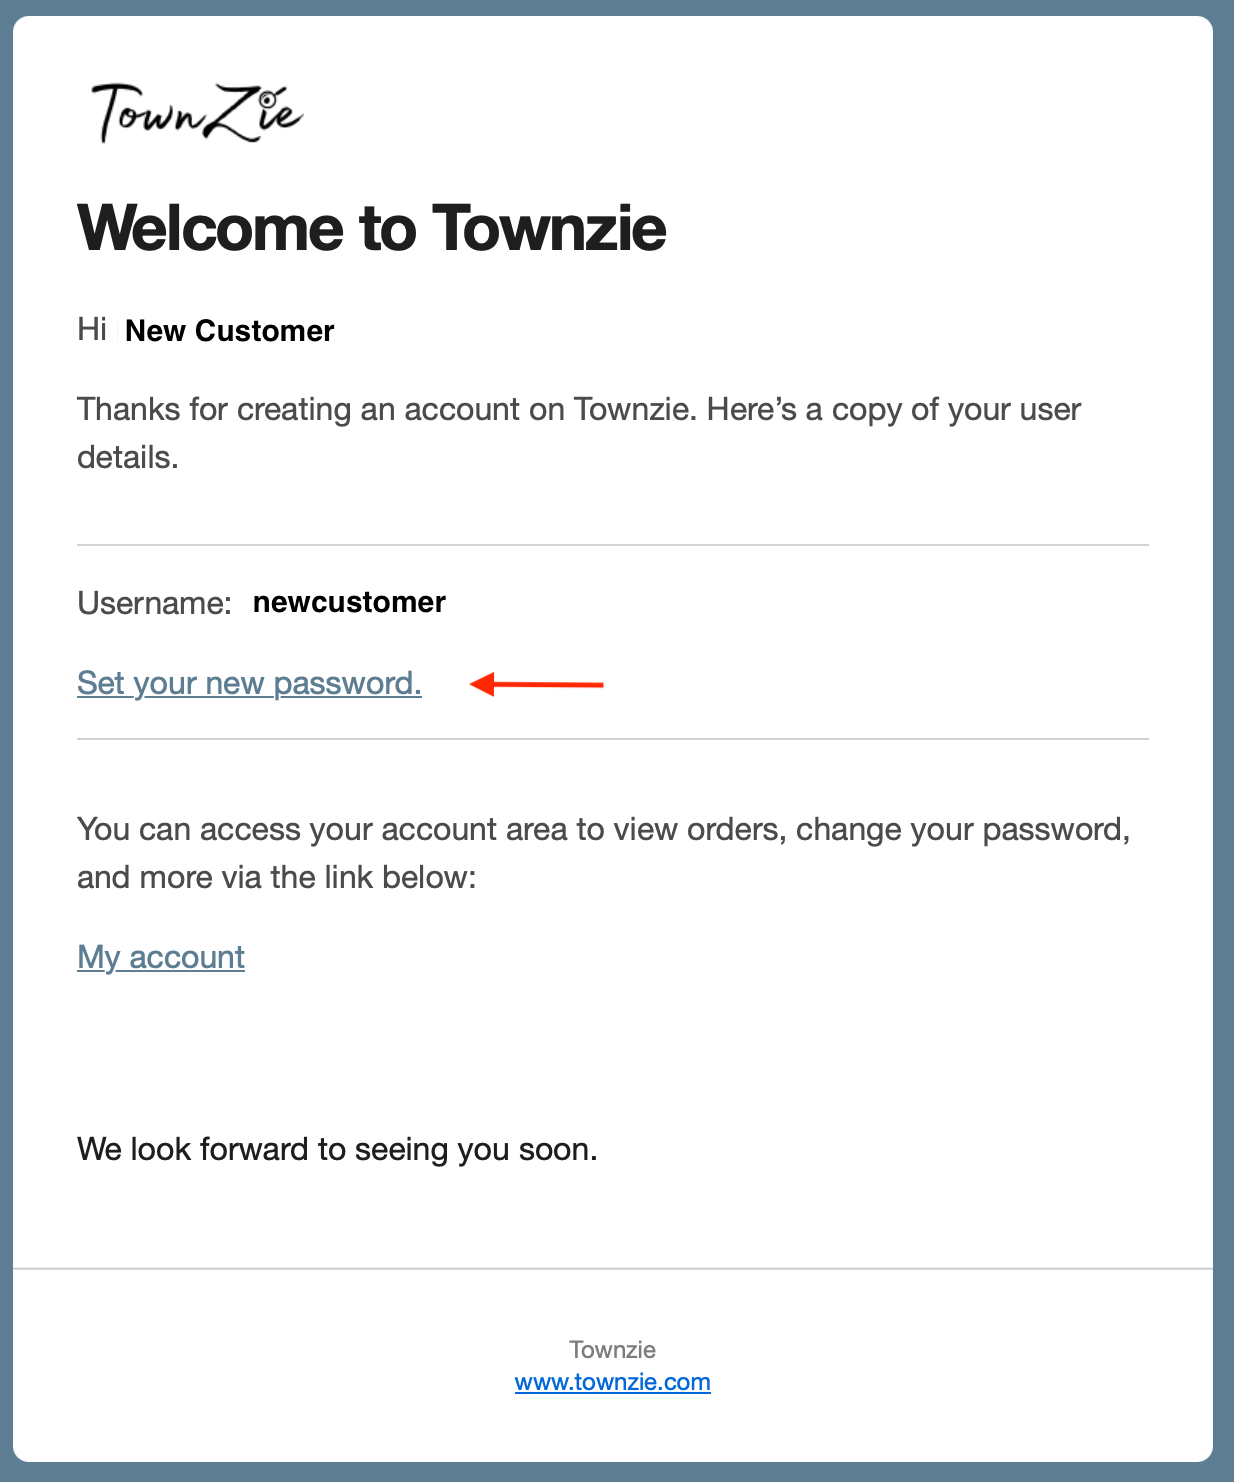
1. You should have received an email straight after you completed the registration form. Locate this email, and click on “Set your new password.”
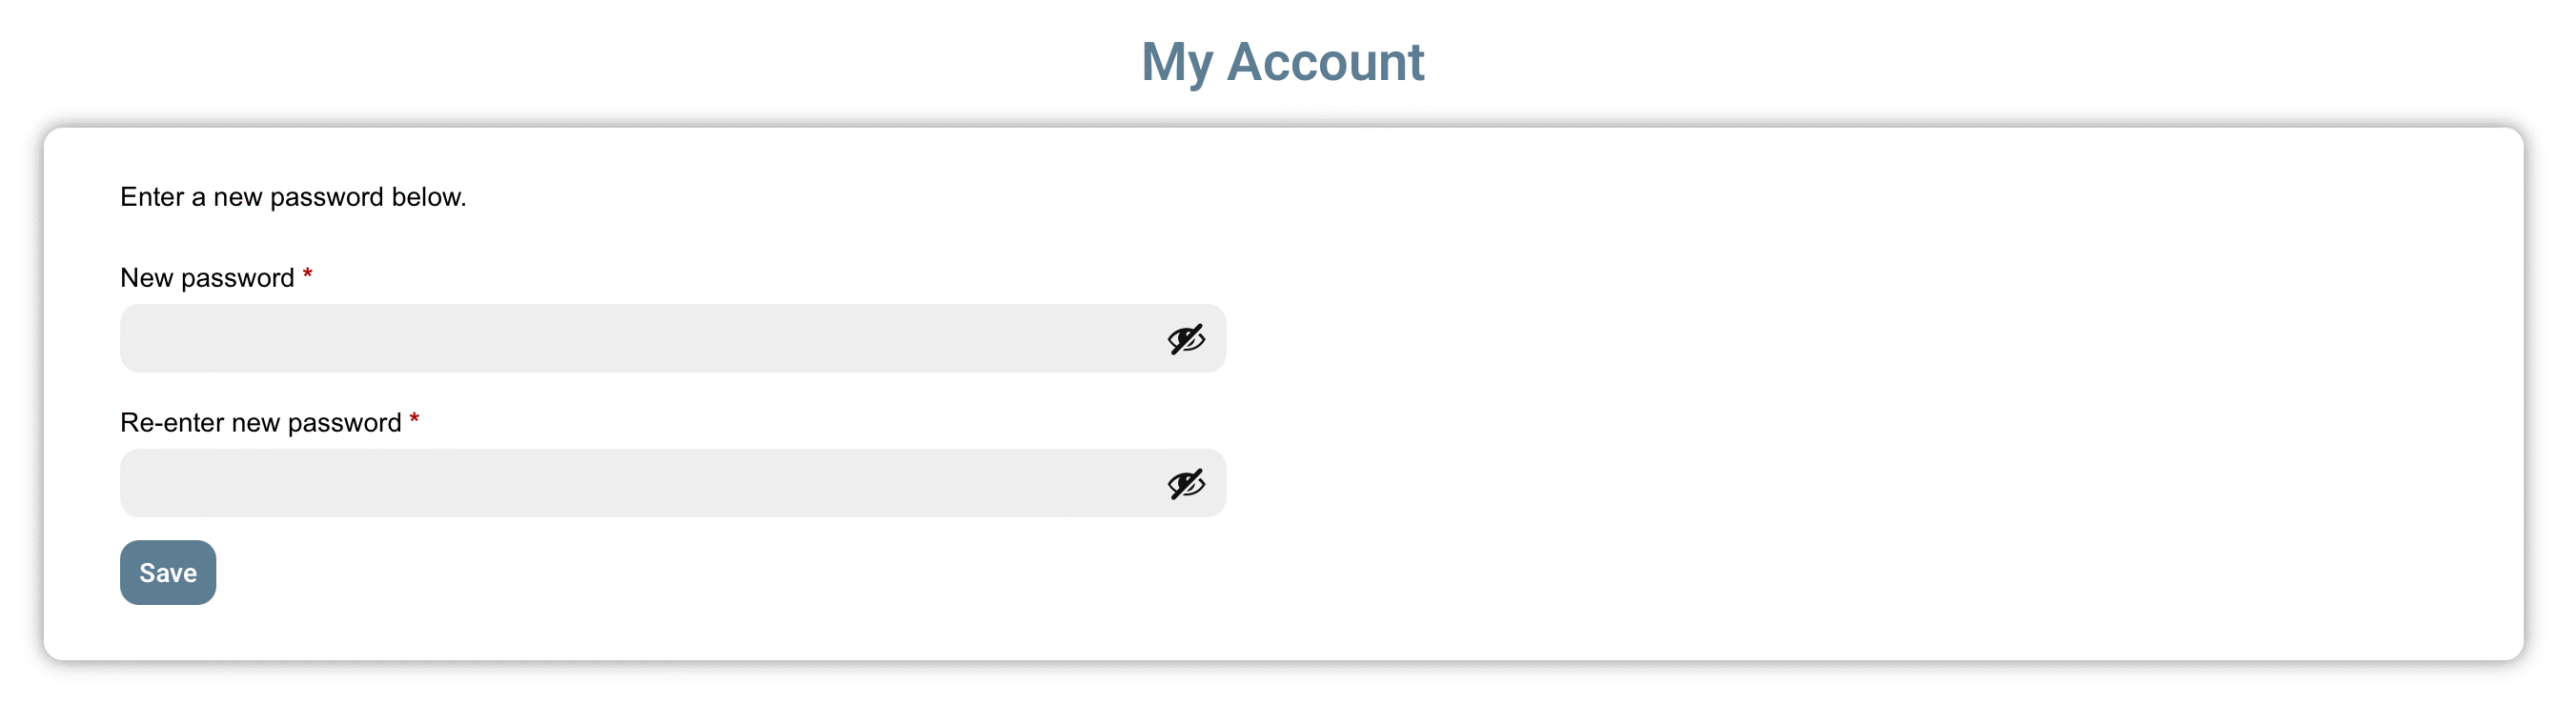
2. You will be redirected to a webpage where you may now enter your new password. Once completed, click on Save.
3. You will be redirected to the My Account web page.
If you registered as a Vendor:
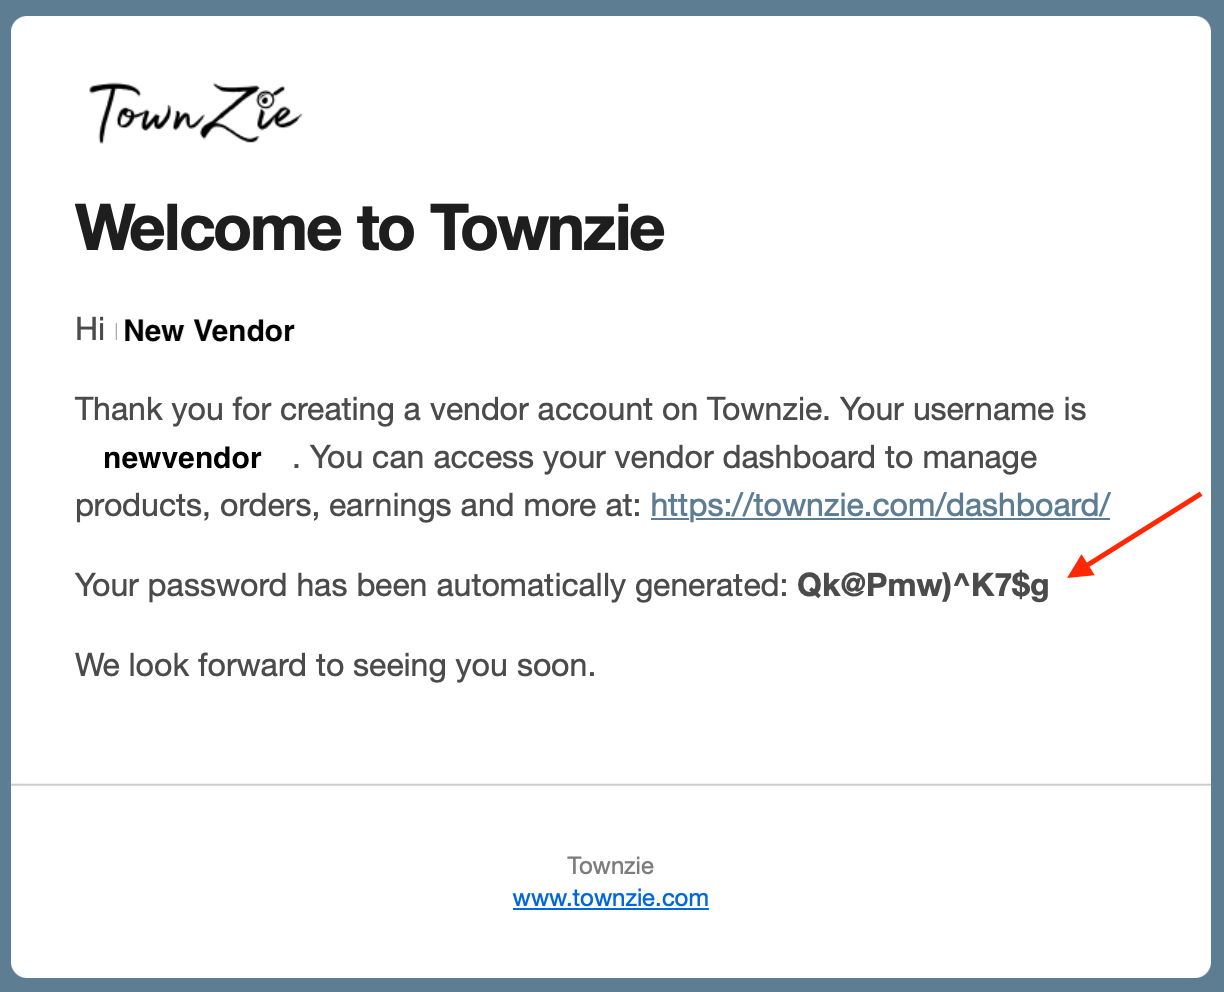
1. You should have received an email straight after you completed the registration form. Locate this email, and copy the temporary password received.
2. Return to the Townzie website, and on the Top Menu, select Account/Login.
3. From the dropdown Menu, select My Account.
4. On the Login form, enter your Username or Email, and then use the password you copied from the email in the Password field. Click on Log in. You will be redirected to the My Account page.
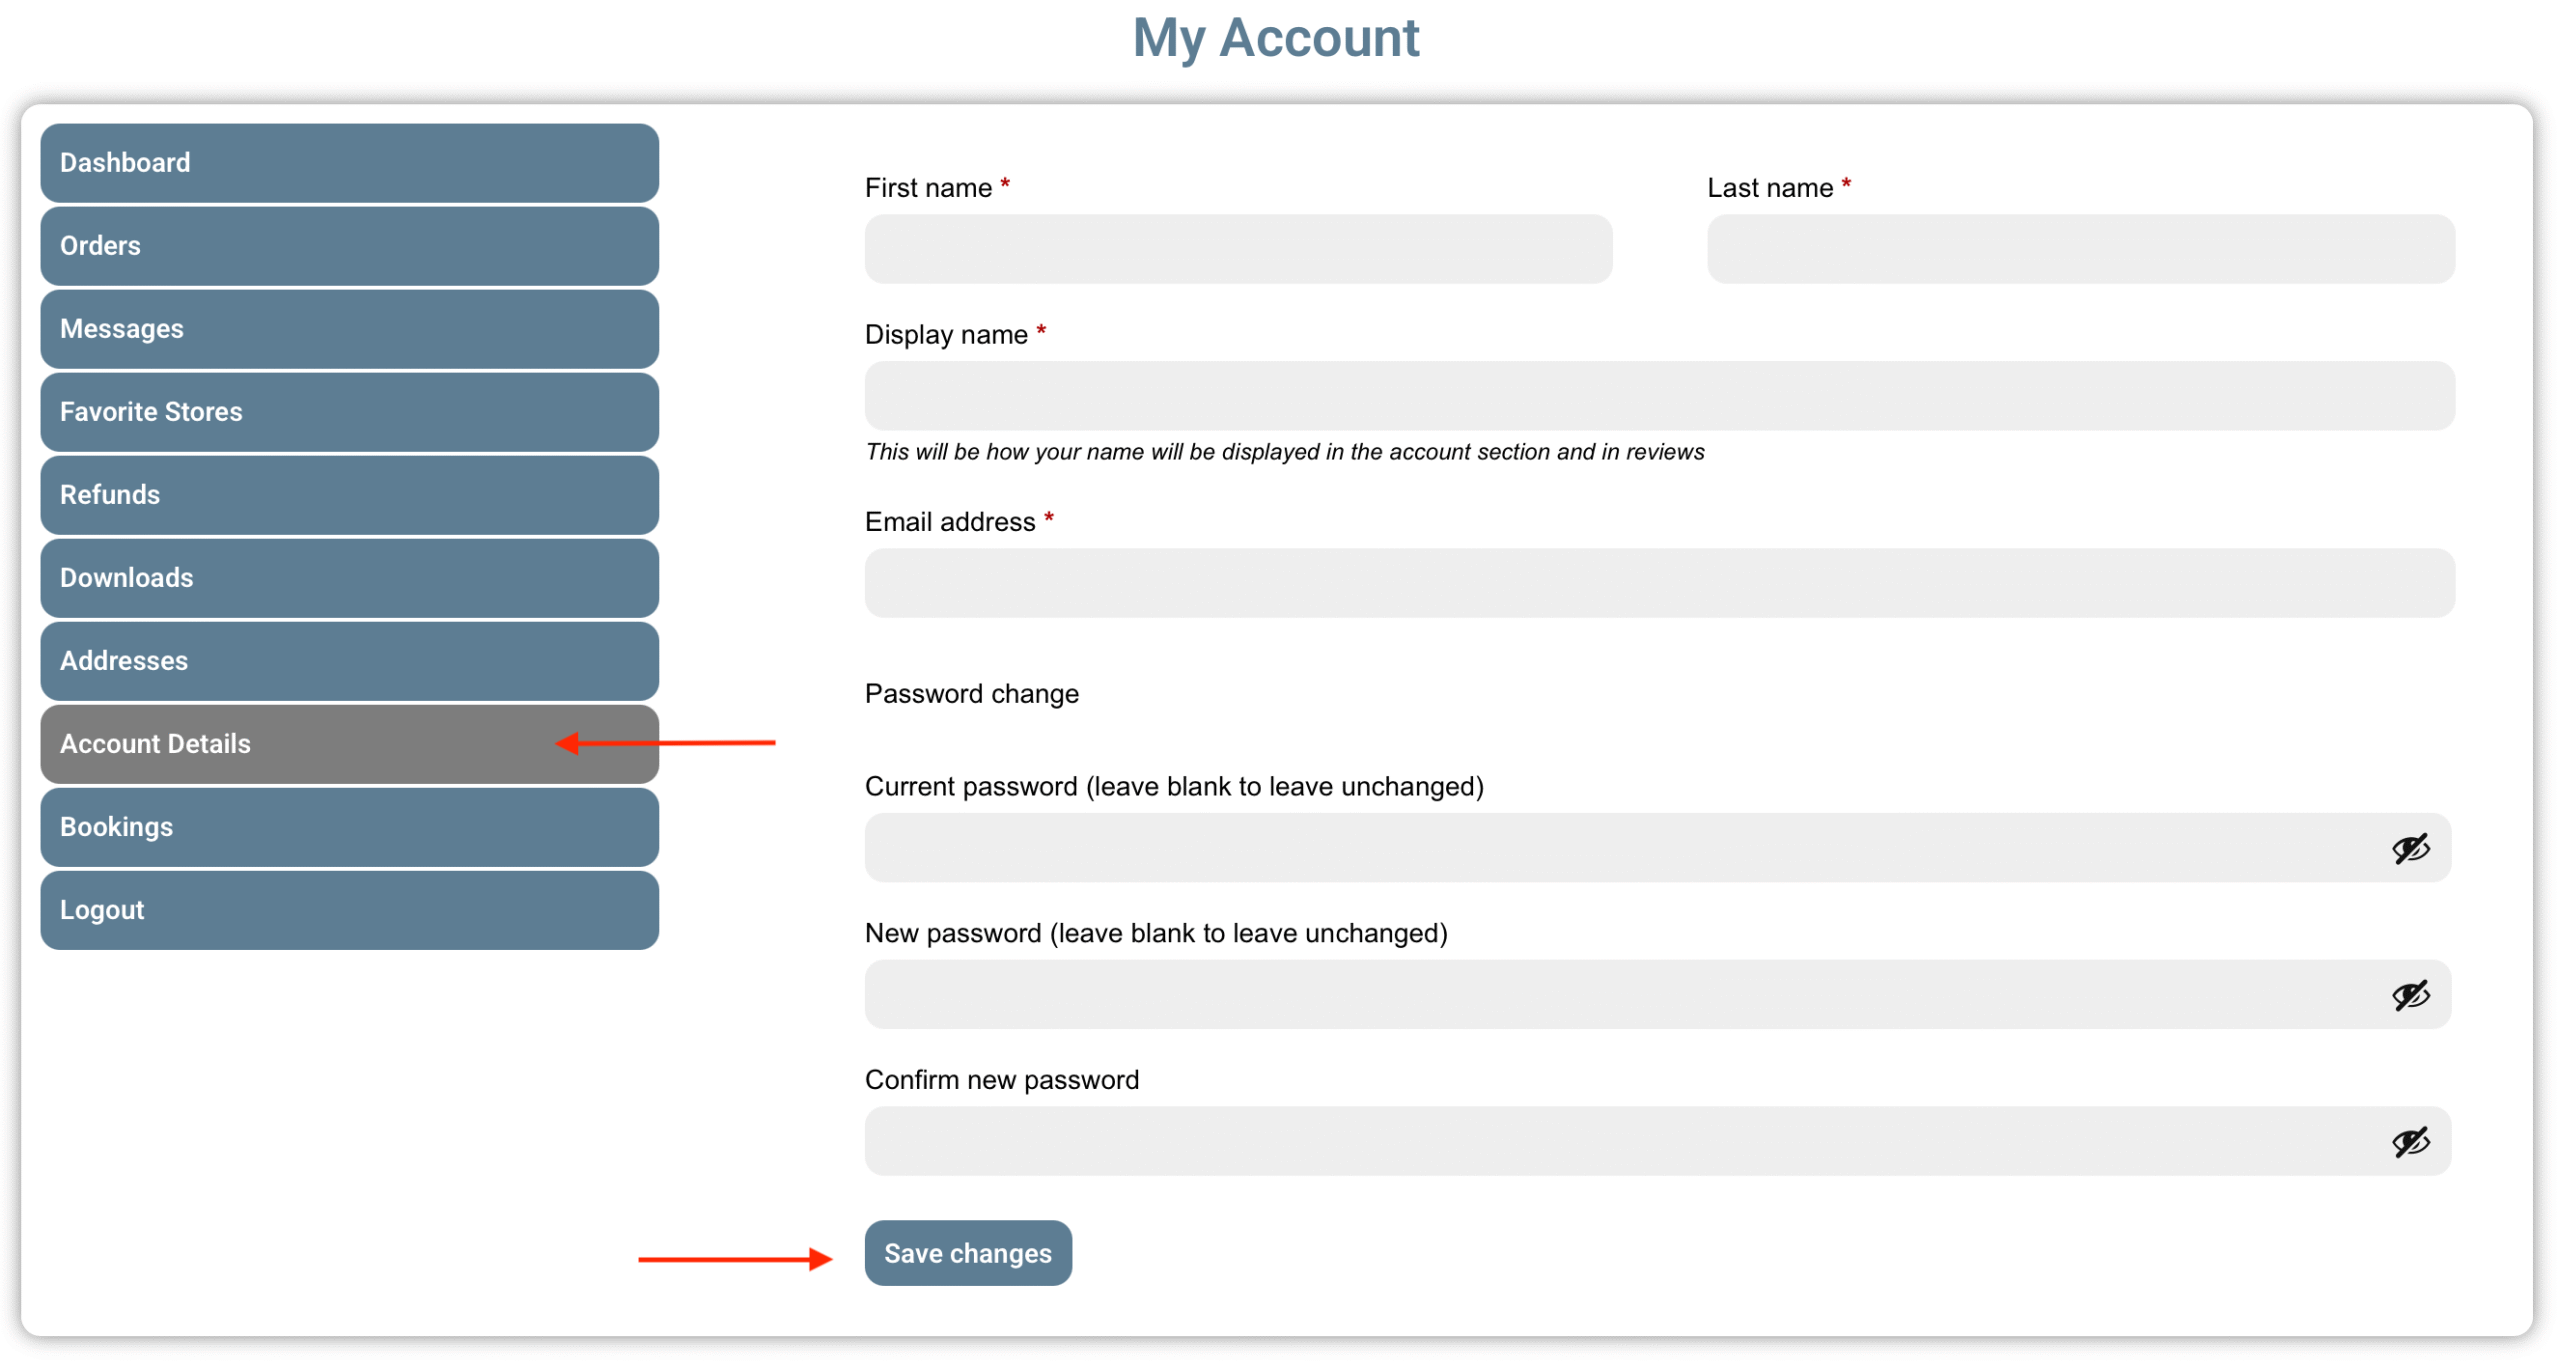
5. On the dashboard, select the Account Details tab. Change your password now in the fields provided. The “current password” will be the password you received in the email.
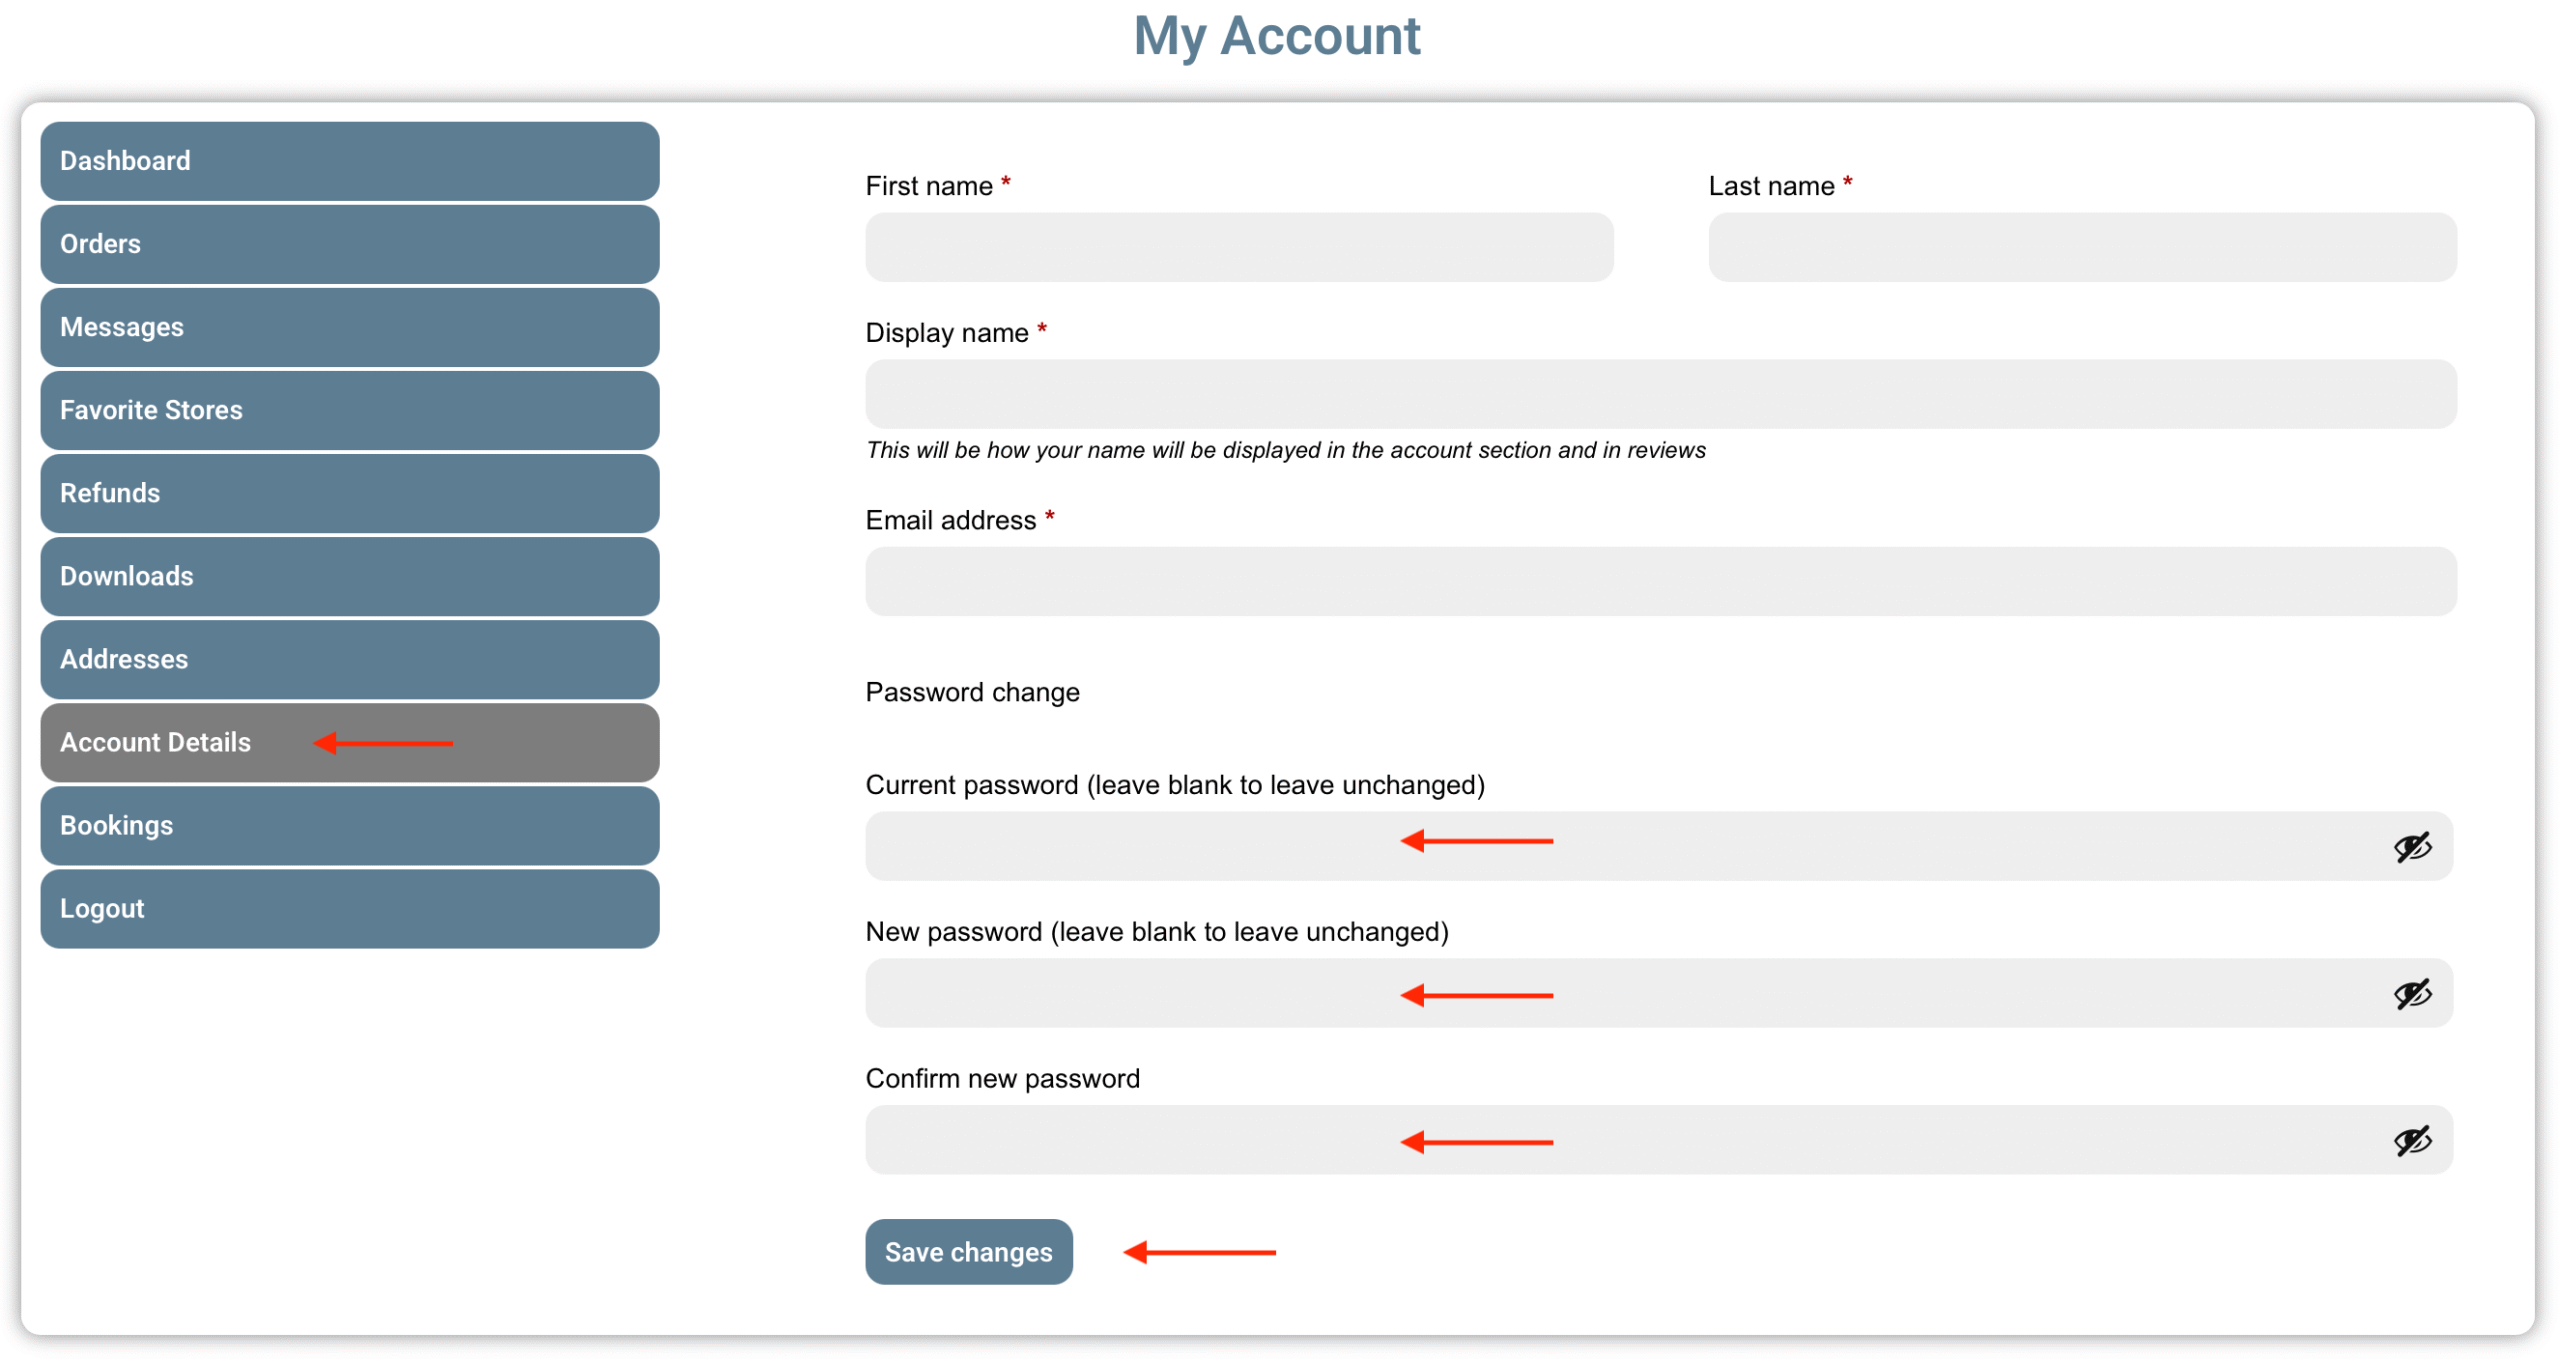
6. Once completed, simply click on Save.
Alternatively:
Simply follow the instructions as per “I have forgotten my Password” below.
1. On the Top Menu, select Account/Login.
2. From the dropdown Menu, select My Account.
3. Complete the Login form on the left:
– Add the Email address that you used when you registered with Townzie.
– Add the Password you chose for the Townzie account.
4. Click the Log in button.
5. You have now logged in and will be redirected to the My Account page.
1. On the Top Menu, select Account/Login.
2. From the dropdown Menu, select My Account.
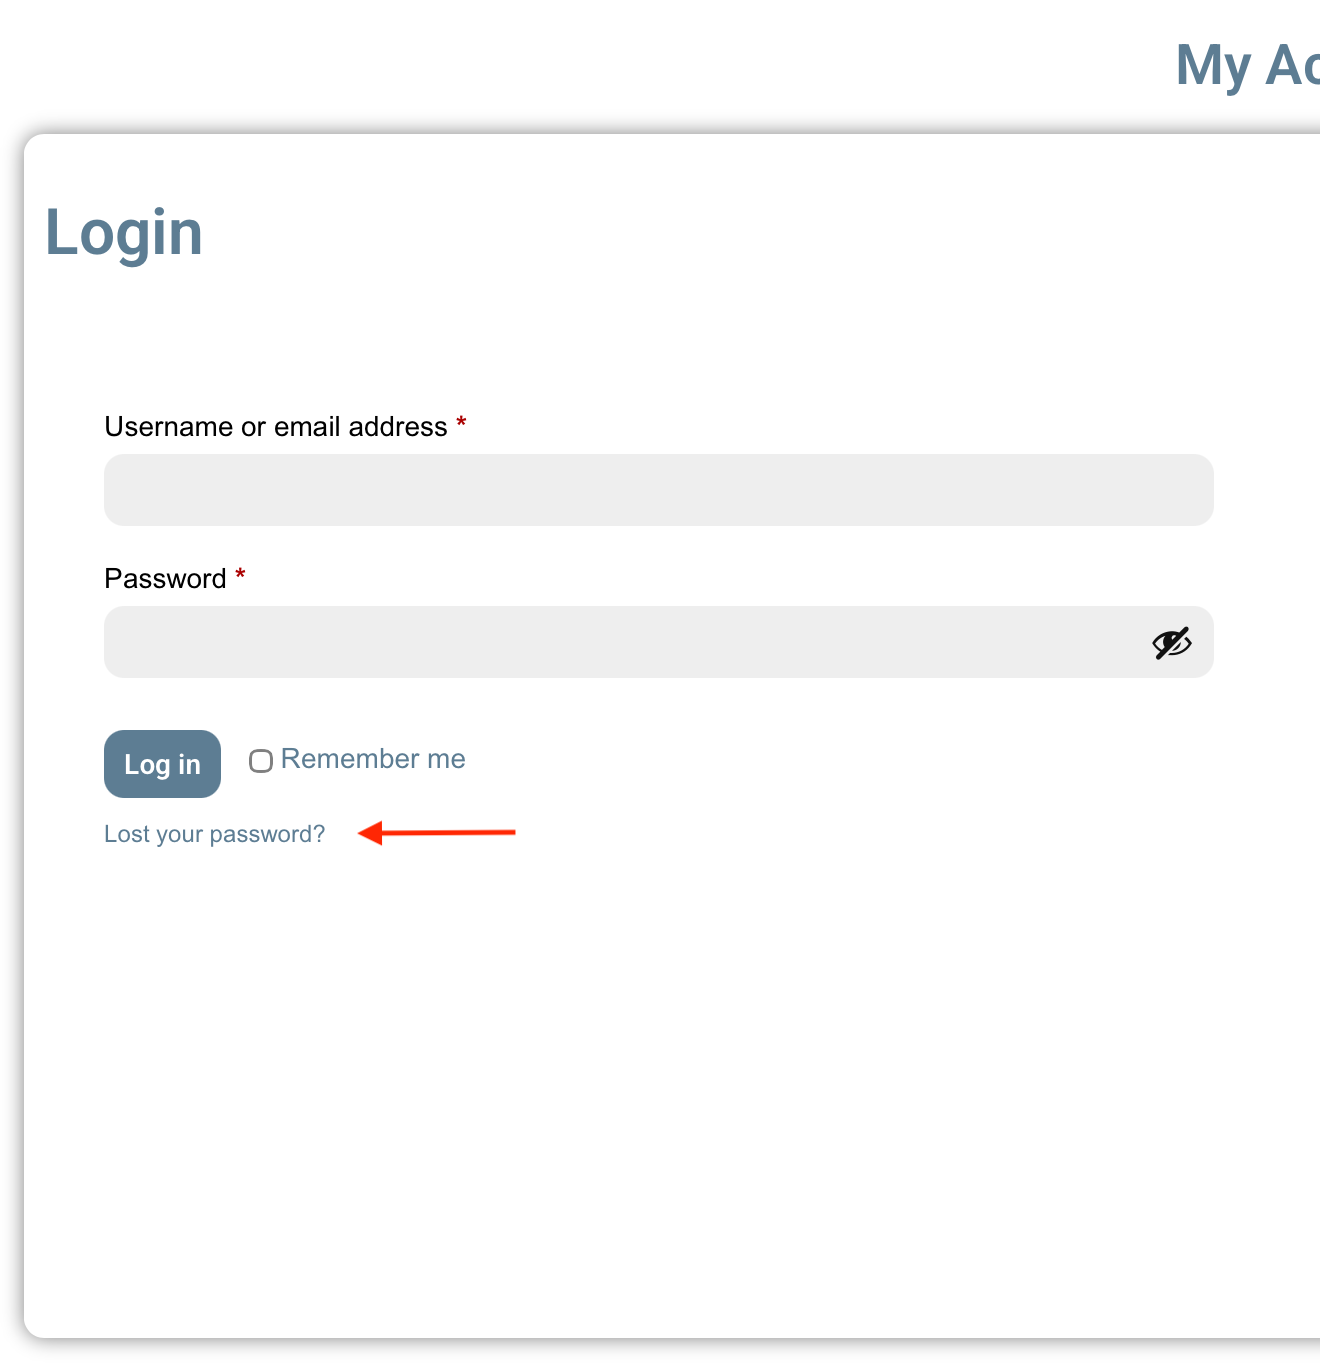
3. On the Login form on the left, you will see “Lost your password?” under the login button. Click on this link.
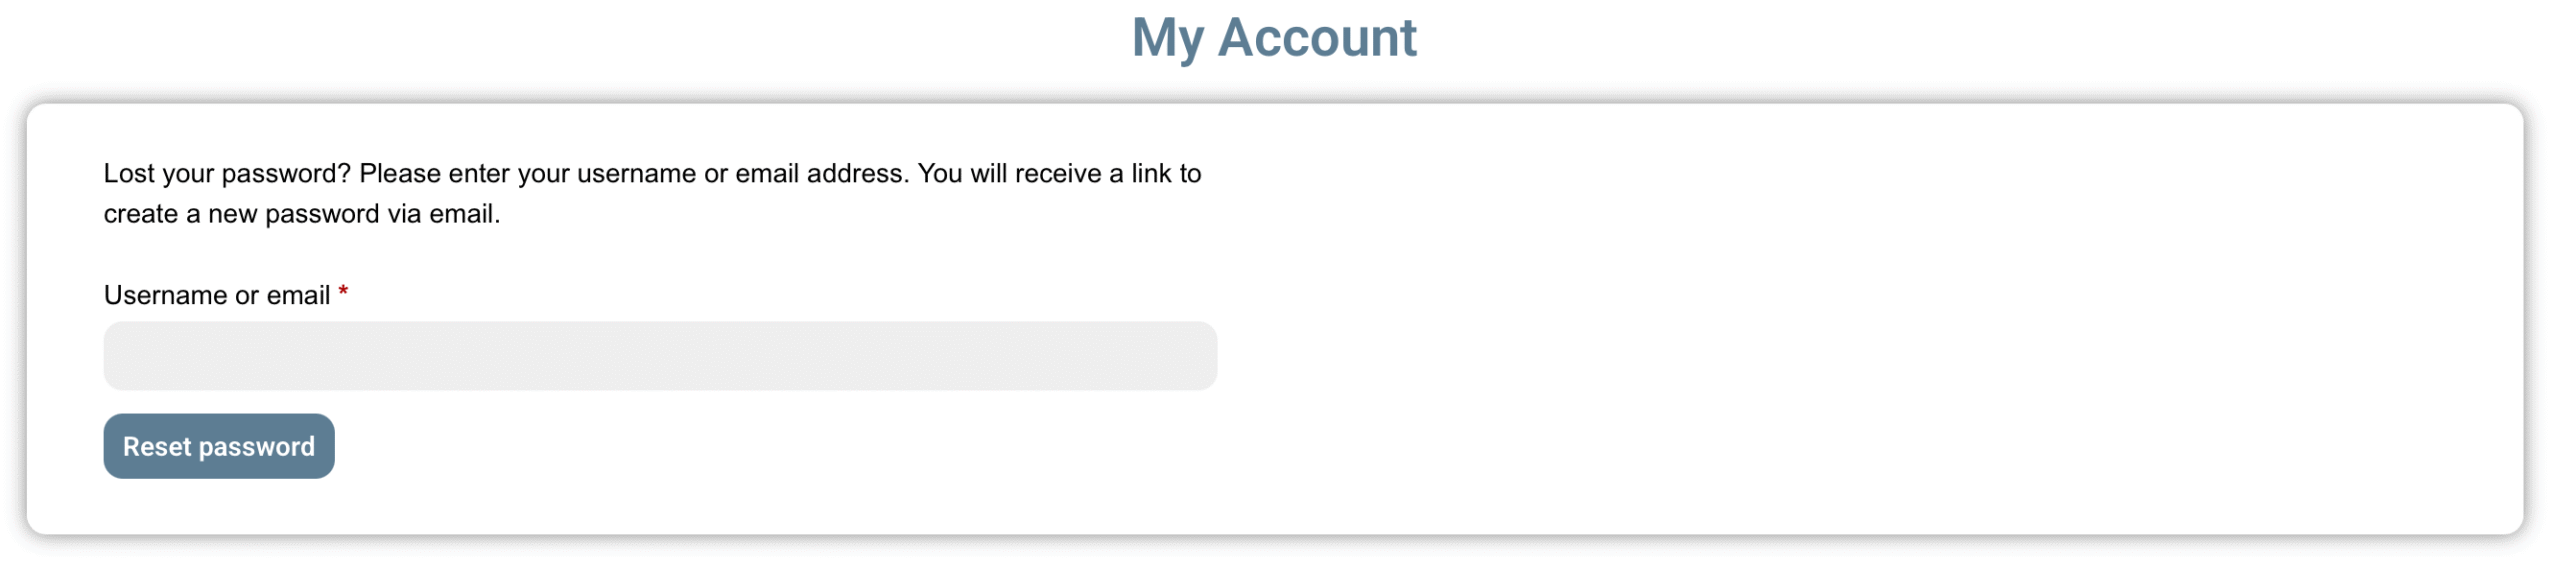
4. You will be redirected to a page where you will add either your Username or the Email that you use with your Townzie account. Enter either into the space provided and click on the button “Reset Password”.
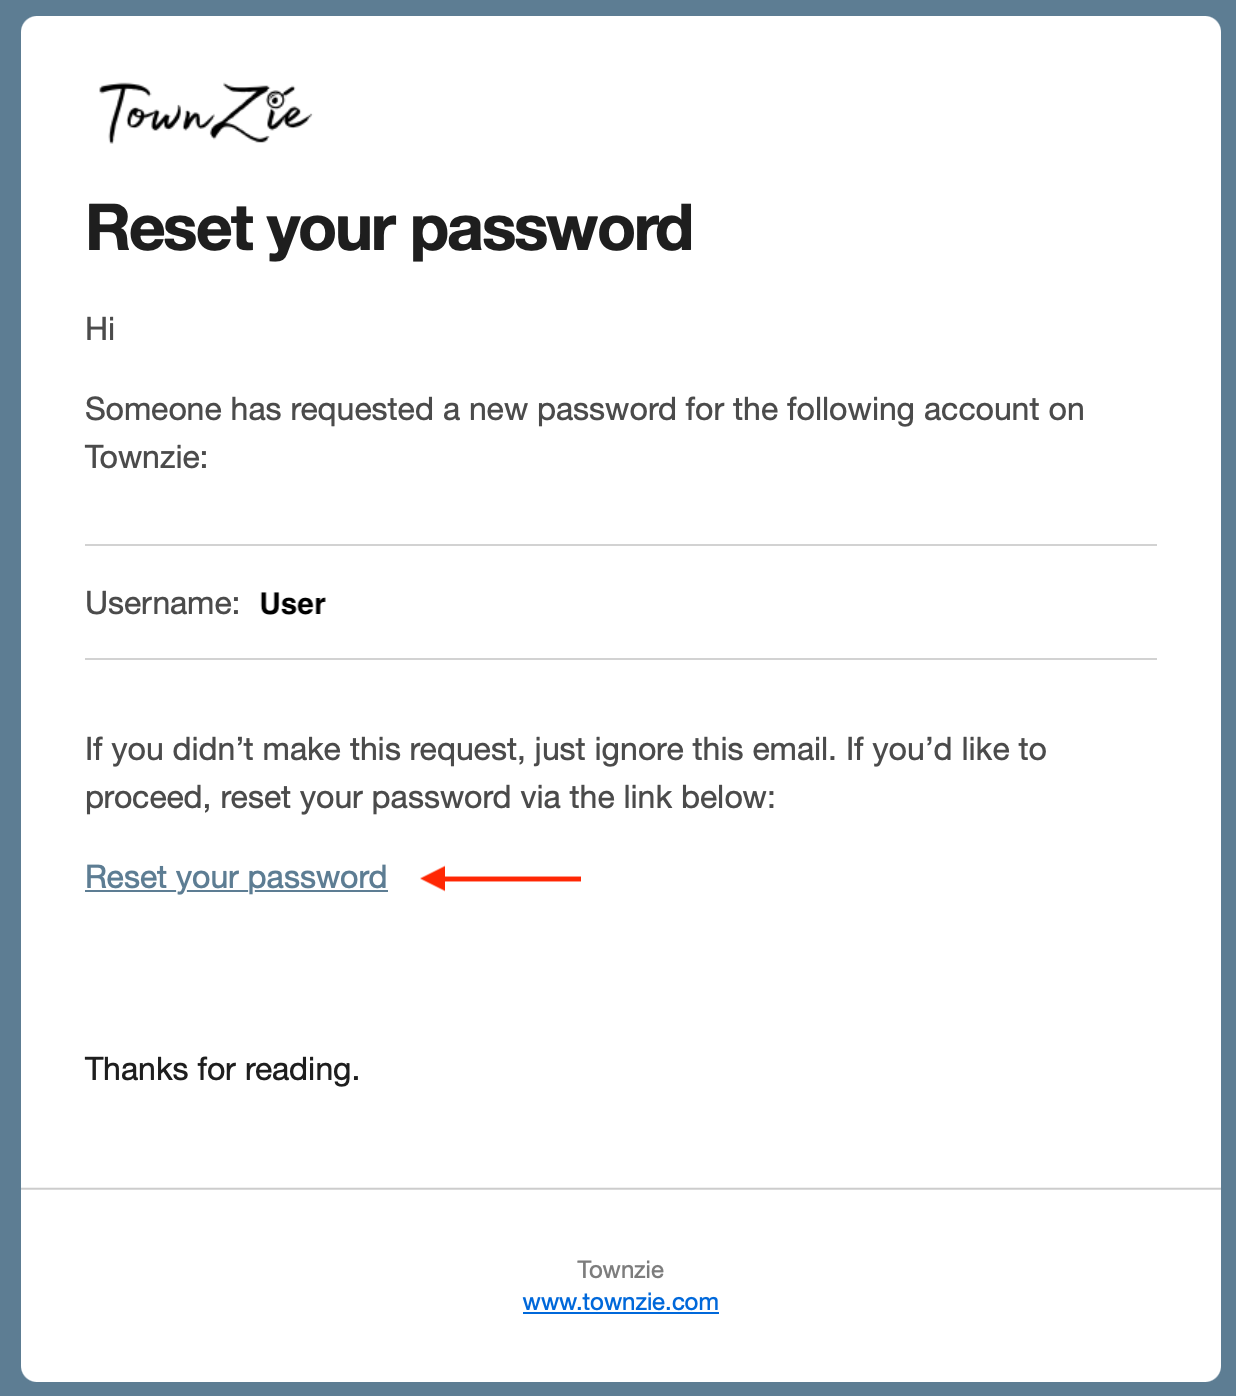
5. You will receive an email. In the email, click on the “Reset your Password” link.
6. You will be redirected to a webpage where you will be asked to enter your new password.
7. Once completed, you should now be able to log in to your account using the new password created.
1. On the Top Menu, select Account/Login.
2. From the dropdown Menu, select My Account.
3. Log in to your account if not already.
4. On the Dashboard, select the “Account Details” tab on the left.
5. On the right, you will now be able to edit any account details you wish to change.
6. Once done with your changes, click on the “Save changes” button.
1. On the Top Menu, select Account/Login.
2. From the dropdown Menu, select My Account.
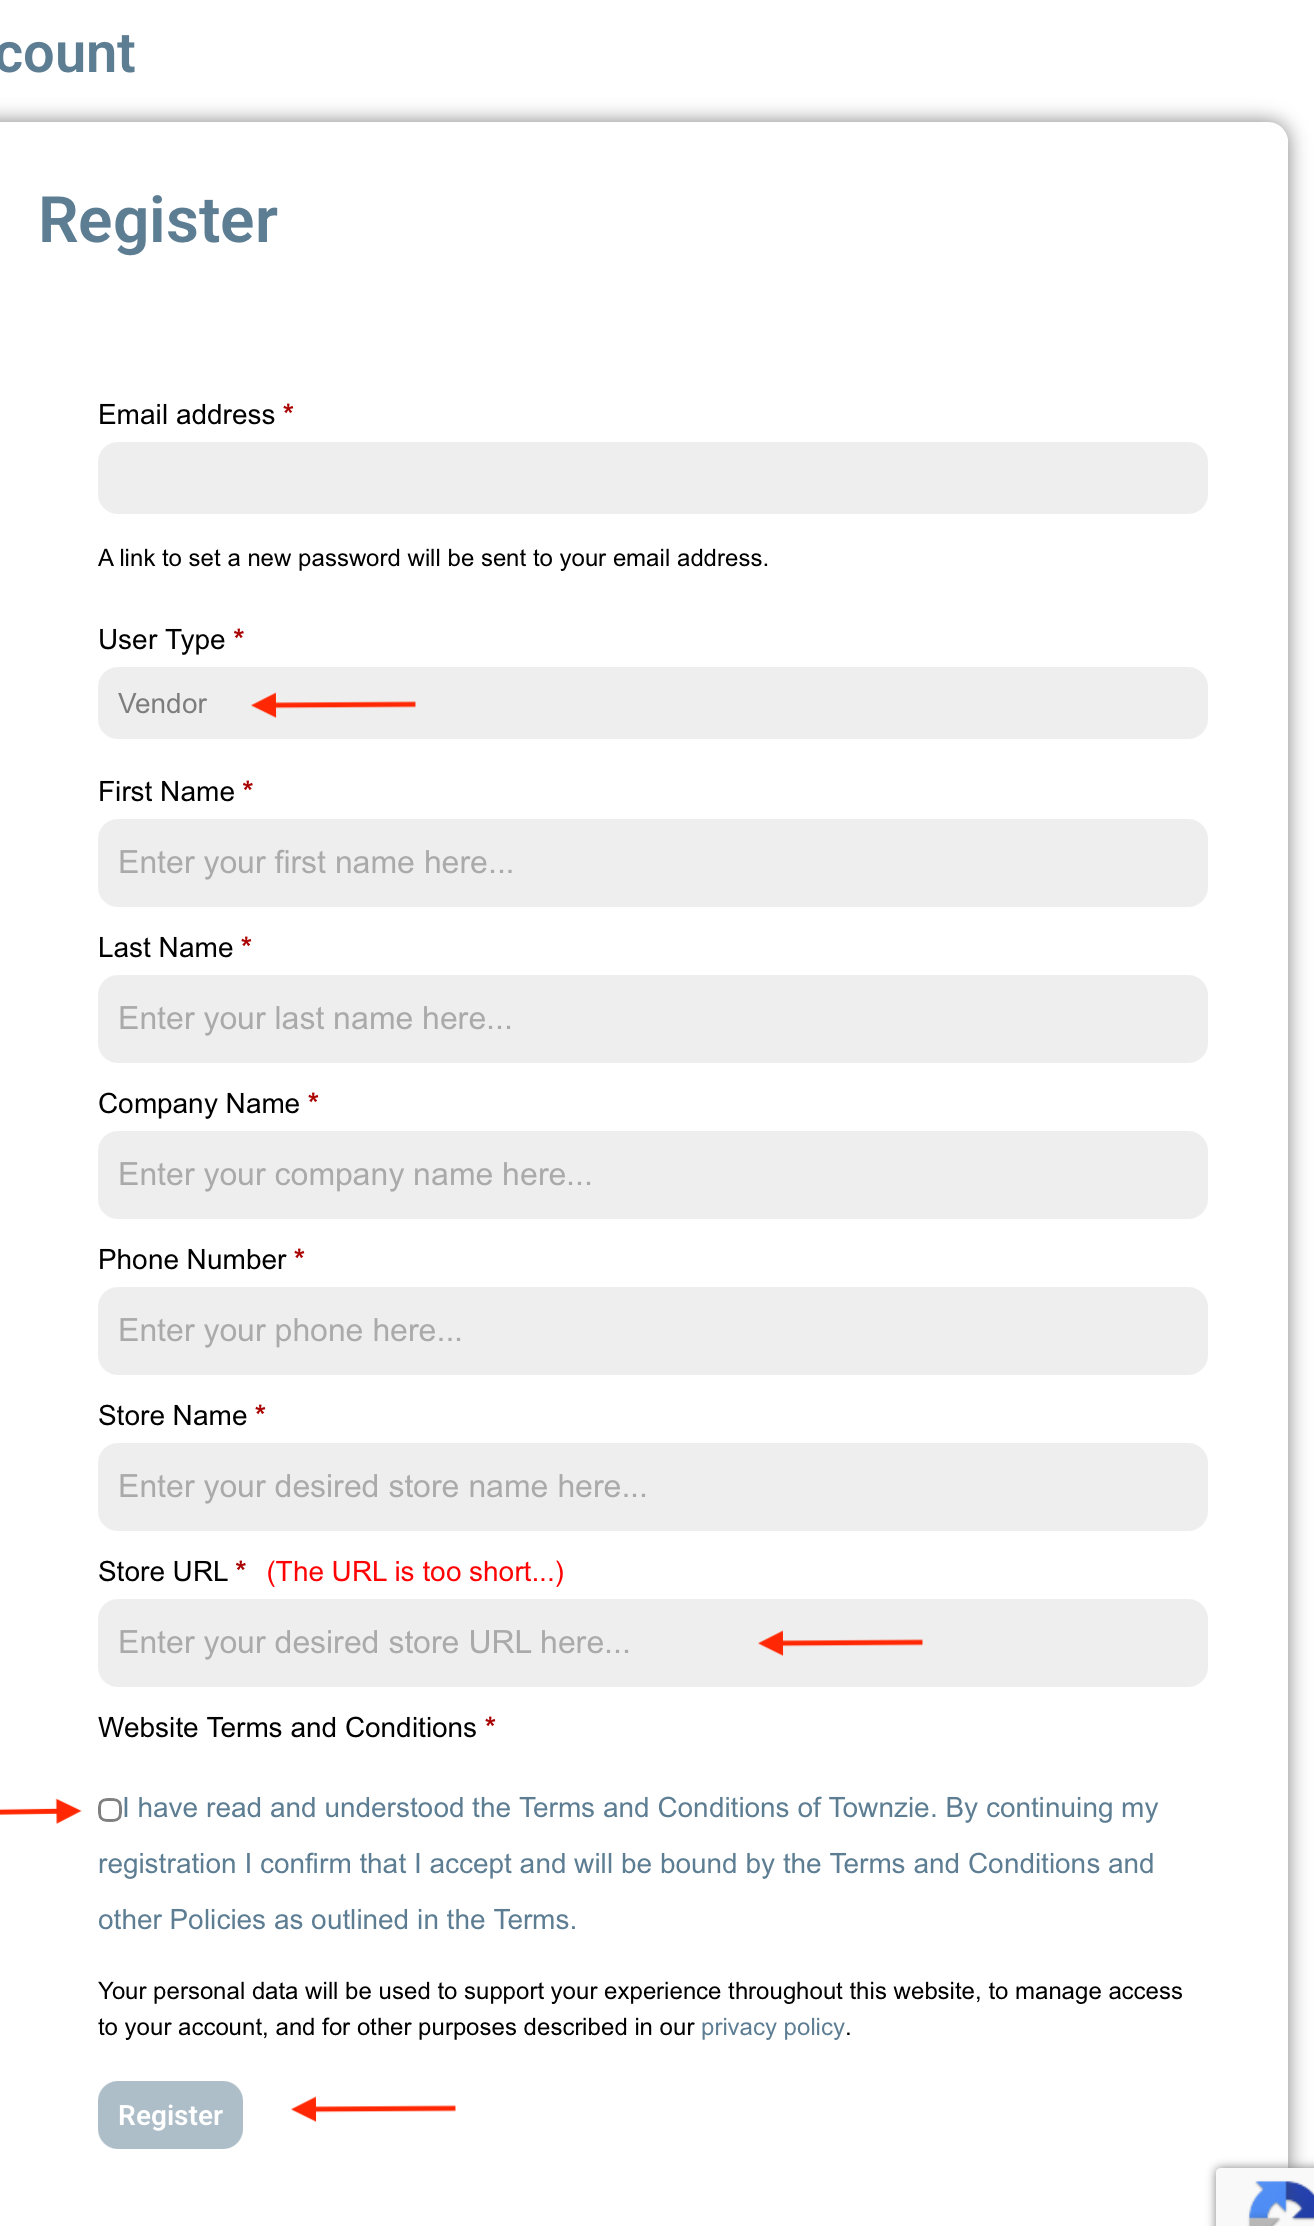
3. Complete the Register Form on the right:
– Add the email address where you wish to receive your communications from Townzie.
– Select the User Type “Vendor”. Once you select this option, more form fields will open that you will need to complete.
– When asked for your Store URL it is advised to keep it short as this is what will be used as part of the www.townzie/my_store/.com URL, and will be the unique identifier for your store (listing) pages.
4. Tick the “Terms and Conditions” box after you have read through them.
5. Click on the Register button at the bottom of the form.
6. Once completed, you will be redirected to the My Account page.
7. You will receive an email that will contain your temporary password. Should you wish to change your password, please follow the “How to set my Account Password” directions given above.
After registration, it is advised to complete all your store information.
1. On the Top Menu, select Account/Login.
2. From the dropdown Menu, select Listing Dashboard.

3. On the bottom left of the Dashboard, select Settings.
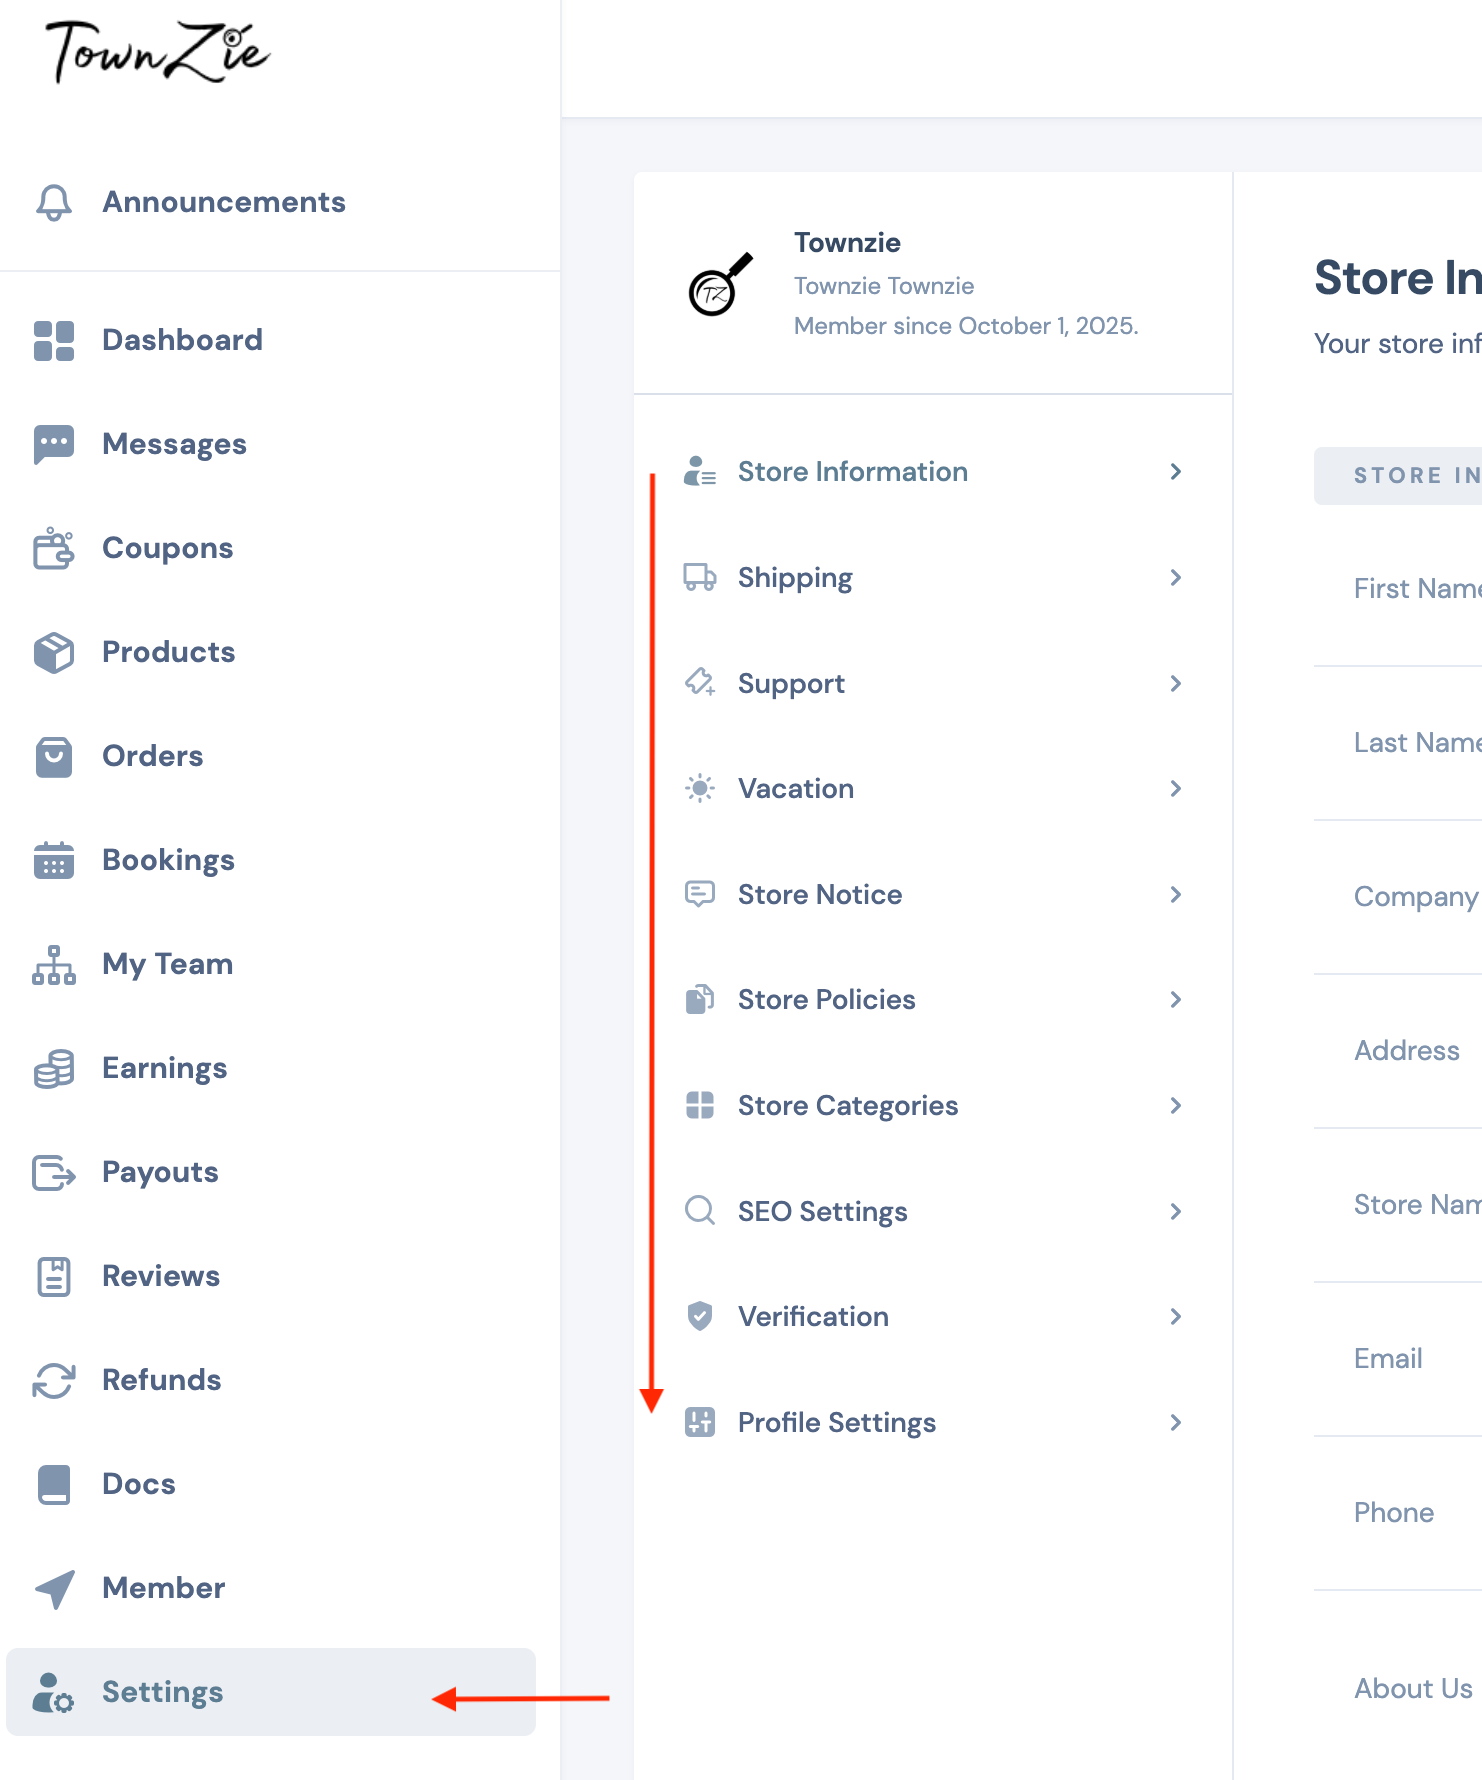
4. Here you will be able to change:
Always remember to click SAVE between information being saved and before moving to the next section/tab.
1. Go to your Listing Dashboard. Select the Settings tab on the left menu.
2. The new tabs that open on the right you will choose the Shipping tab.
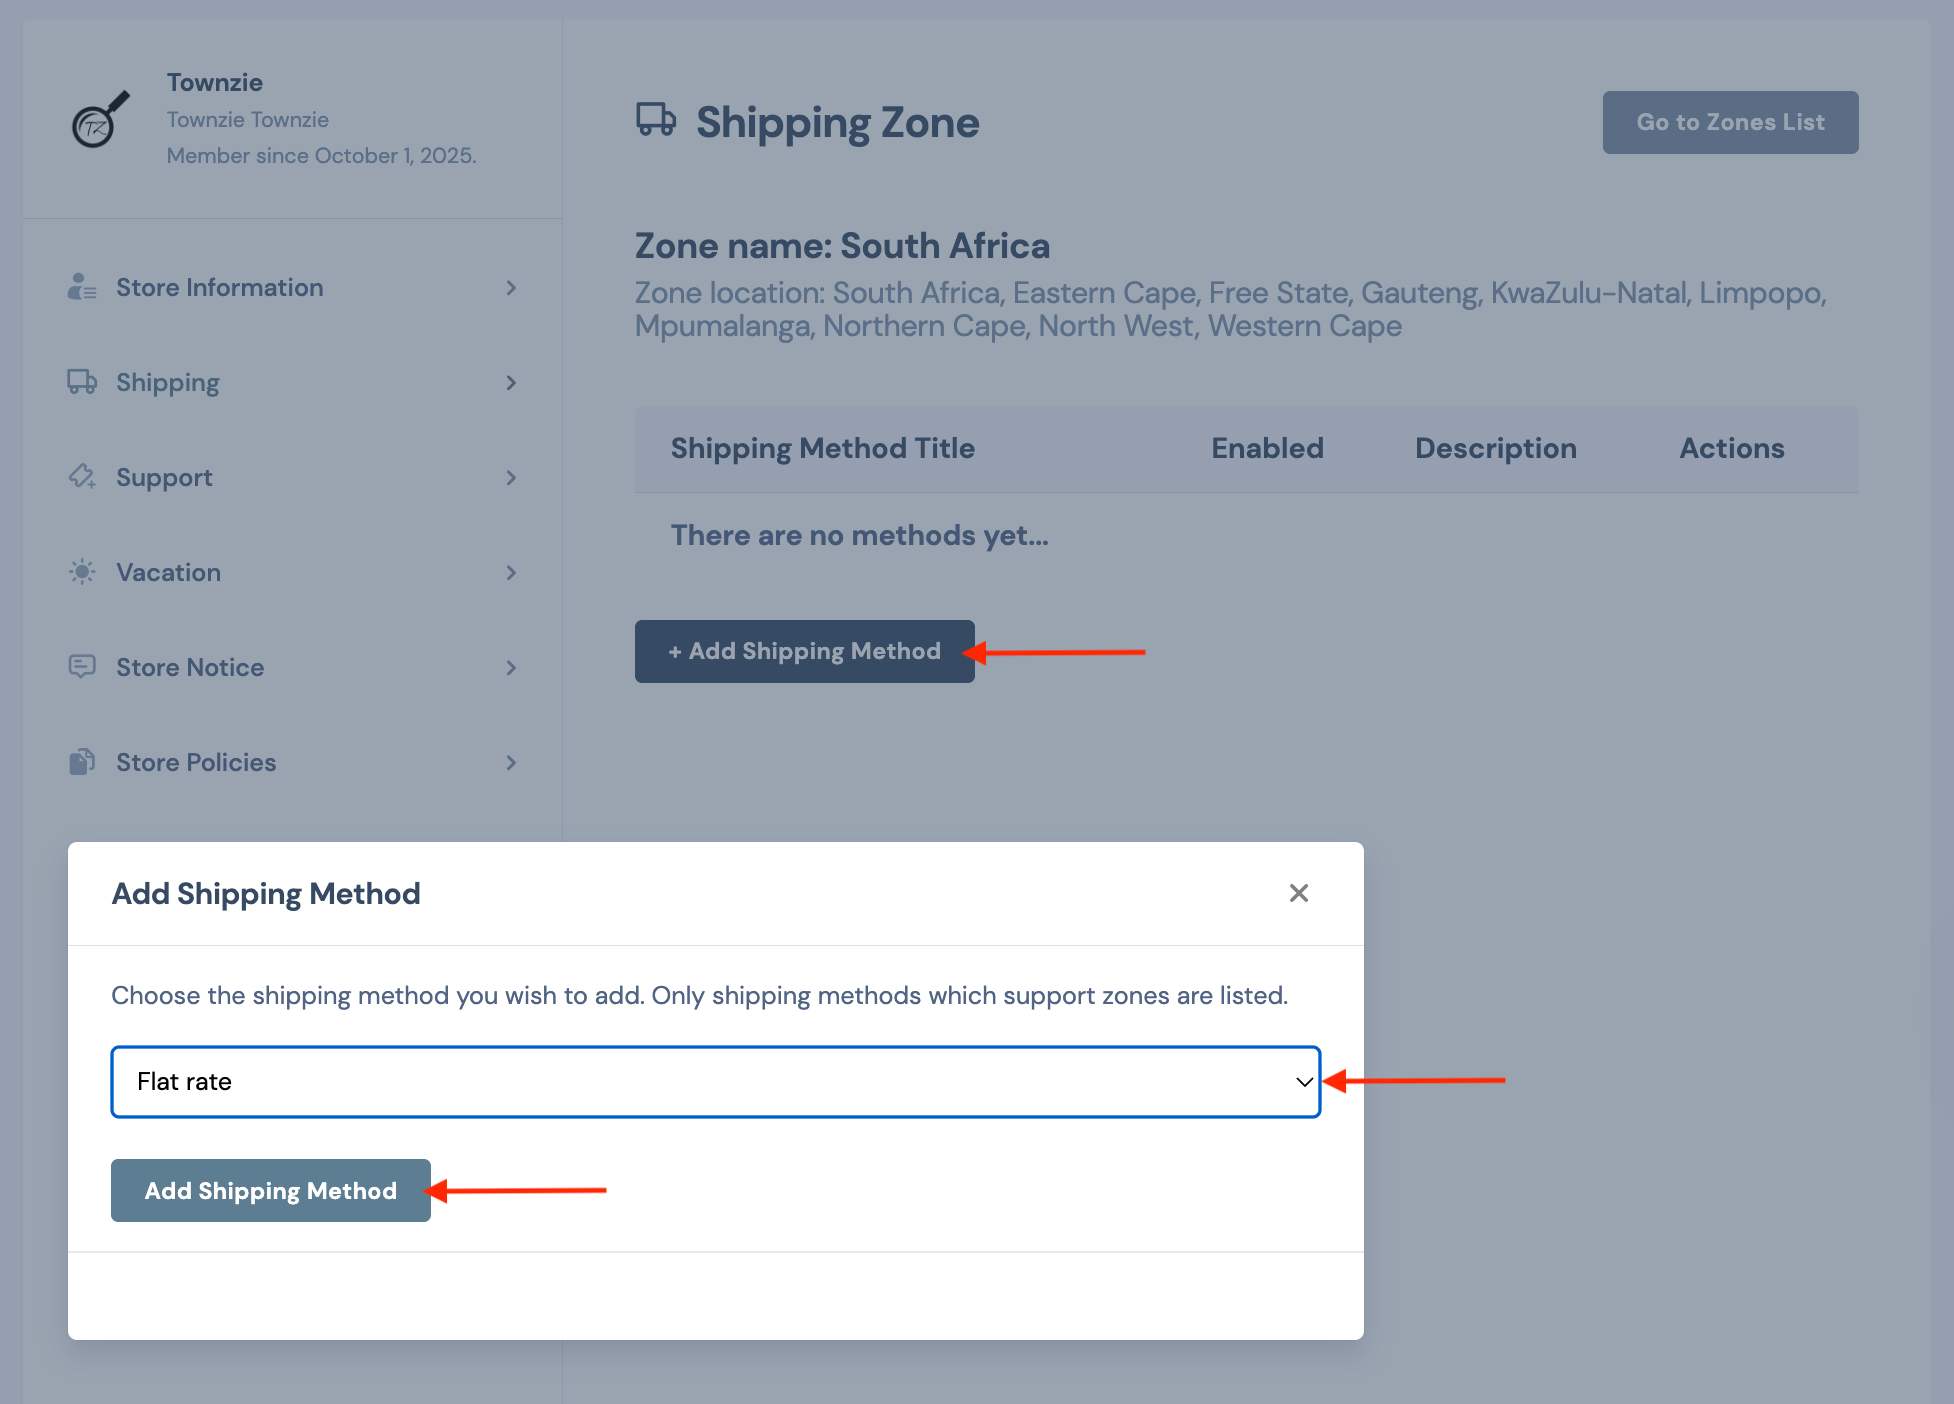
3. Under shipping you will click on the Zone Name where you need to add a shipping option for your customers.
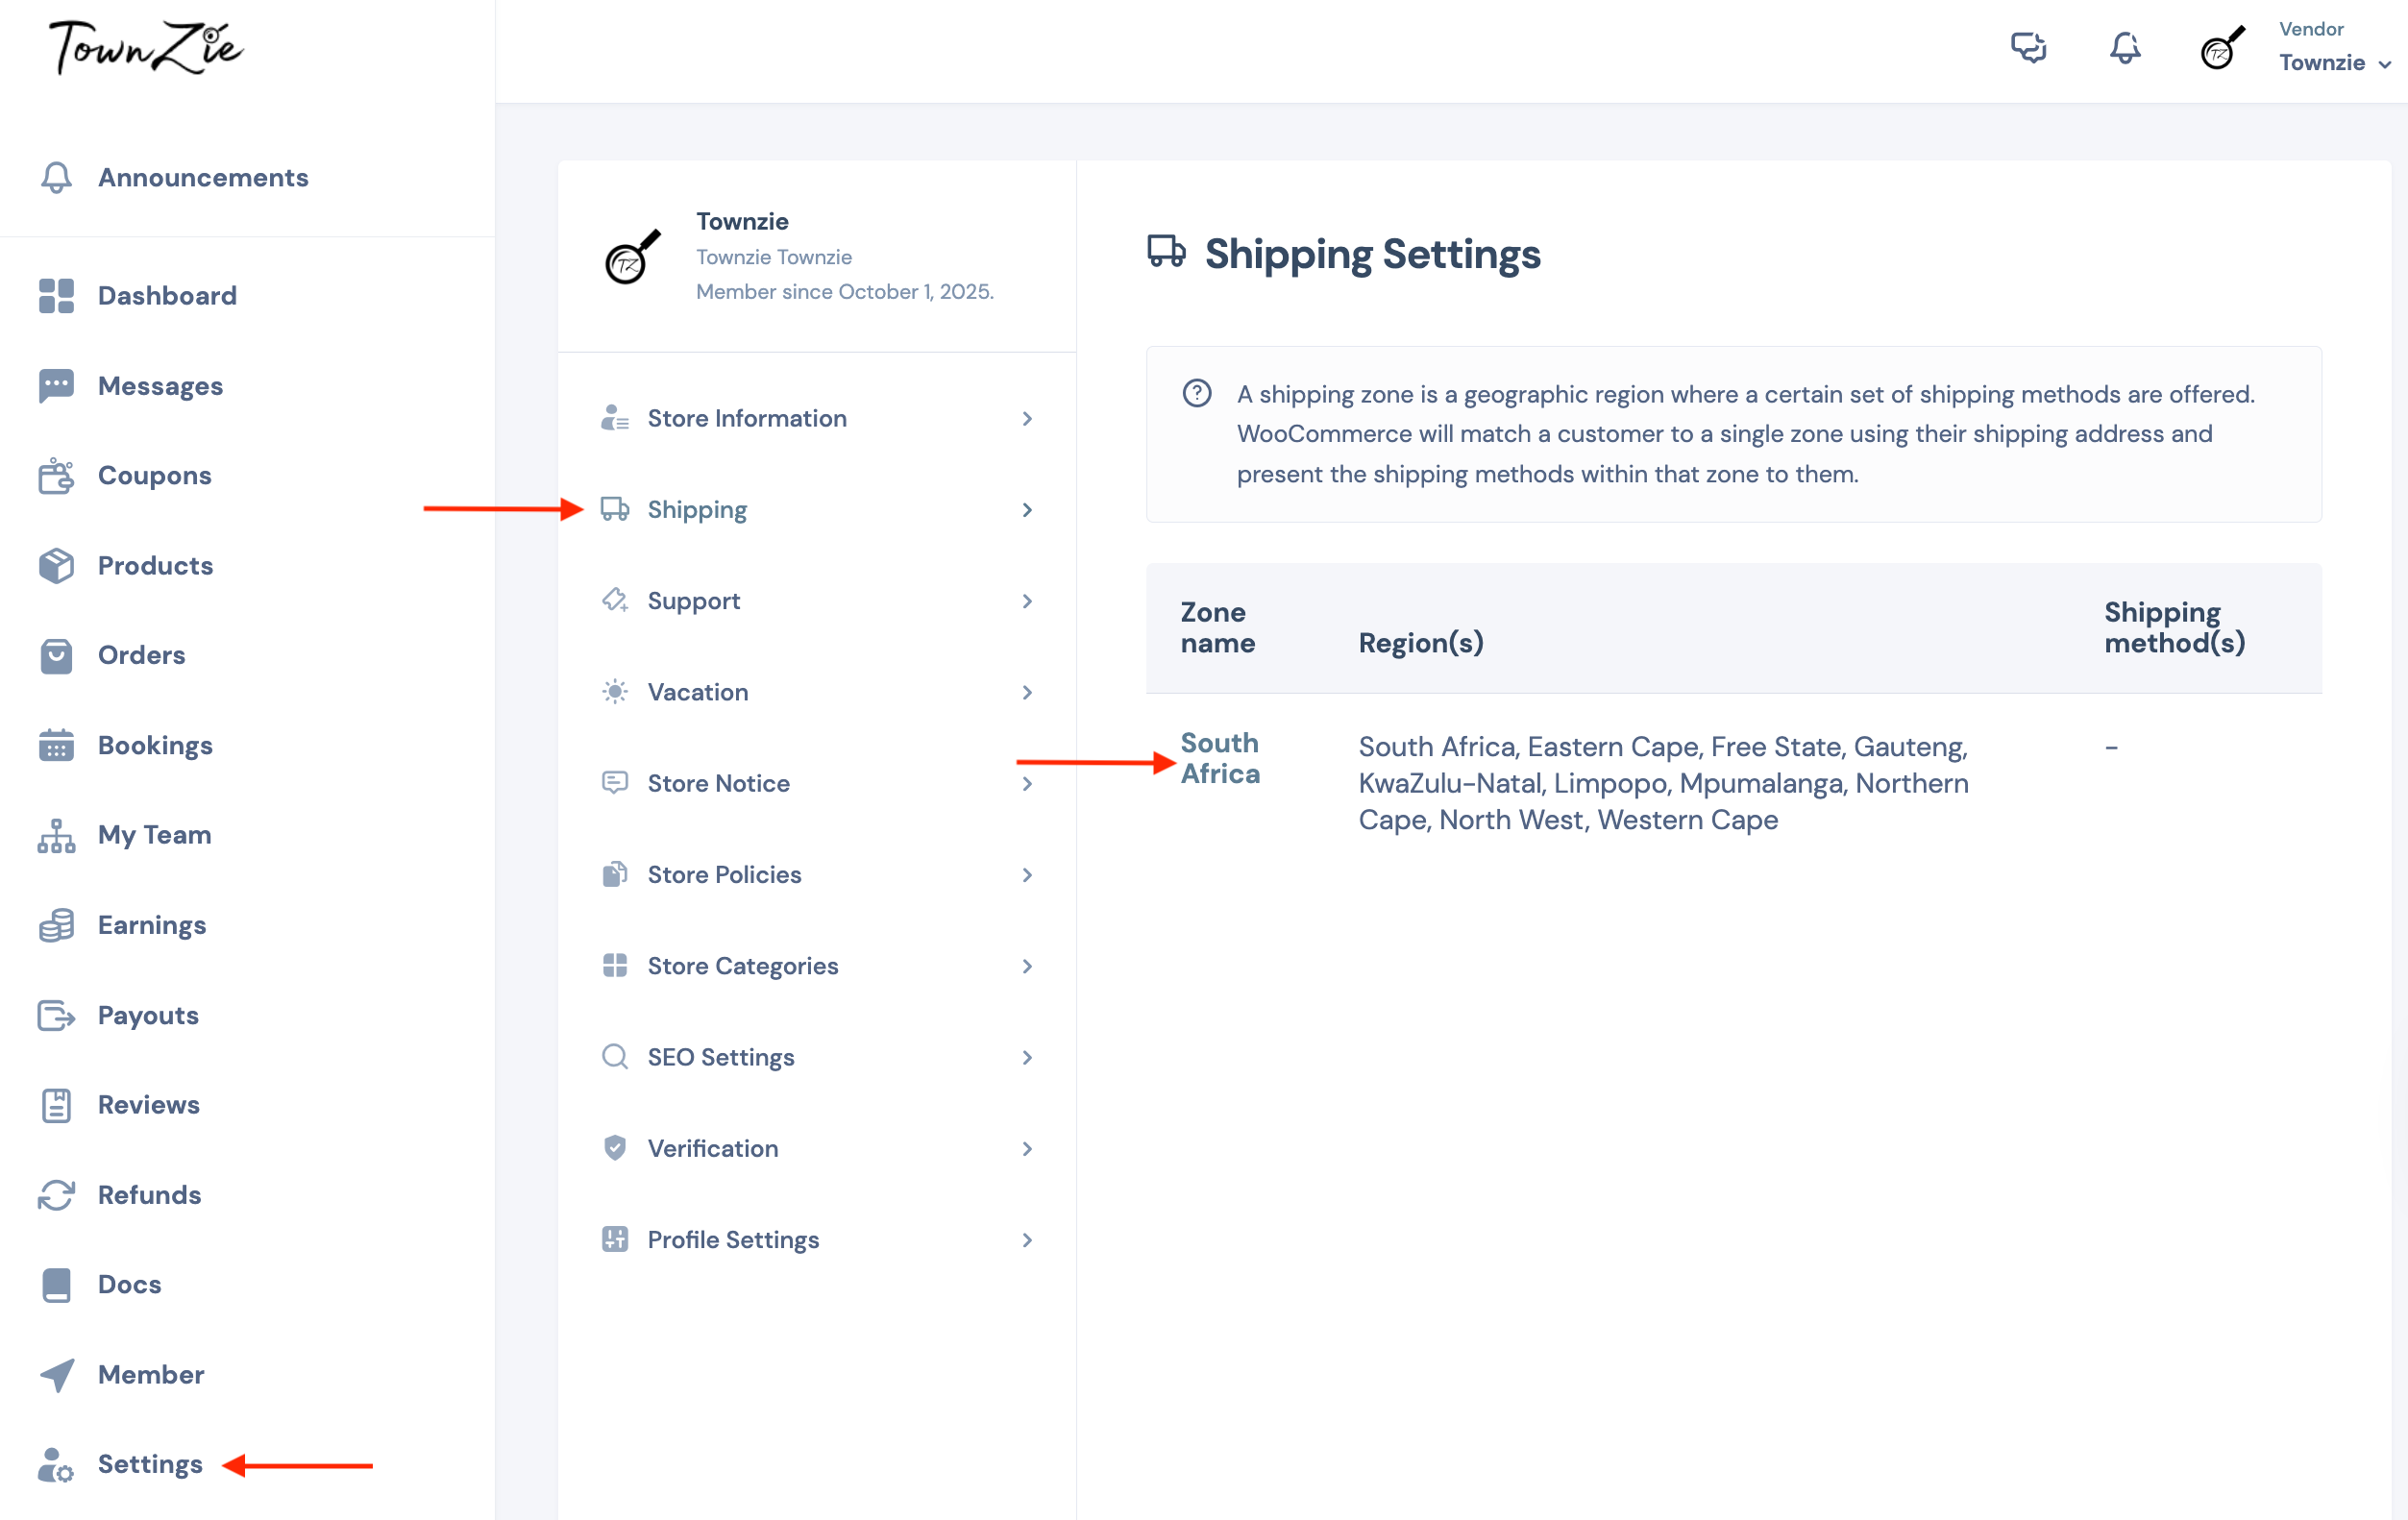
4. Once the Shipping method selected opend you will click on “Add Shipping Method”.
5. A new popup will open where you will select the type of Shipping Option you would like to add. Then click “Add Shipping method”. You can add all the shipping options relevant to your store.
6. Once you have added these shipping methods they should be available on your “Add Product Form”.
1. Before you can add your own listing, you will have to register as a Vendor first. Please follow the steps outlined in “How to register to become a Vendor?” and “What to do after Registration?” as explained above.
2. If you have already created a Vendor Account, log in to your account. After logging in, you will go to the Listing Dashboard. On the Top Menu, select Account/Login. From the dropdown Menu, select Listing Dashboard.

3. Once the listing Dashboard has opened, select the Products tab on the left menu.
4. In the top right corner, you will see a button “Add Product”, click this button.
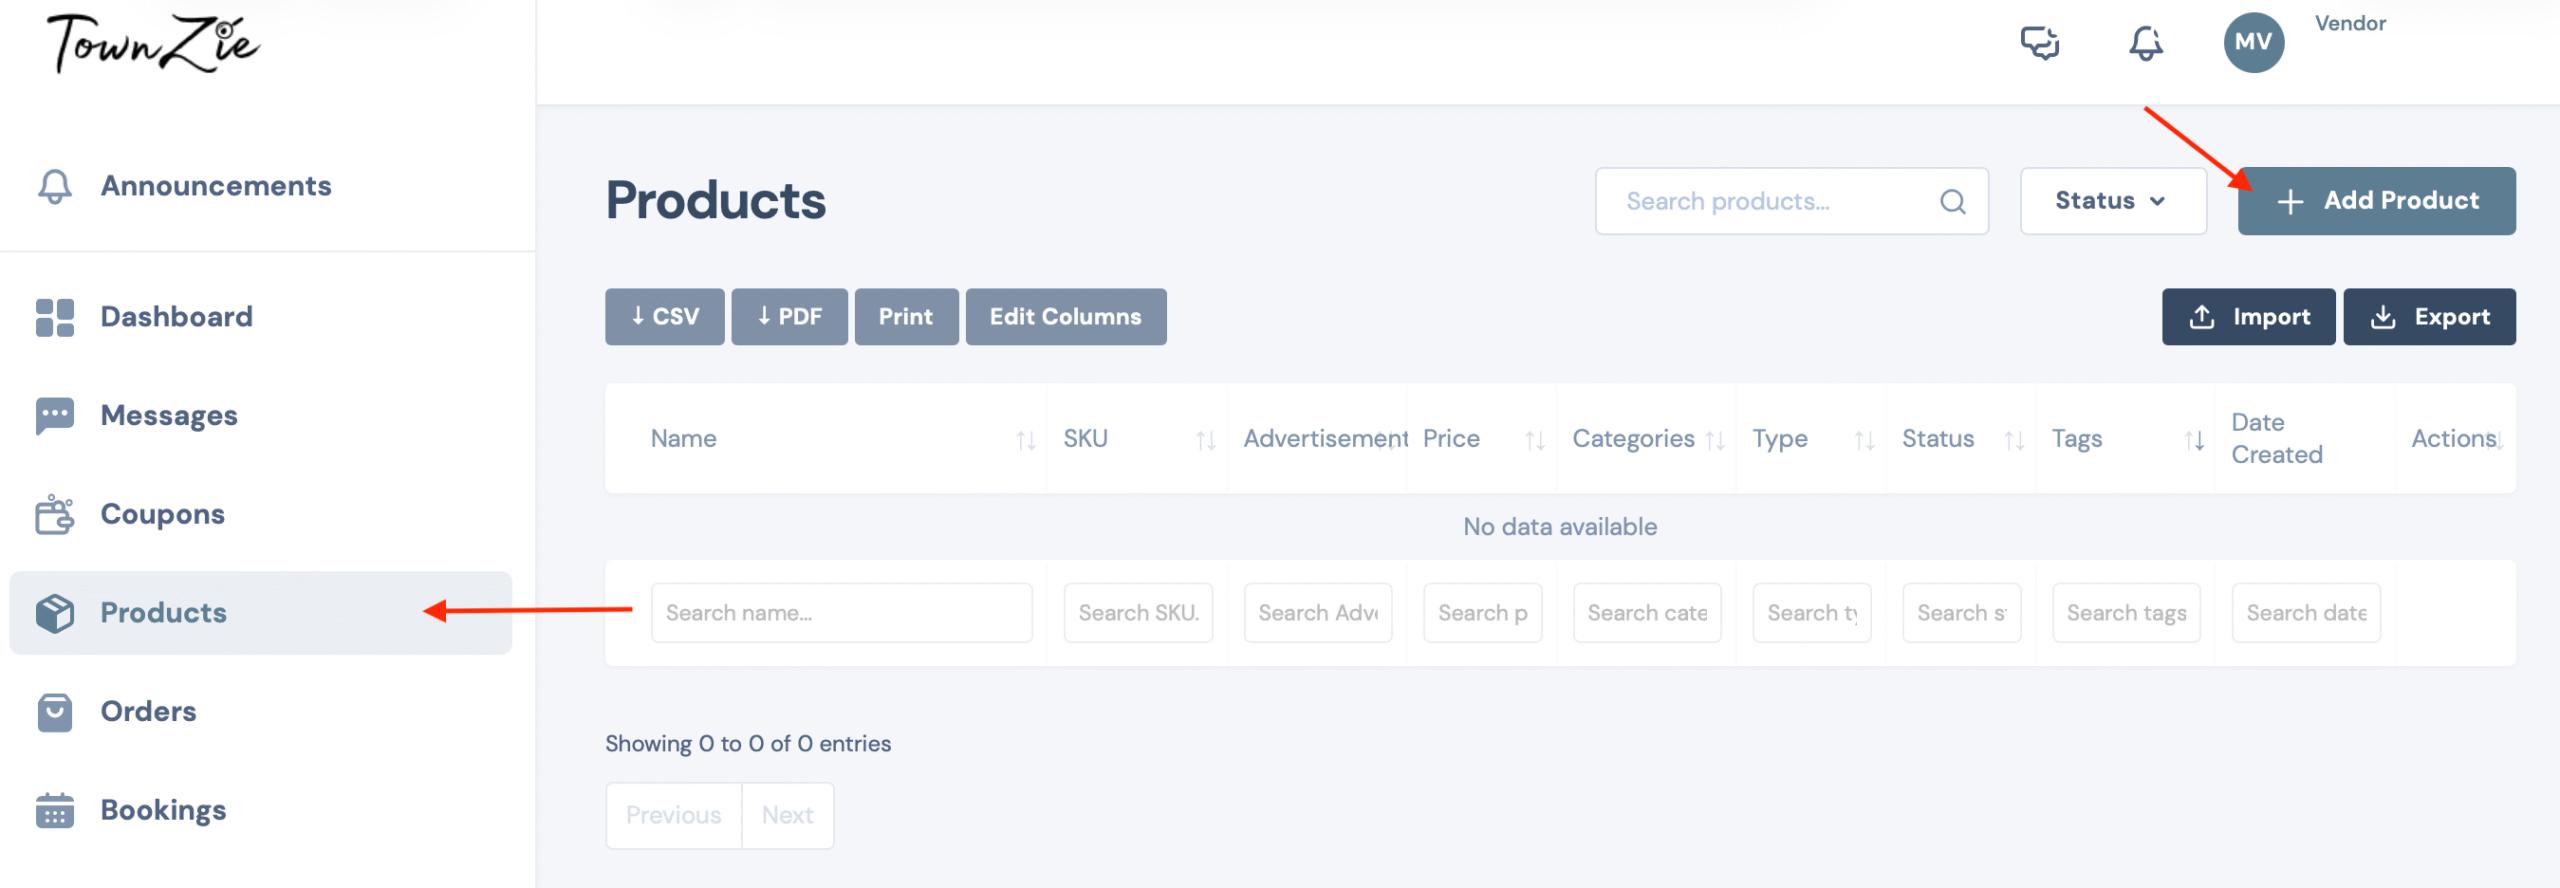
5. The new window that opens will allow you to add all the details about your listing. You will be adding:

1. Go to your Listing Dashboard. Select the Products tab on the left menu.
2. If you would like to edit an existing Product, you can search for the Product Name or find it in the list shown. To edit the Product, click on the 3 dots (…) on the right-hand side of the Product in question. From the Menu that opens, select “Edit Product”.
3. If you are adding a new Product, you will see a button in the top right corner, “Add Product”. Click this button
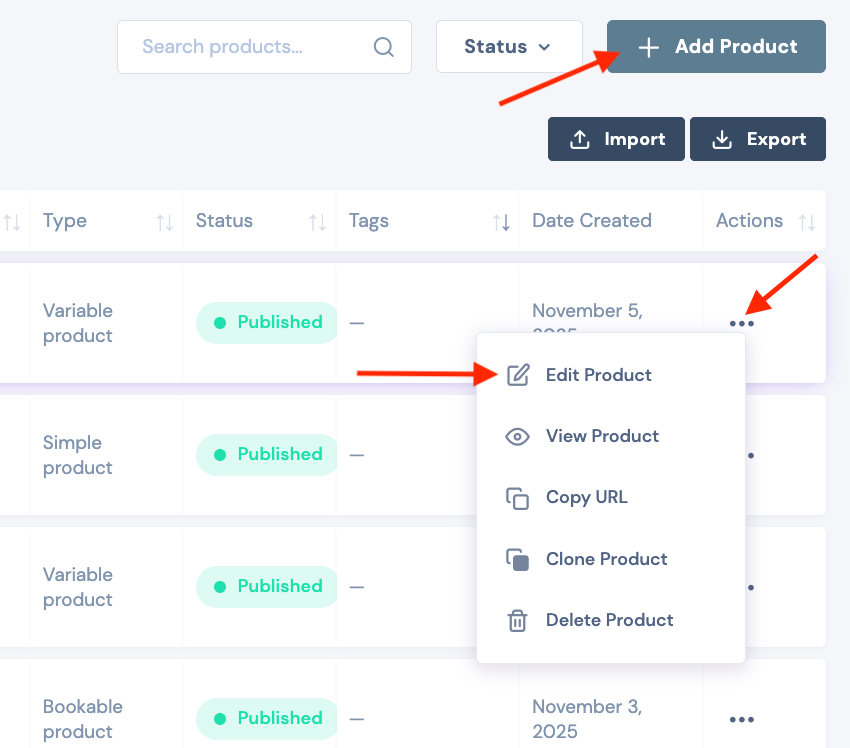
4. On the Product page, we will be working on the “Product Data”. This is where we set the Pricing for the Product/Listing.
5. The first thing we will need to consider is what type of Product we are adding. There are a few options to consider:
6. Simple Product – (Local Products, Second Hand Products, or Event Tickets where availability doesn’t need to be confirmed, and customers may purchase the ticket immediately).
6.1. Initial settings:
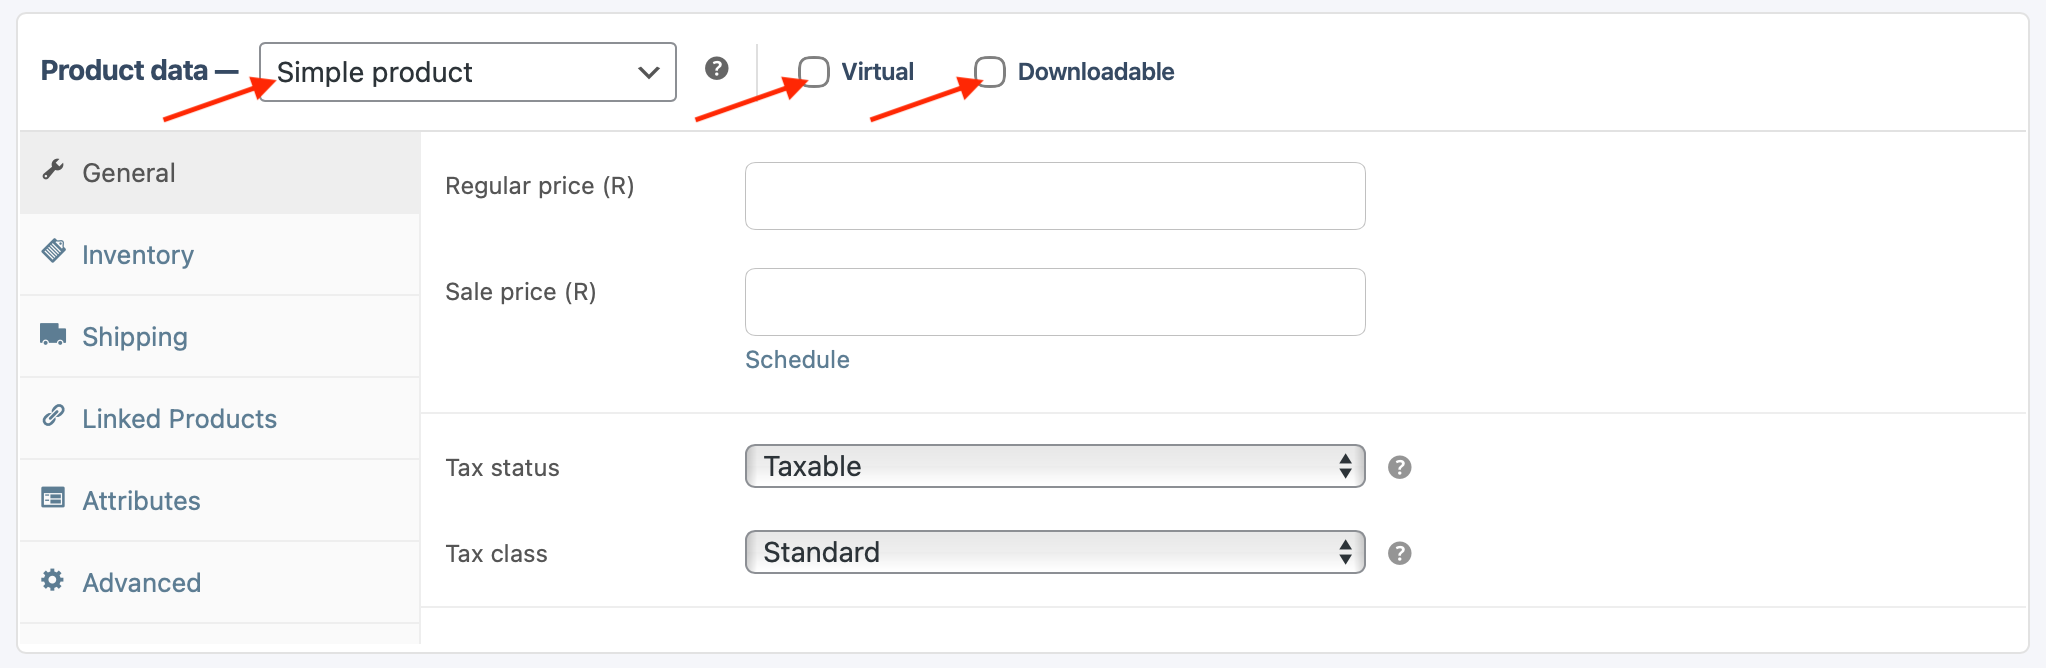
6.2. General settings
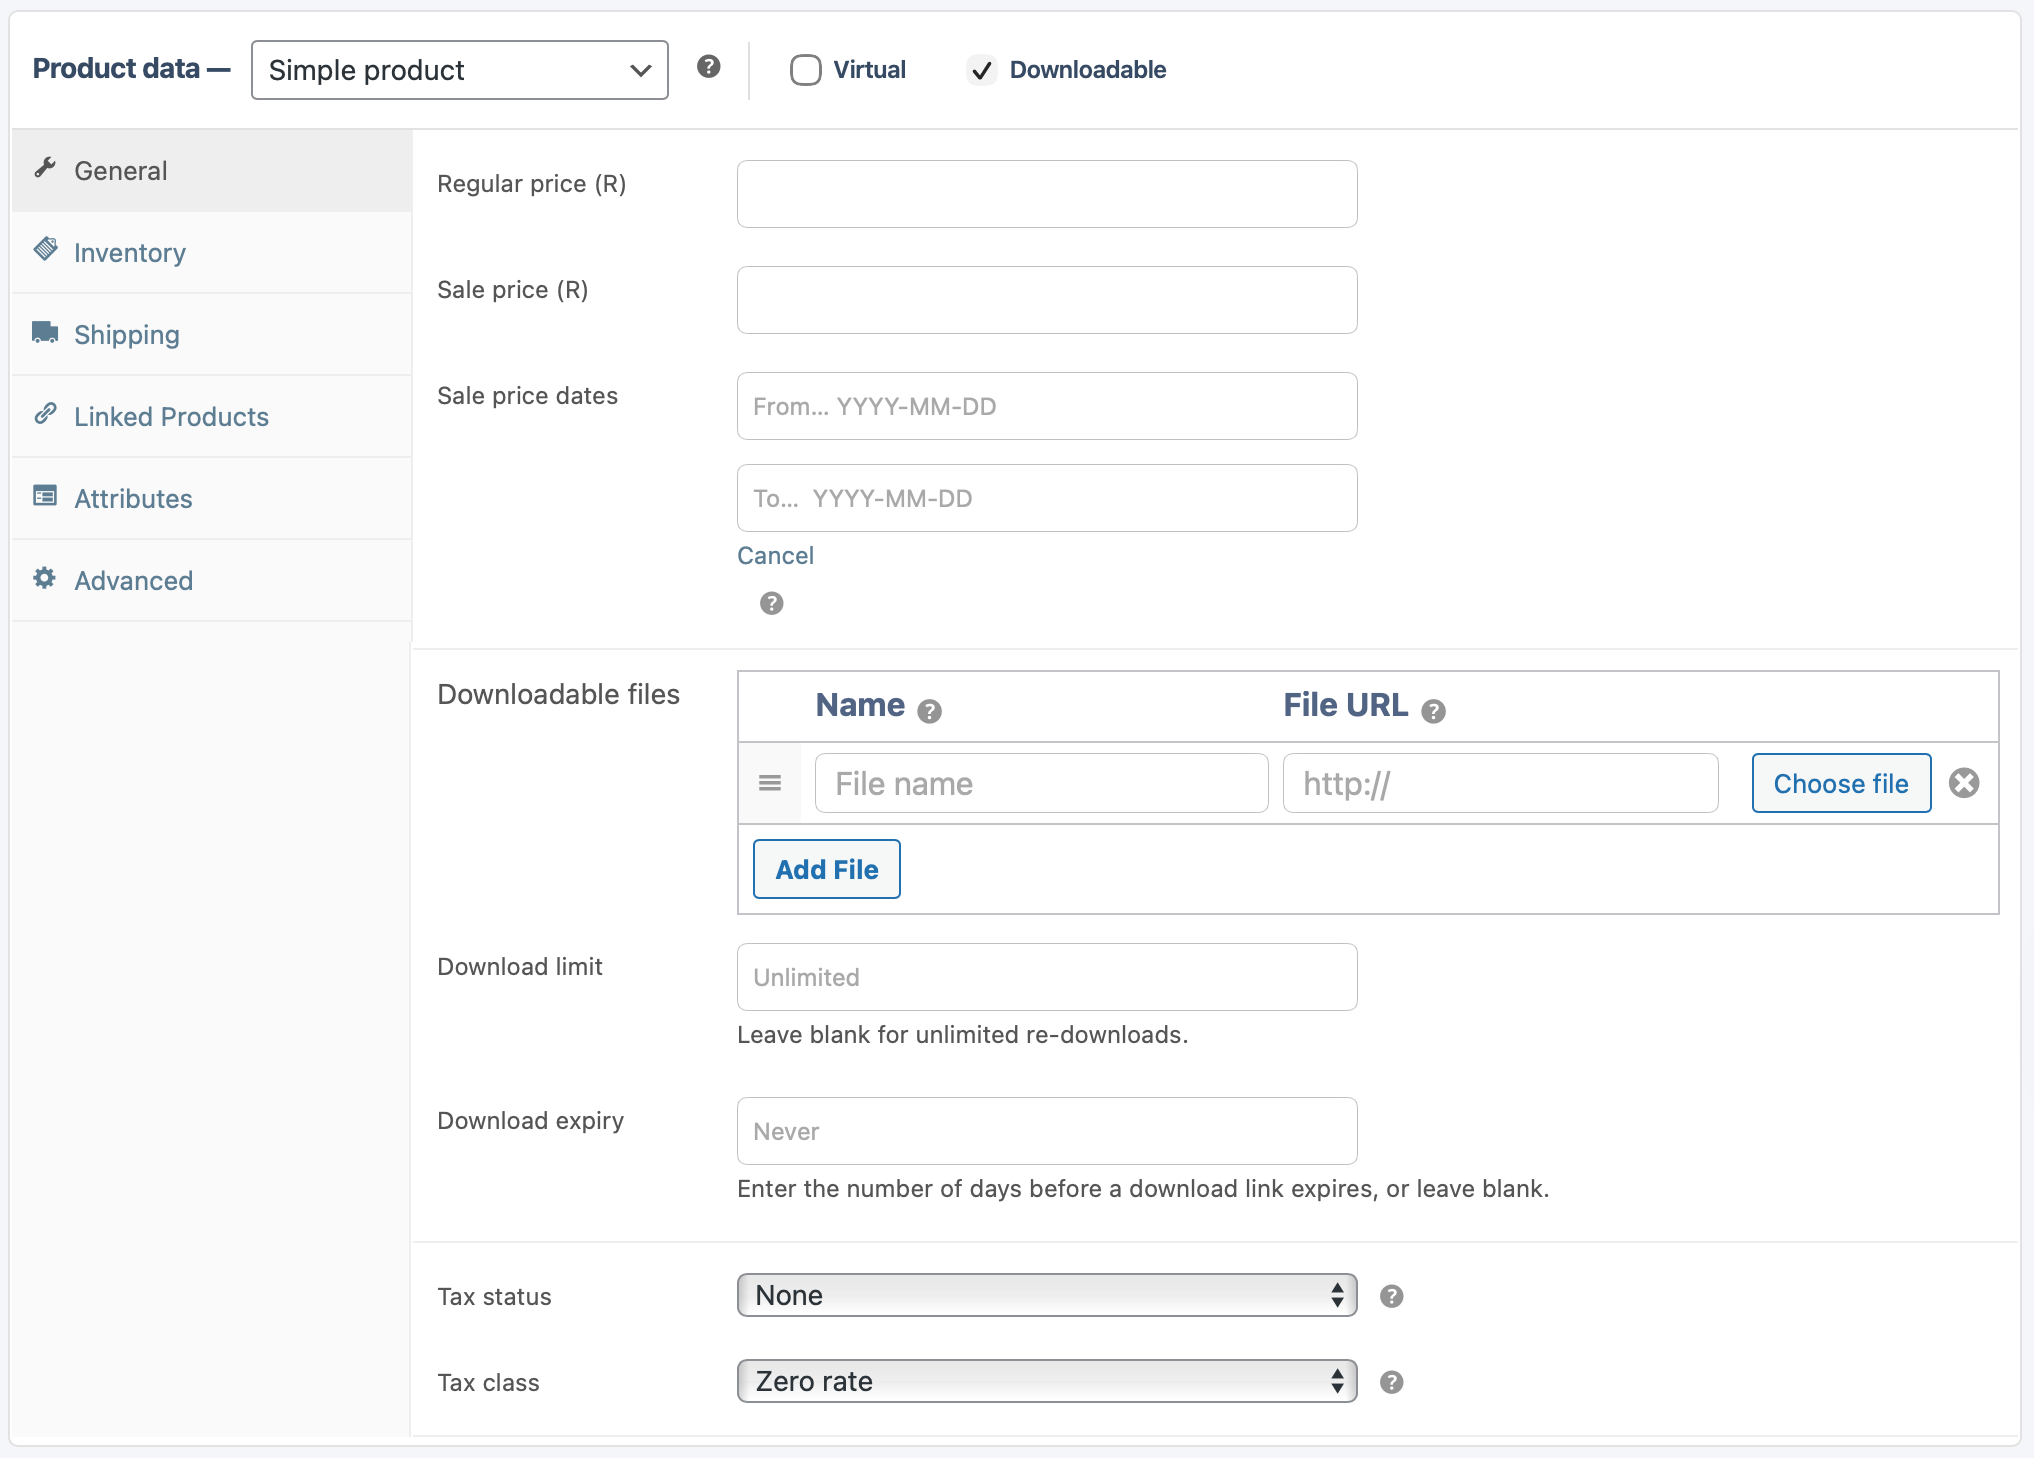
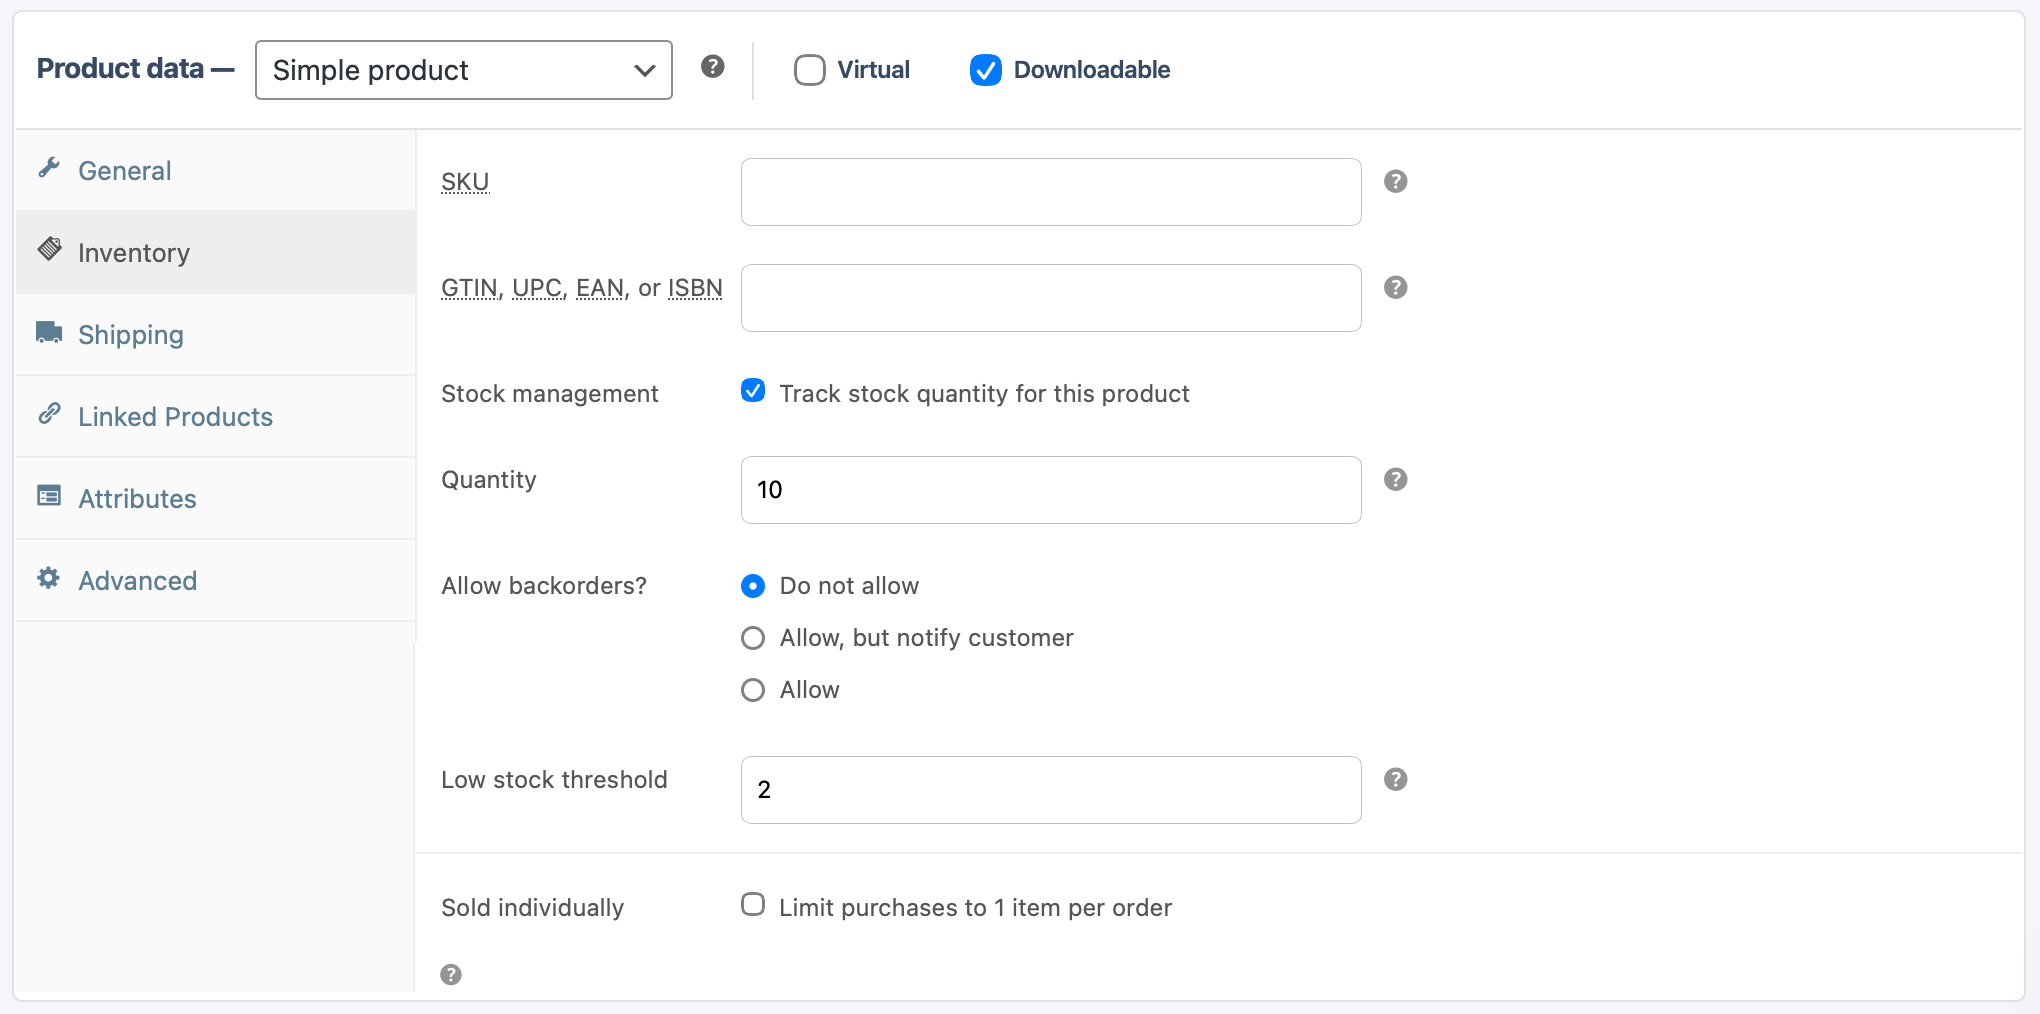
6.3. Inventory:
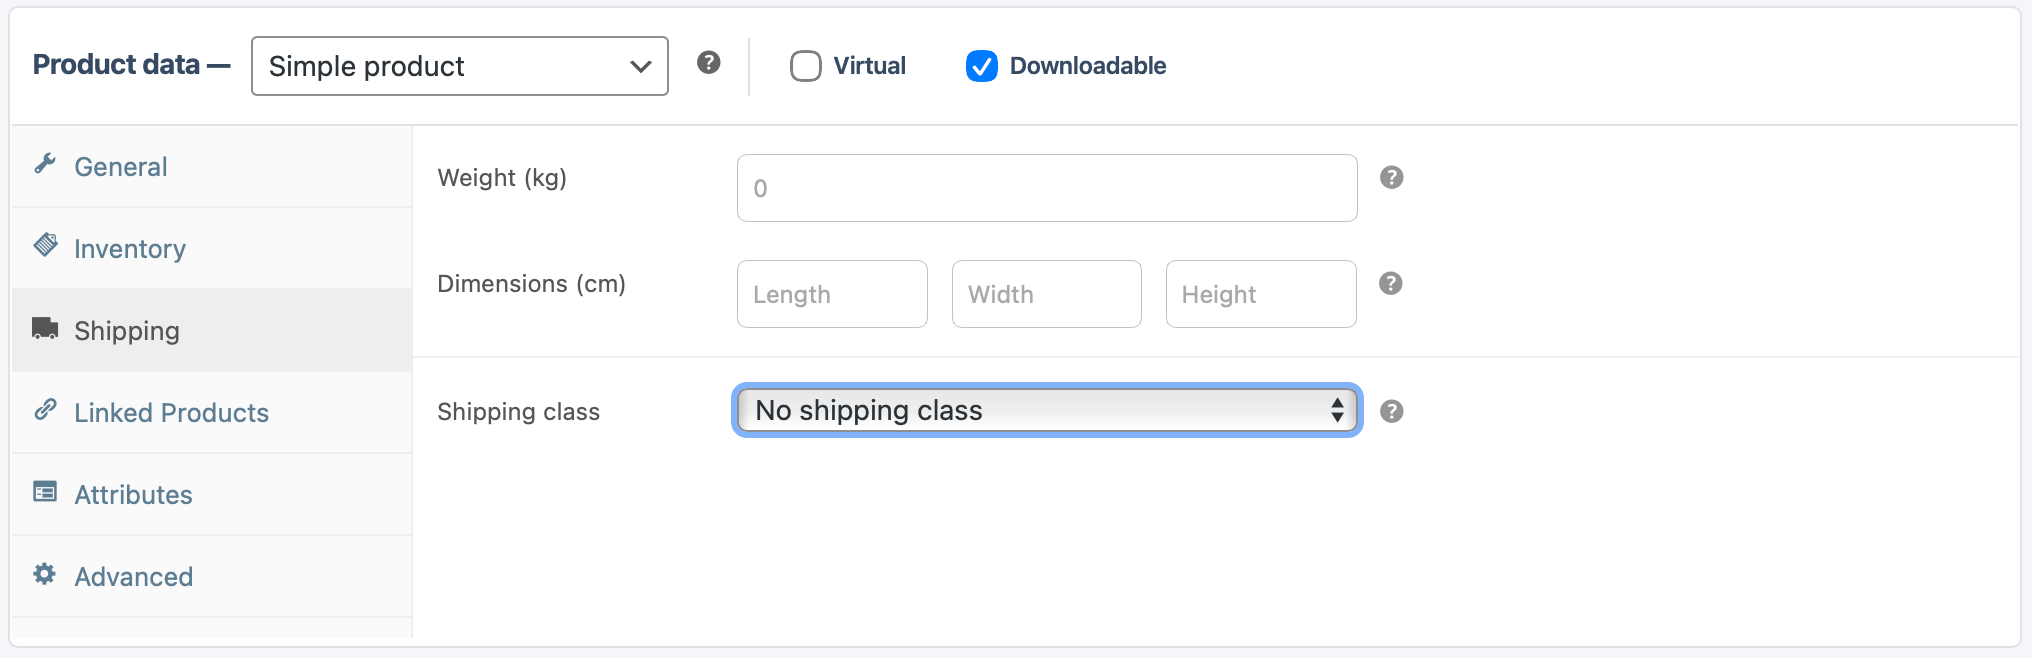
6.3 Shipping:
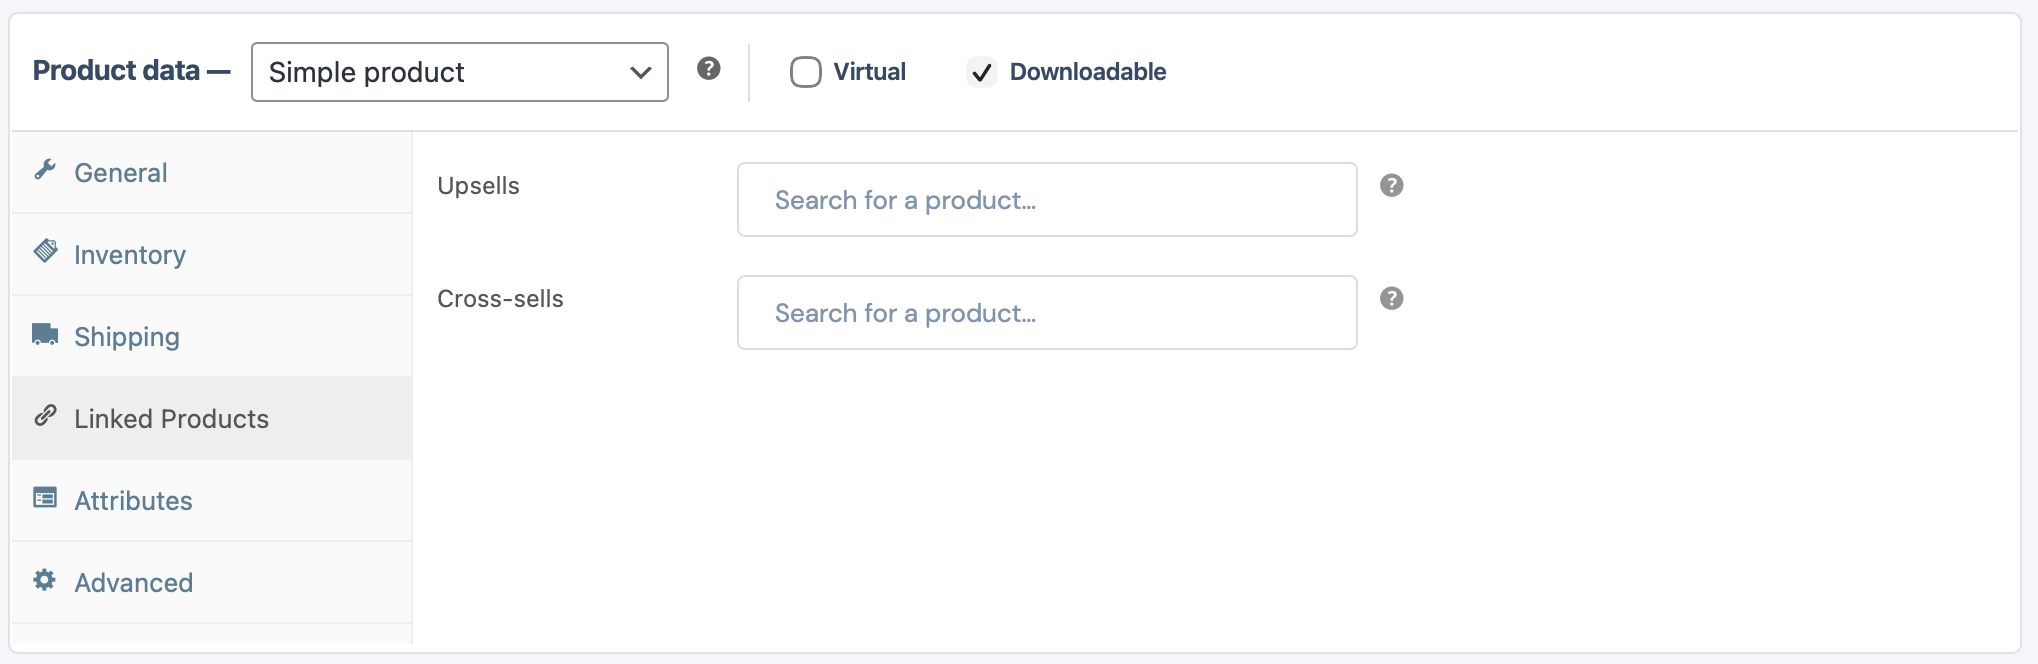
6.4 Linked Products:
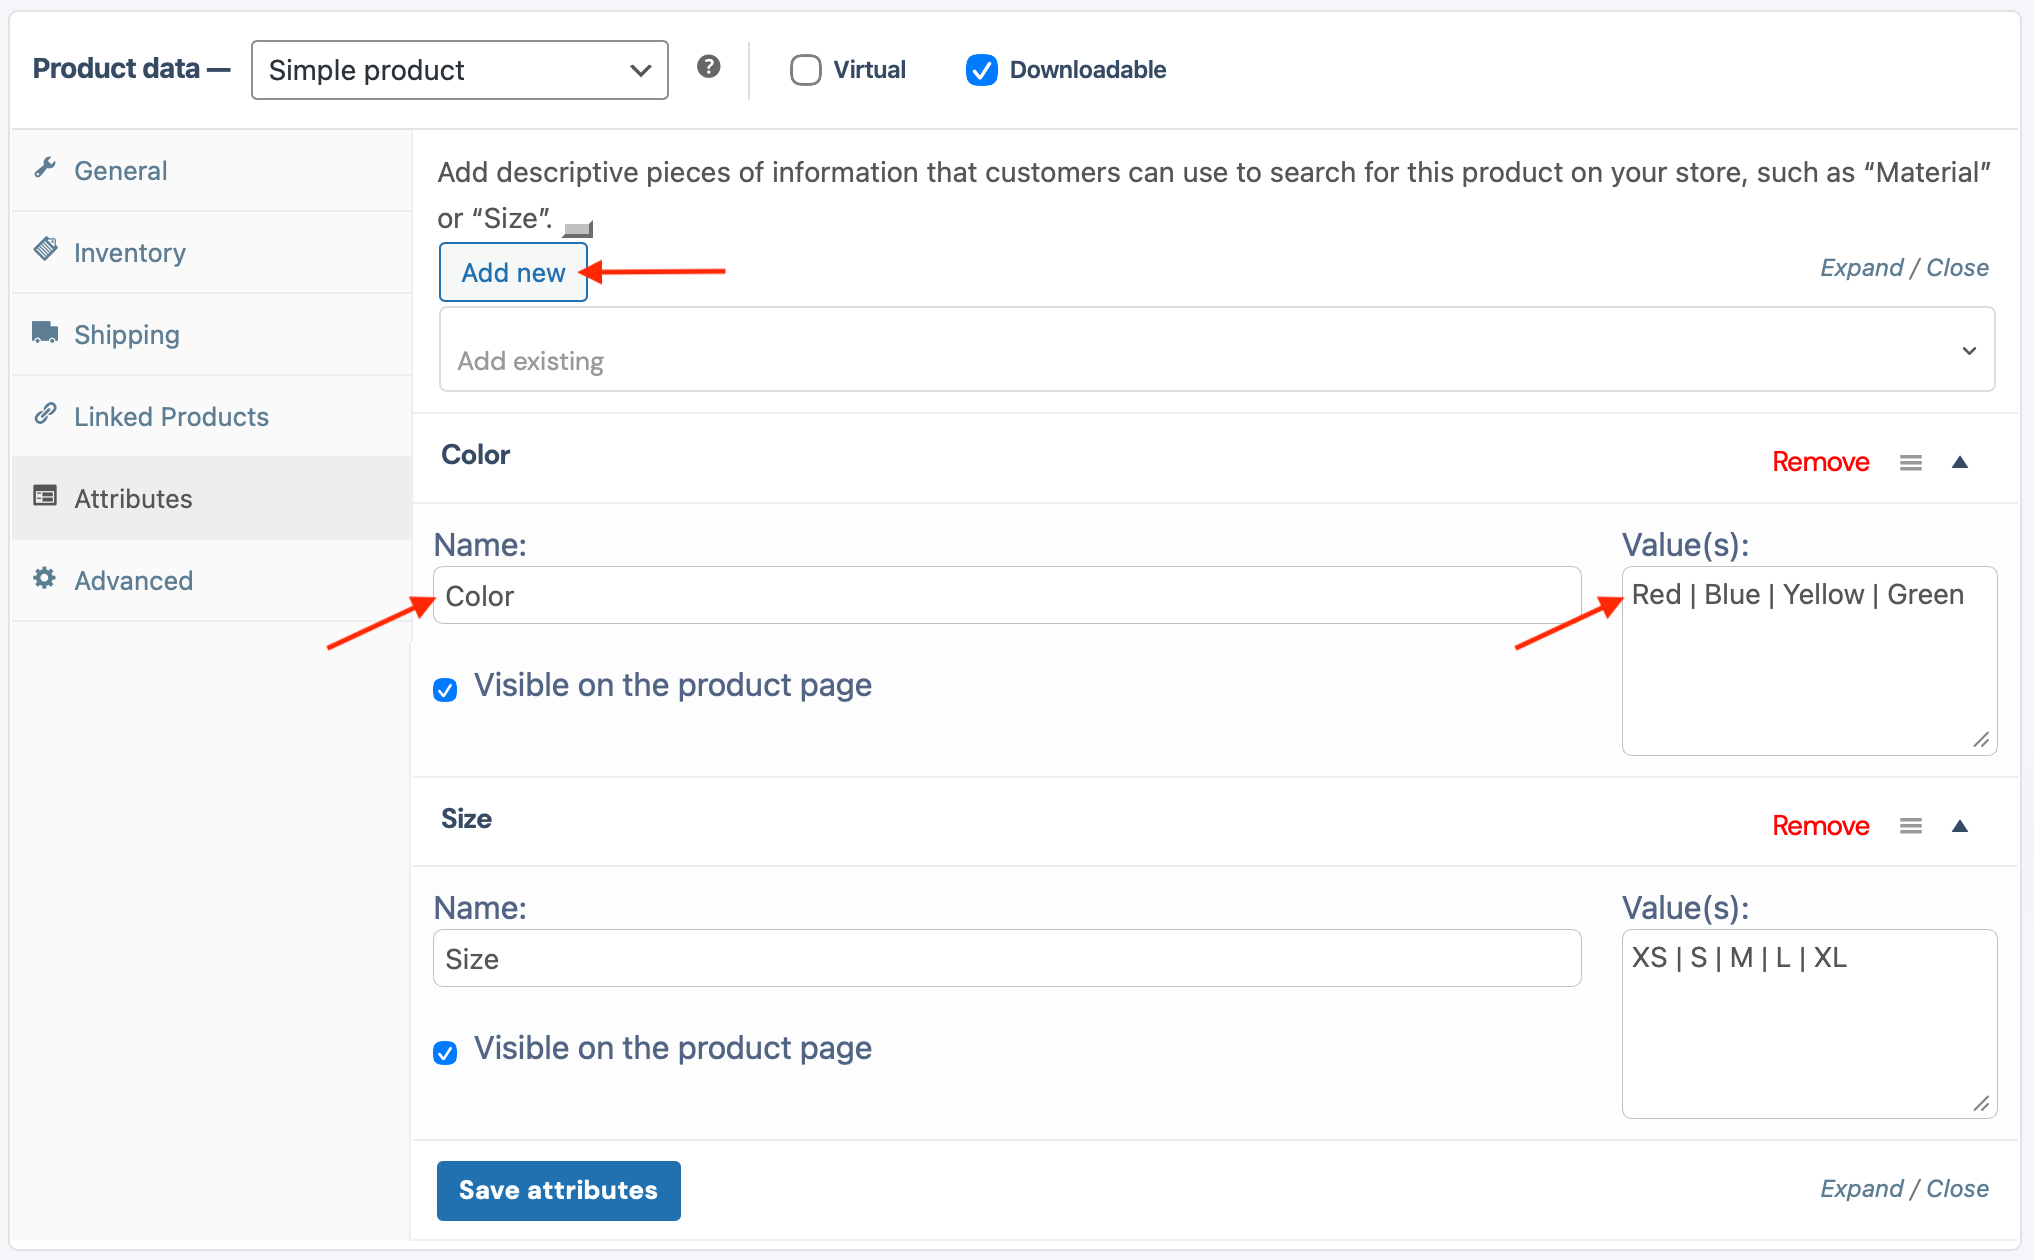
6.5 Attributes:
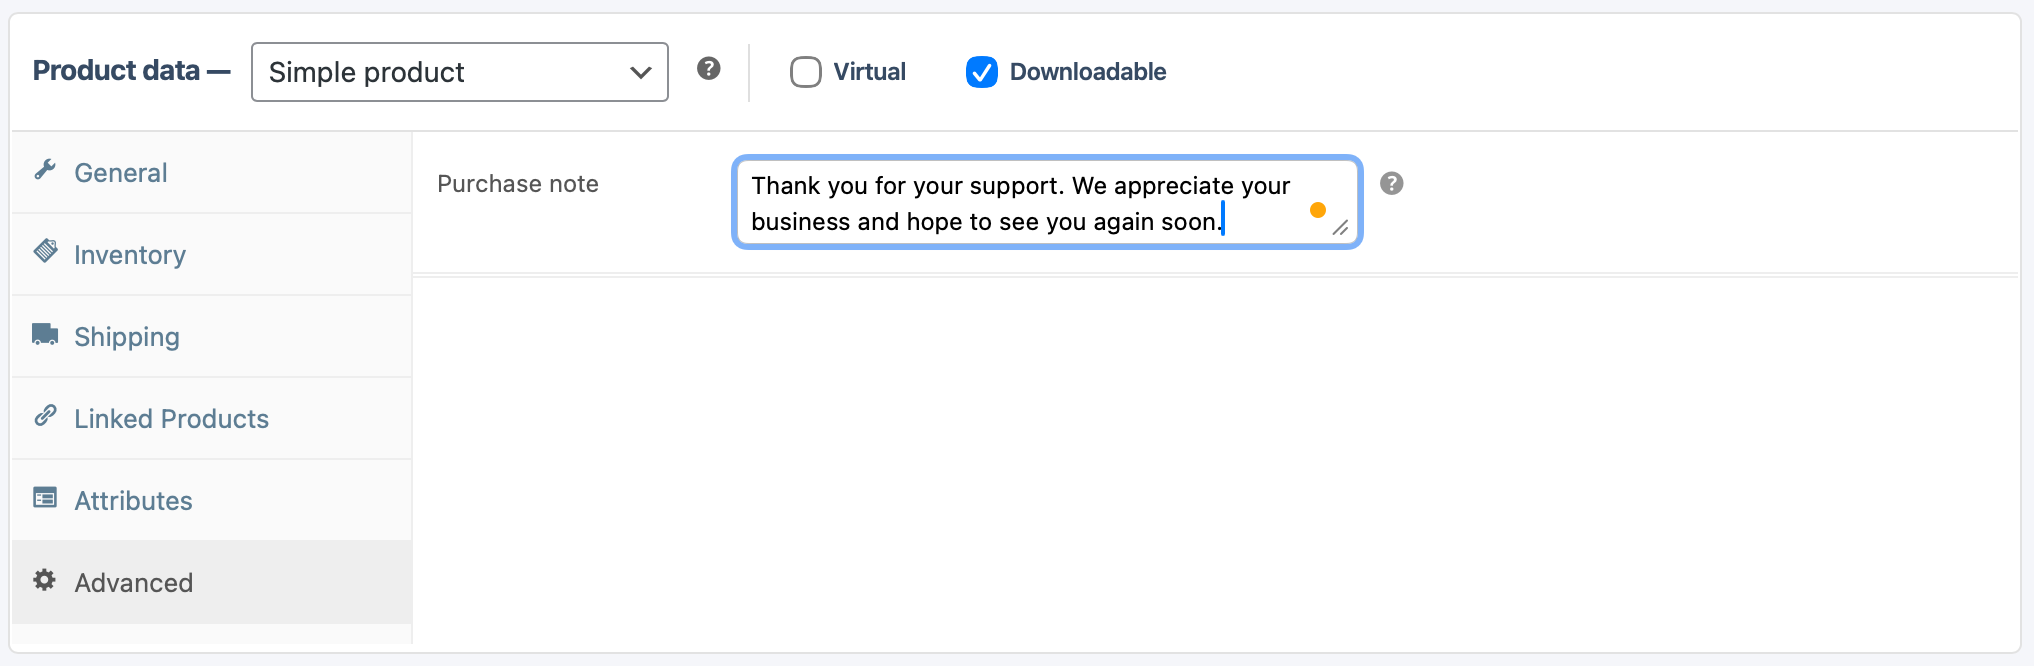
6.5 Advanced:
7. Variable Product – (This is a Single Product that has more than one option available, for example, you are selling T-shirts that are different colors or sizes. Or you are selling homemade baked goods and have a few bread varieties to choose from).
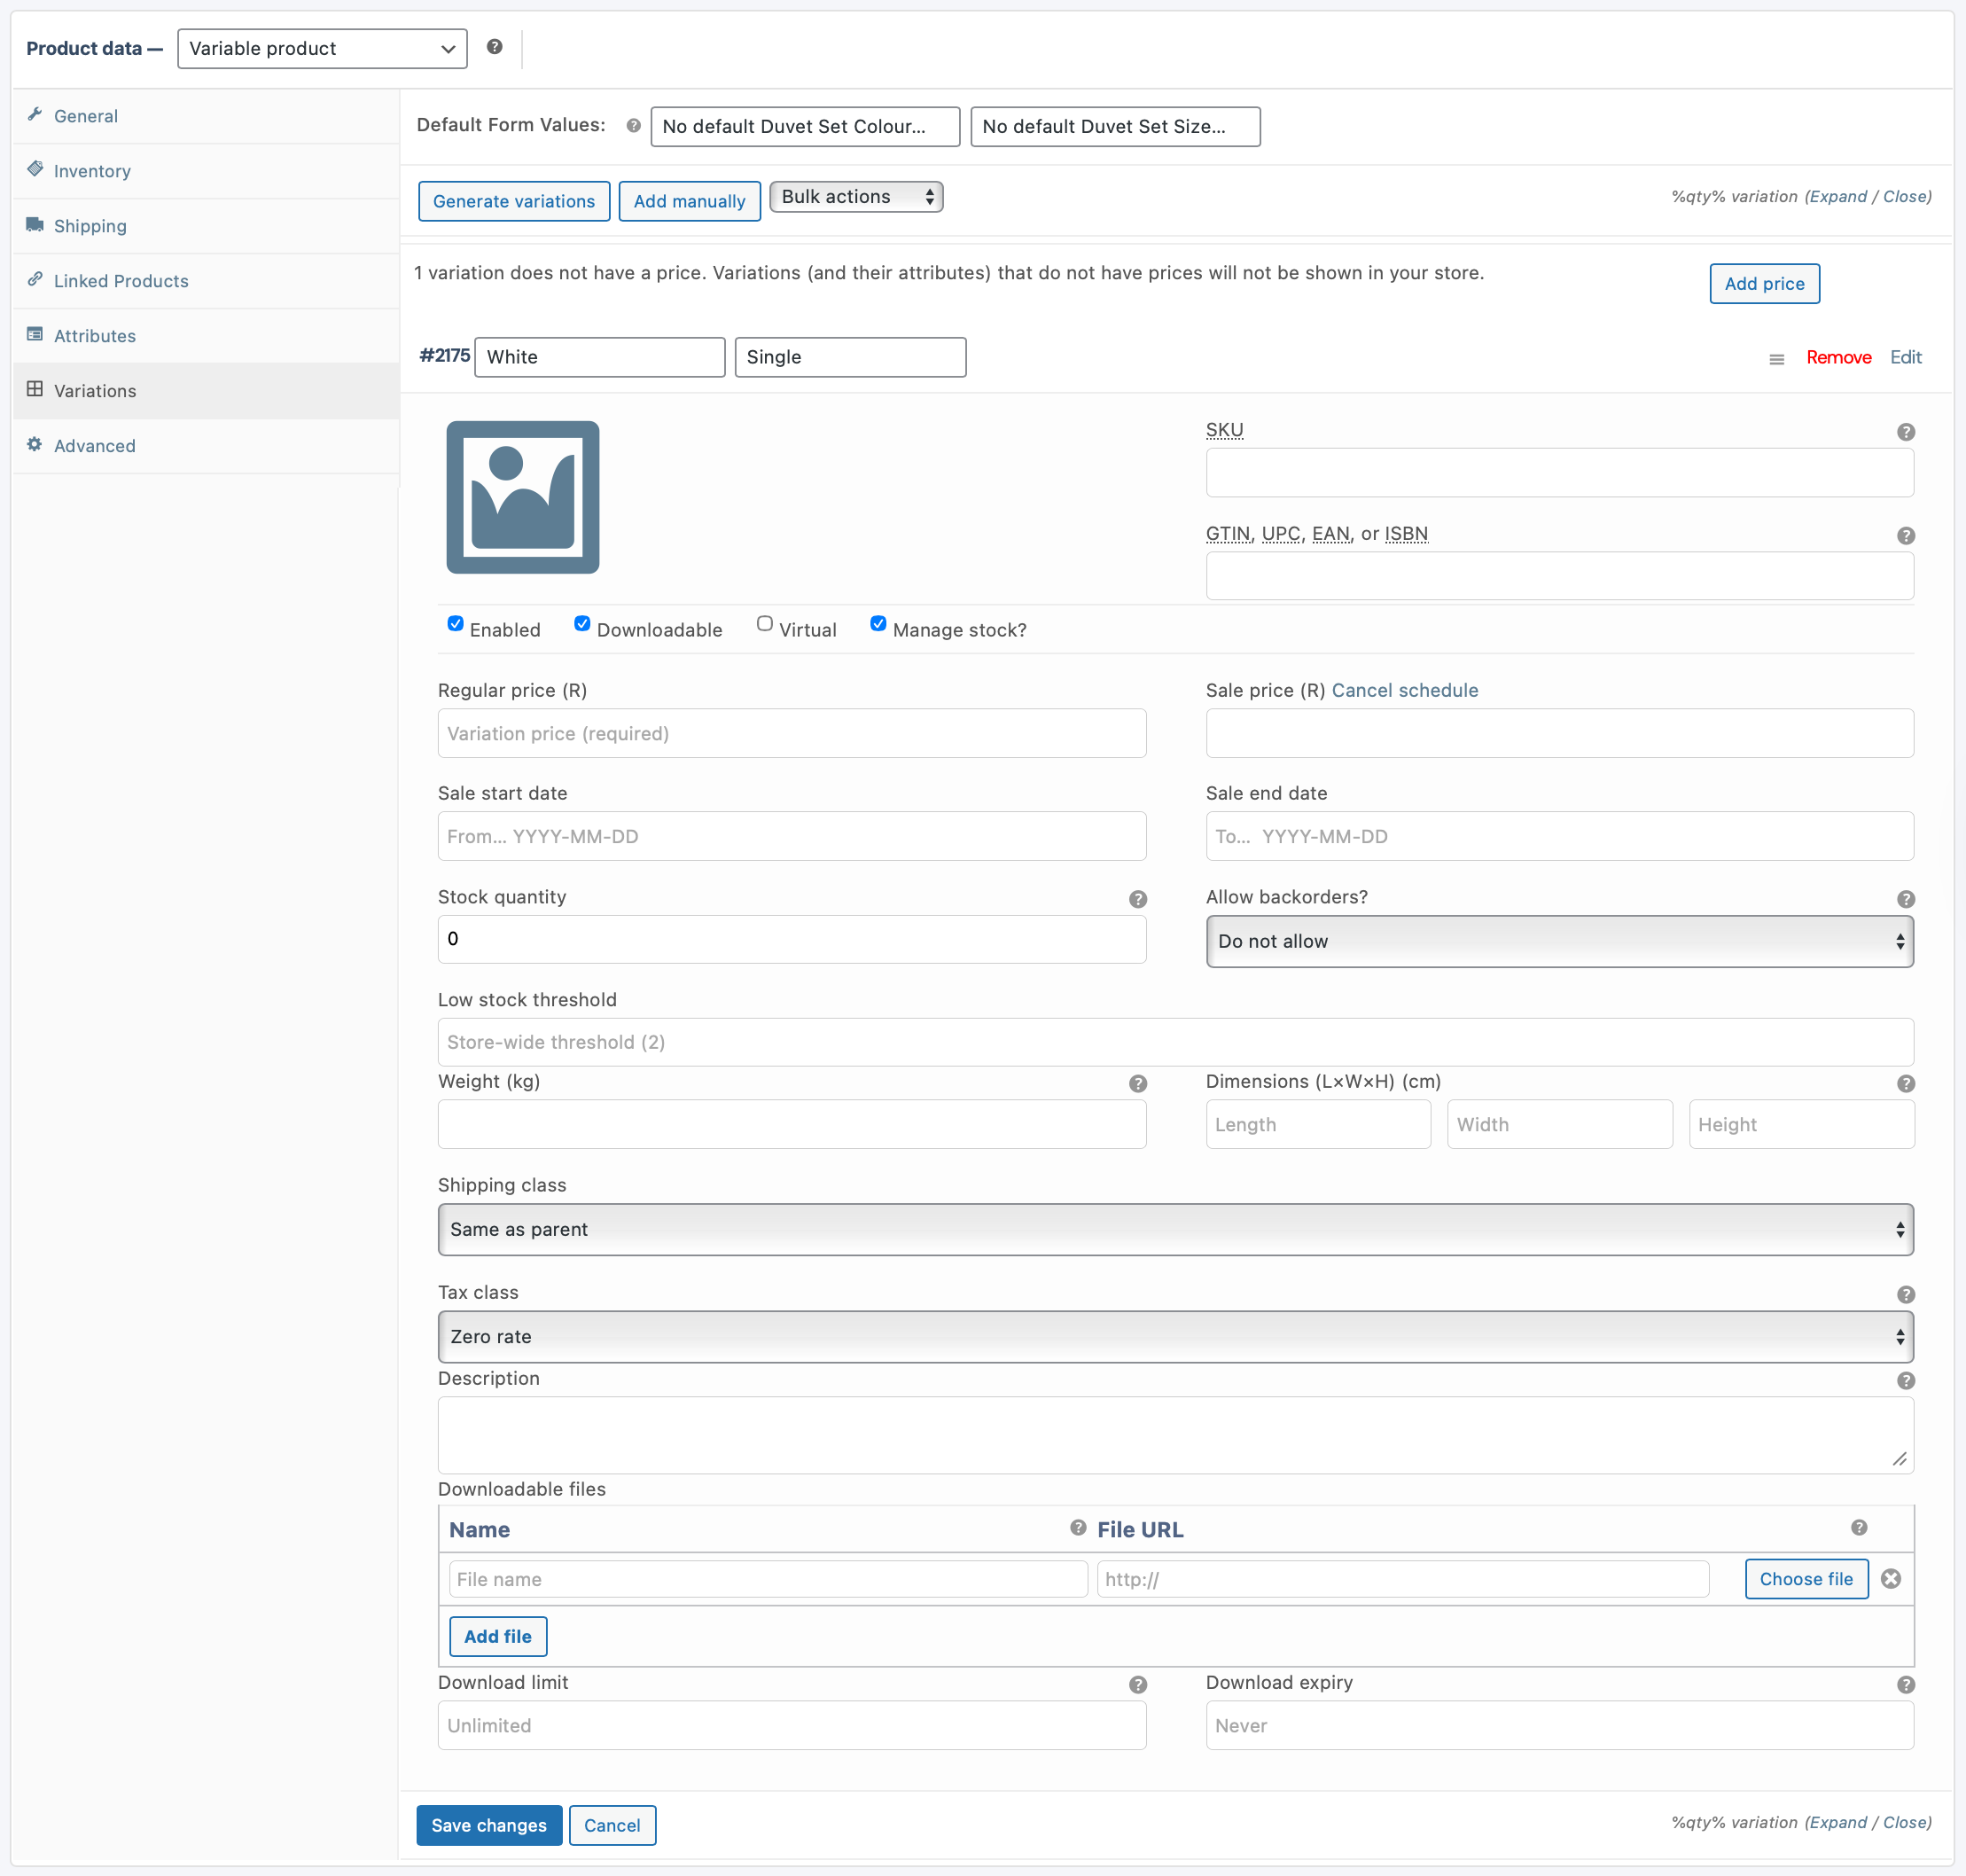
7.1 Initial settings:
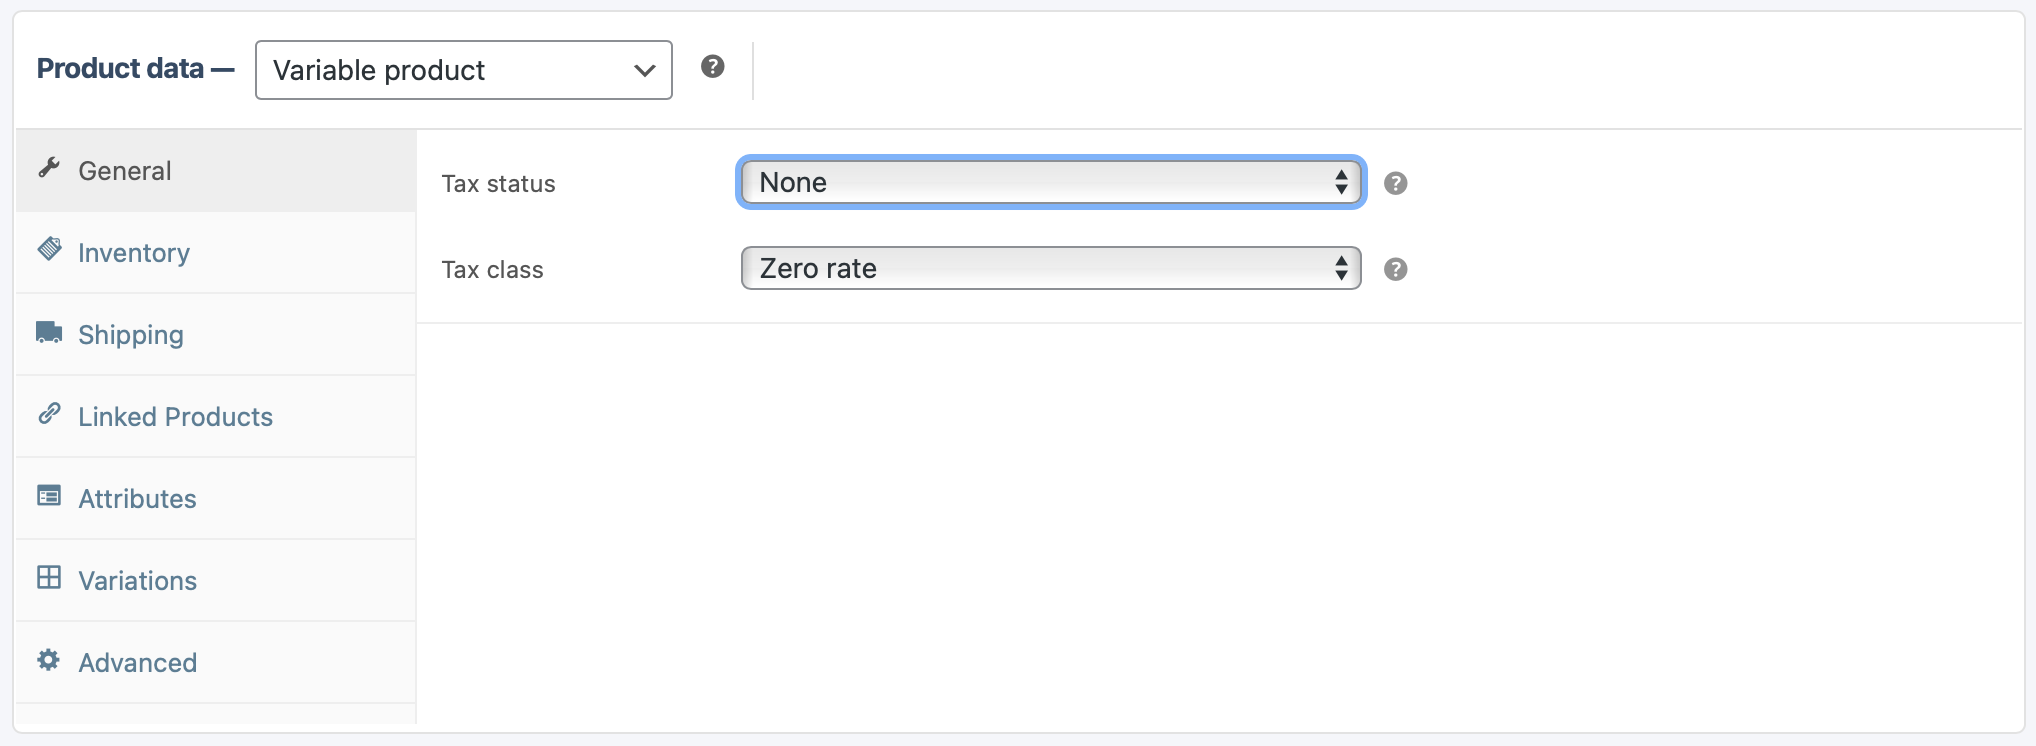
7.2 General:
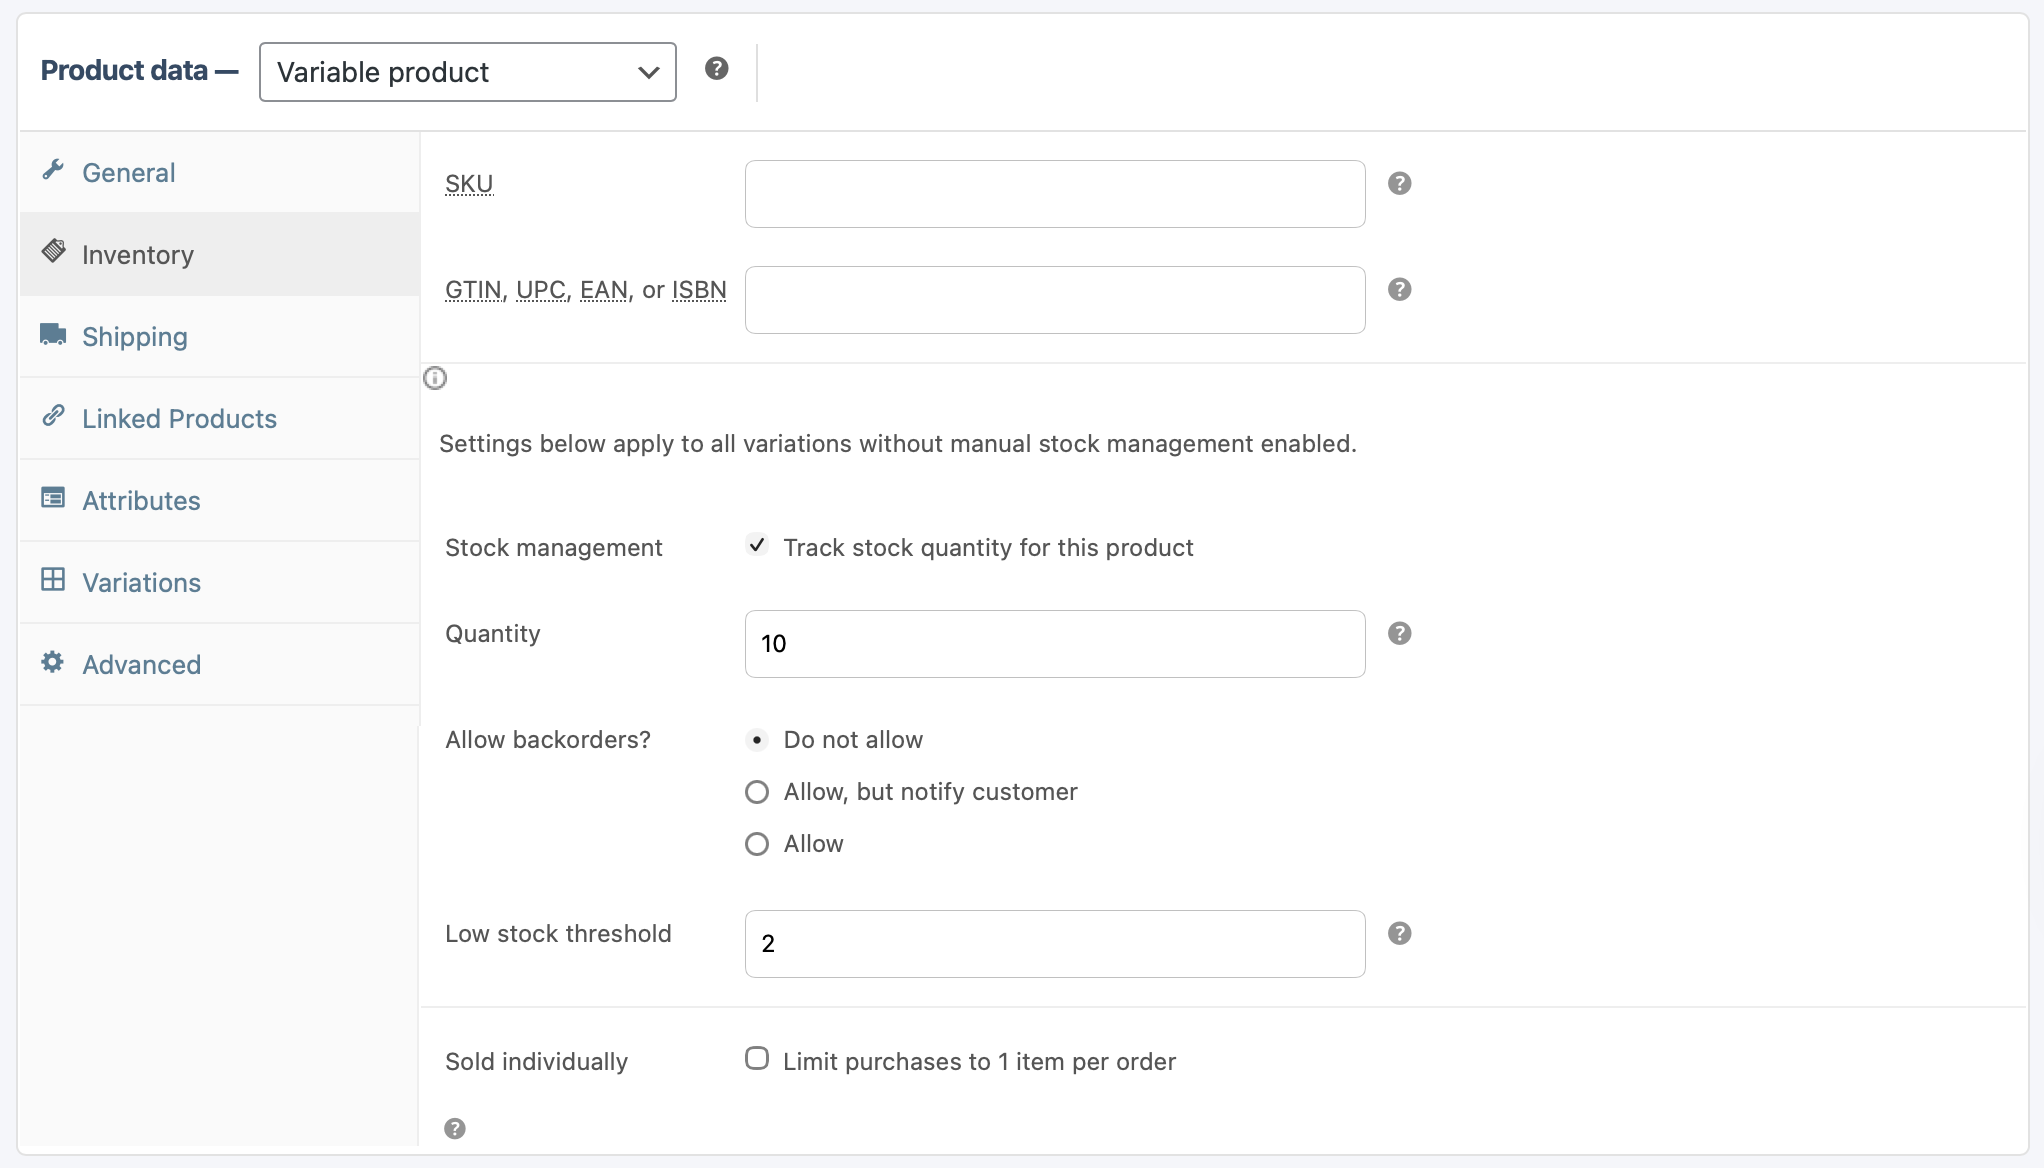
7.3 Inventory:
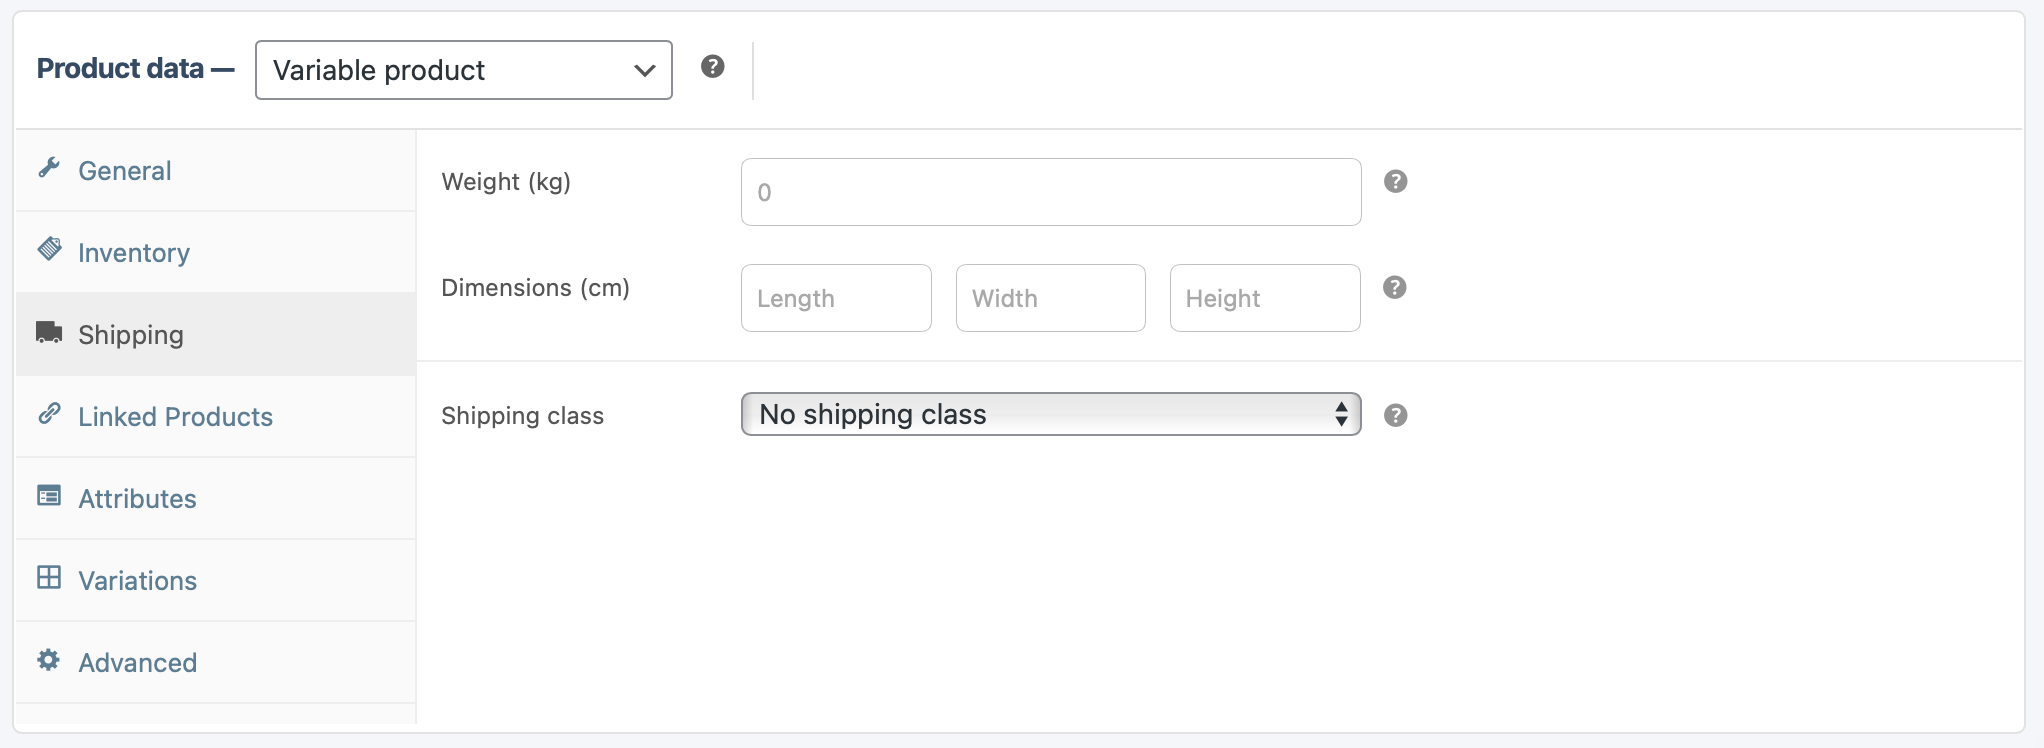
7.4 Shipping:
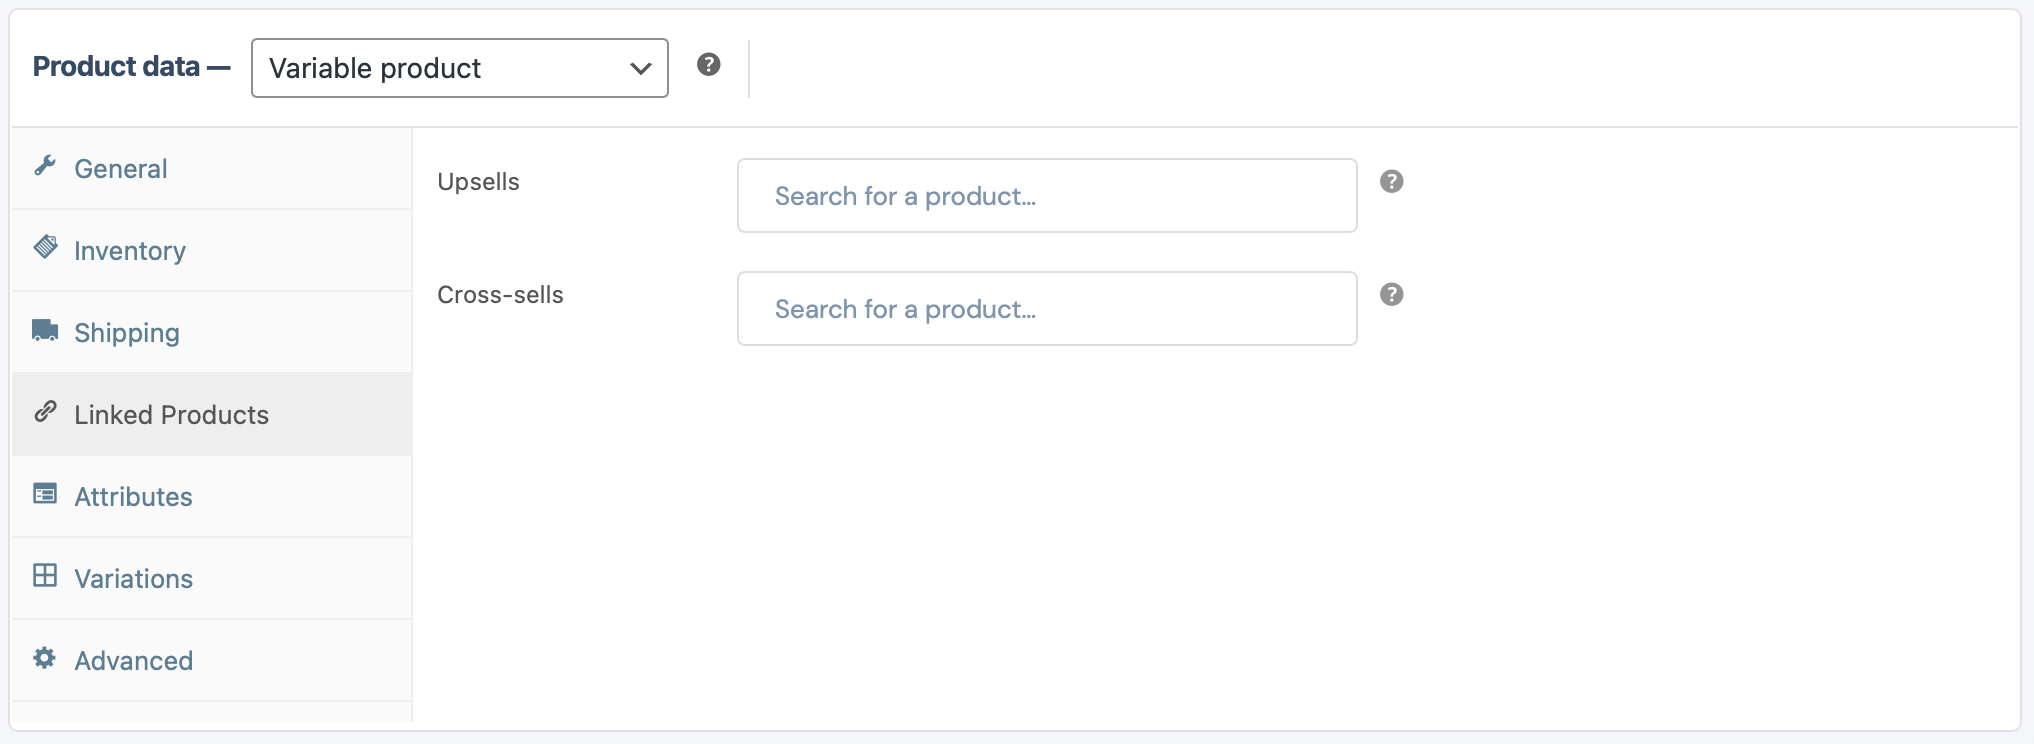
7.5 Linked Products:
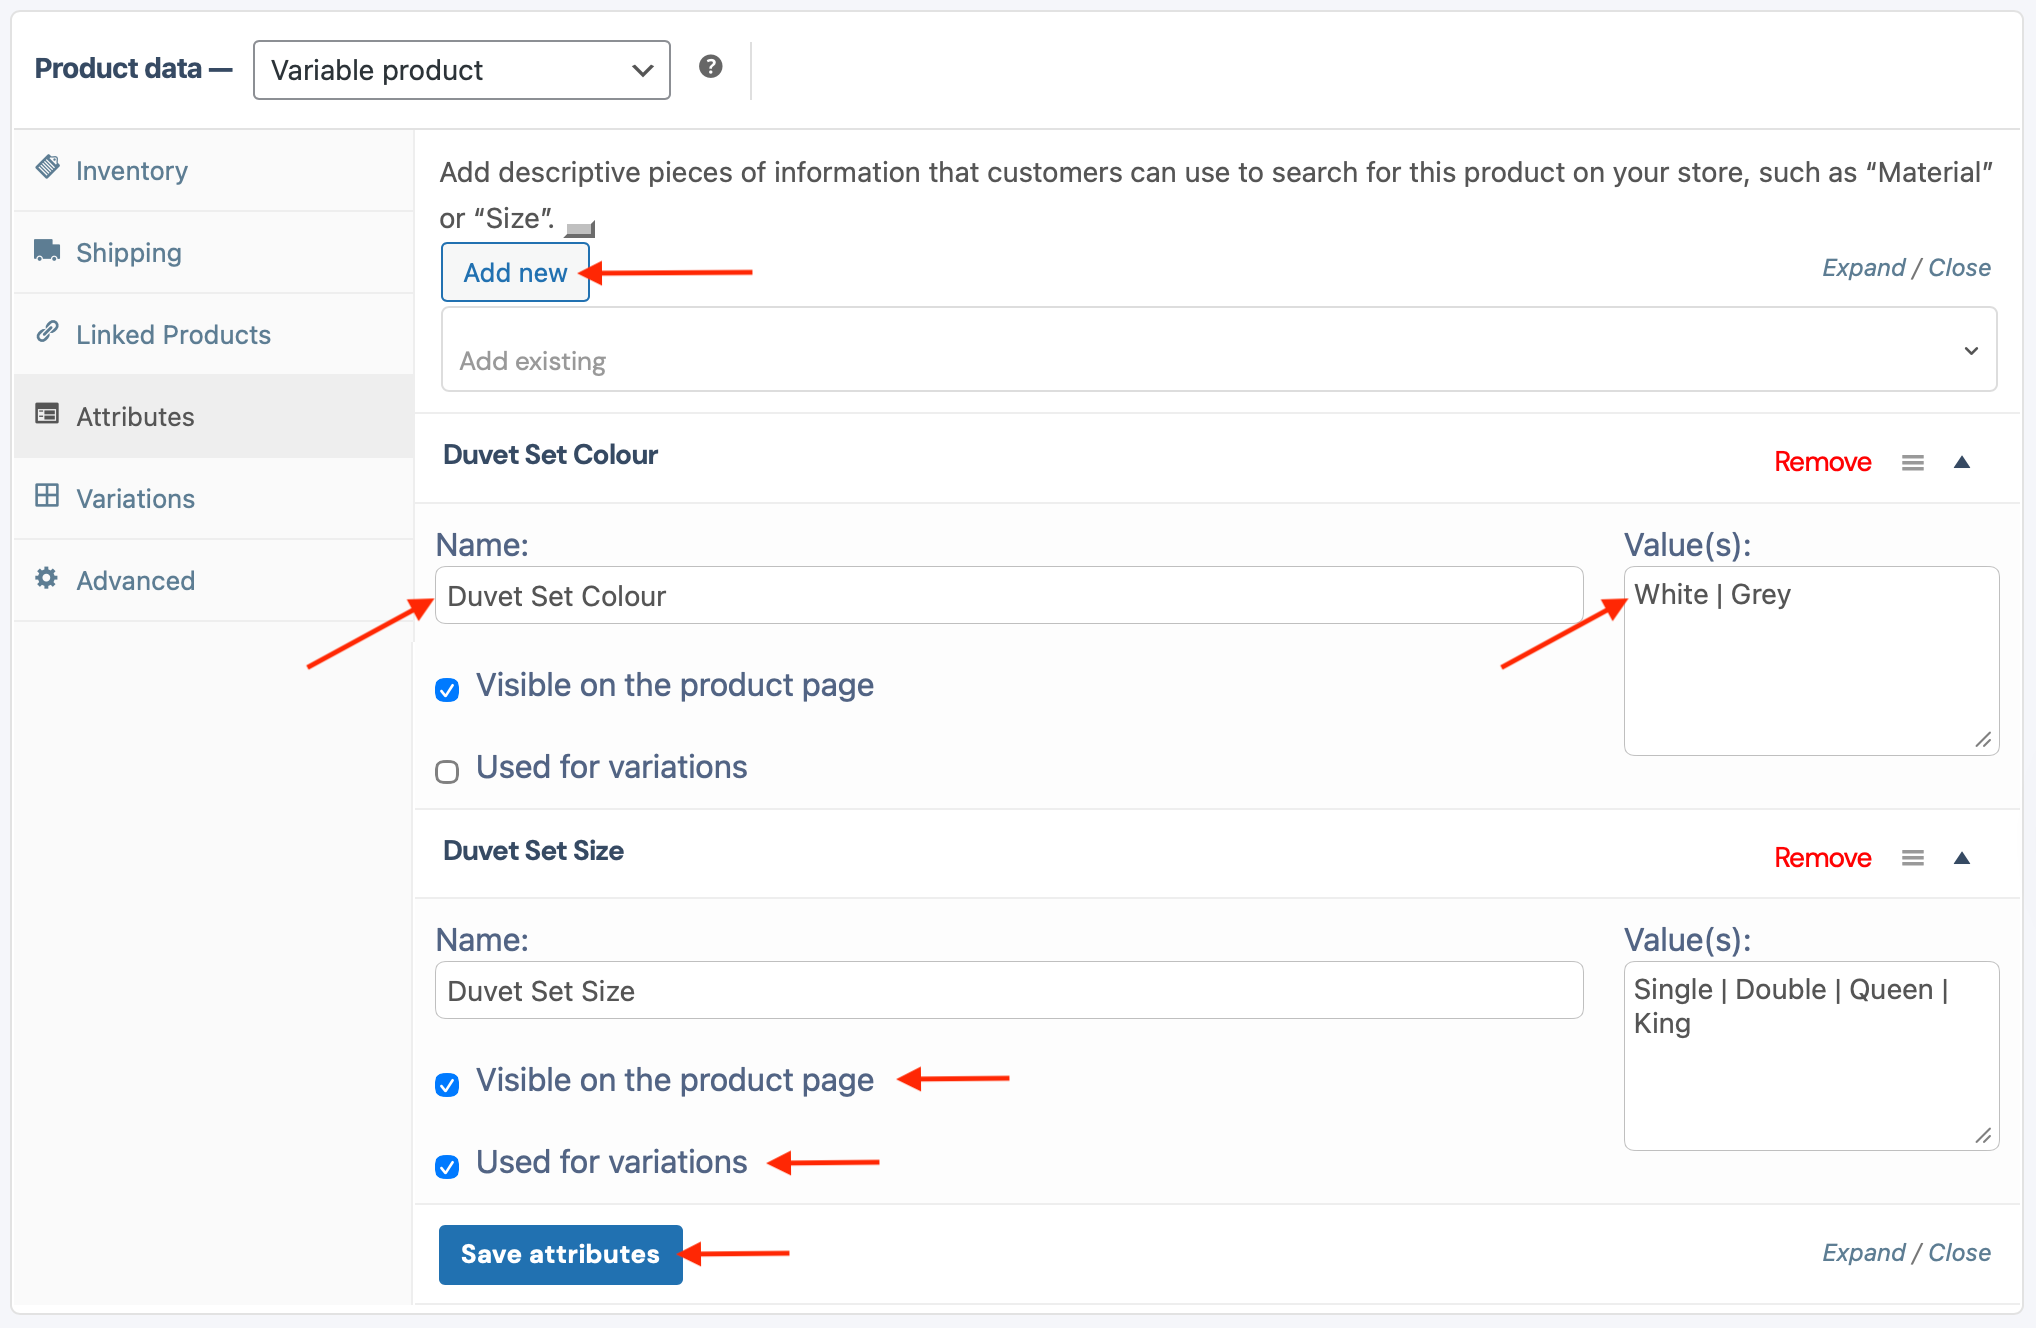
7.6 Attributes:
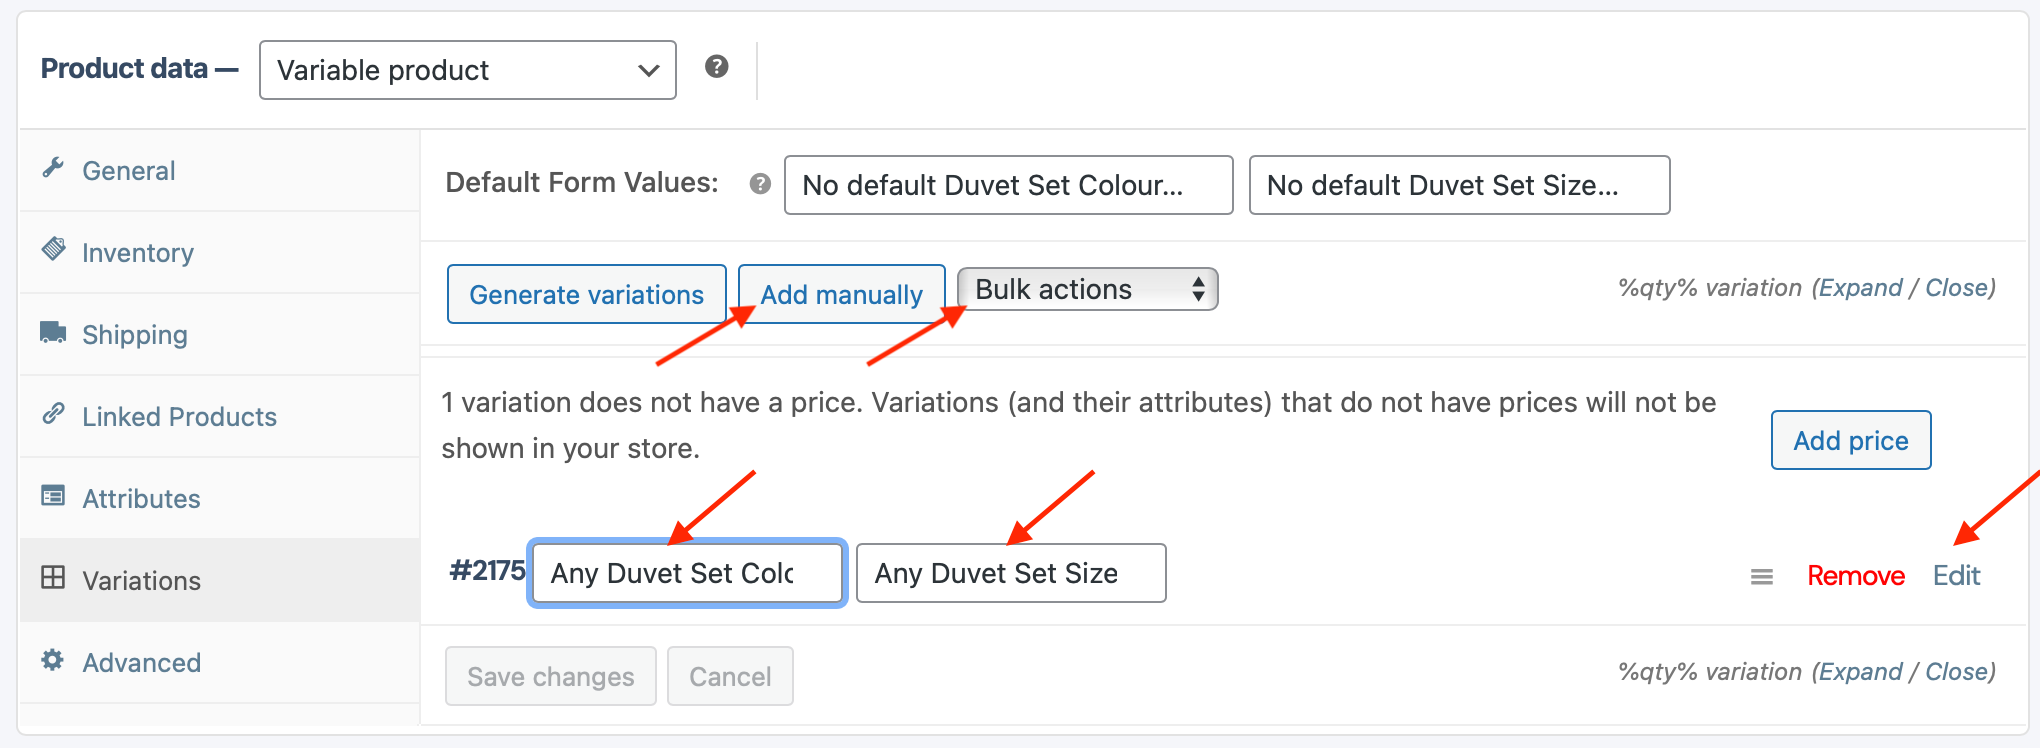
7.7 Variations
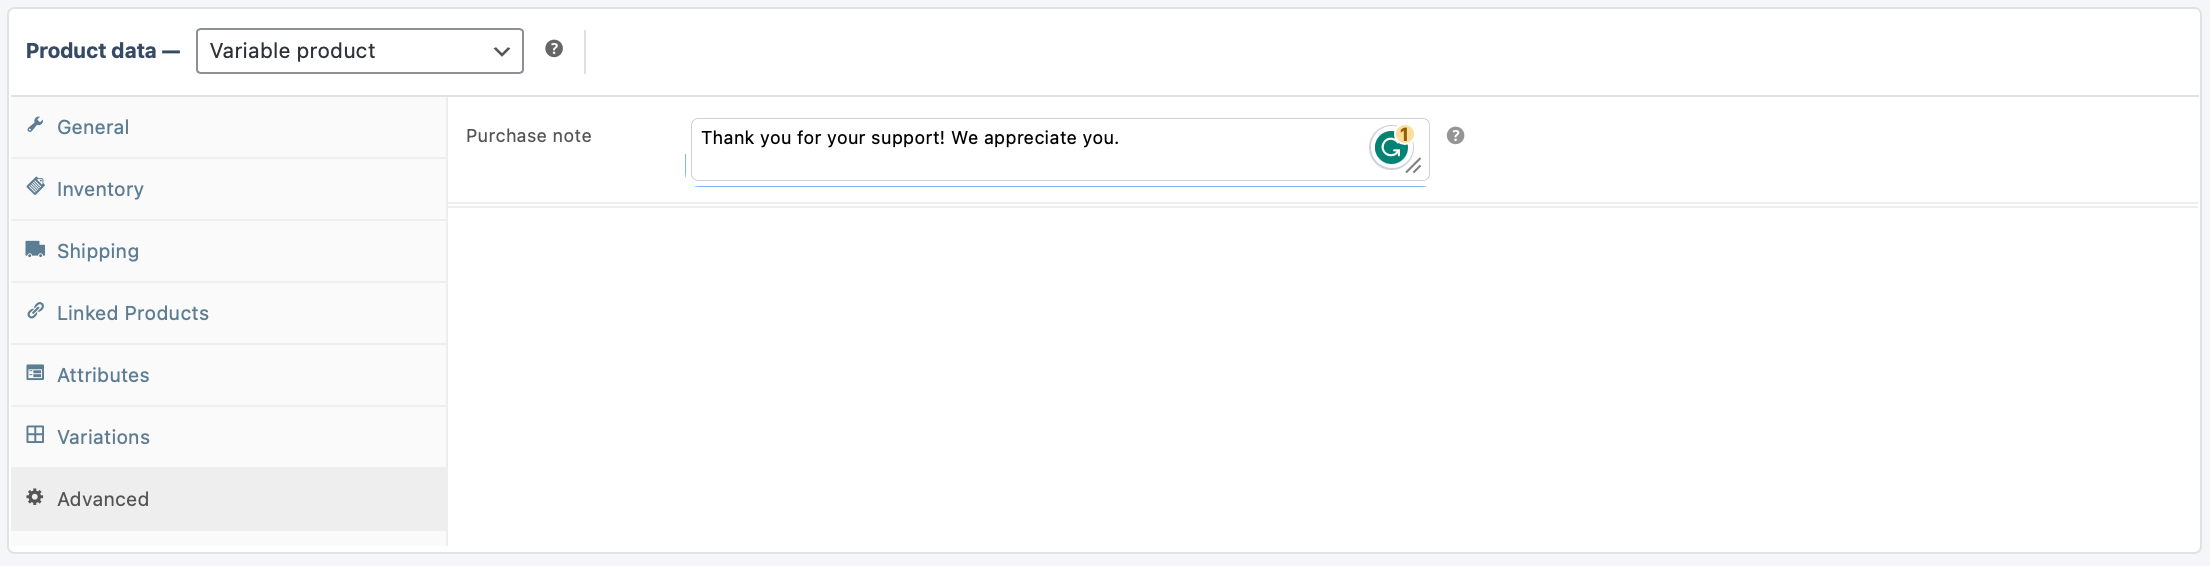
7.8 Advanced:
1. Go to your Listing Dashboard. Select the Products tab on the left menu.
2. If you would like to edit an existing Product, you can search for the Product Name or find it in the list shown. To edit the Product, click on the 3 dots (…) on the right-hand side of the Product in question. From the Menu that opens, select “Edit Product”.
3. If you are adding a new Product, you will see a button in the top right corner, “Add Product”. Click this button
4. On the Product page, we will be working on the “Product Data”. This is where we set the Pricing for the Product/Listing.
5. The first thing we will need to consider is what type of Product we are adding. There are a few options to consider:
6. Bookable Product – (Activities, or Events where the ticket availability needs to be confirmed by the Vendor before the Customer pays for the tickets).
6.1. Initial settings:
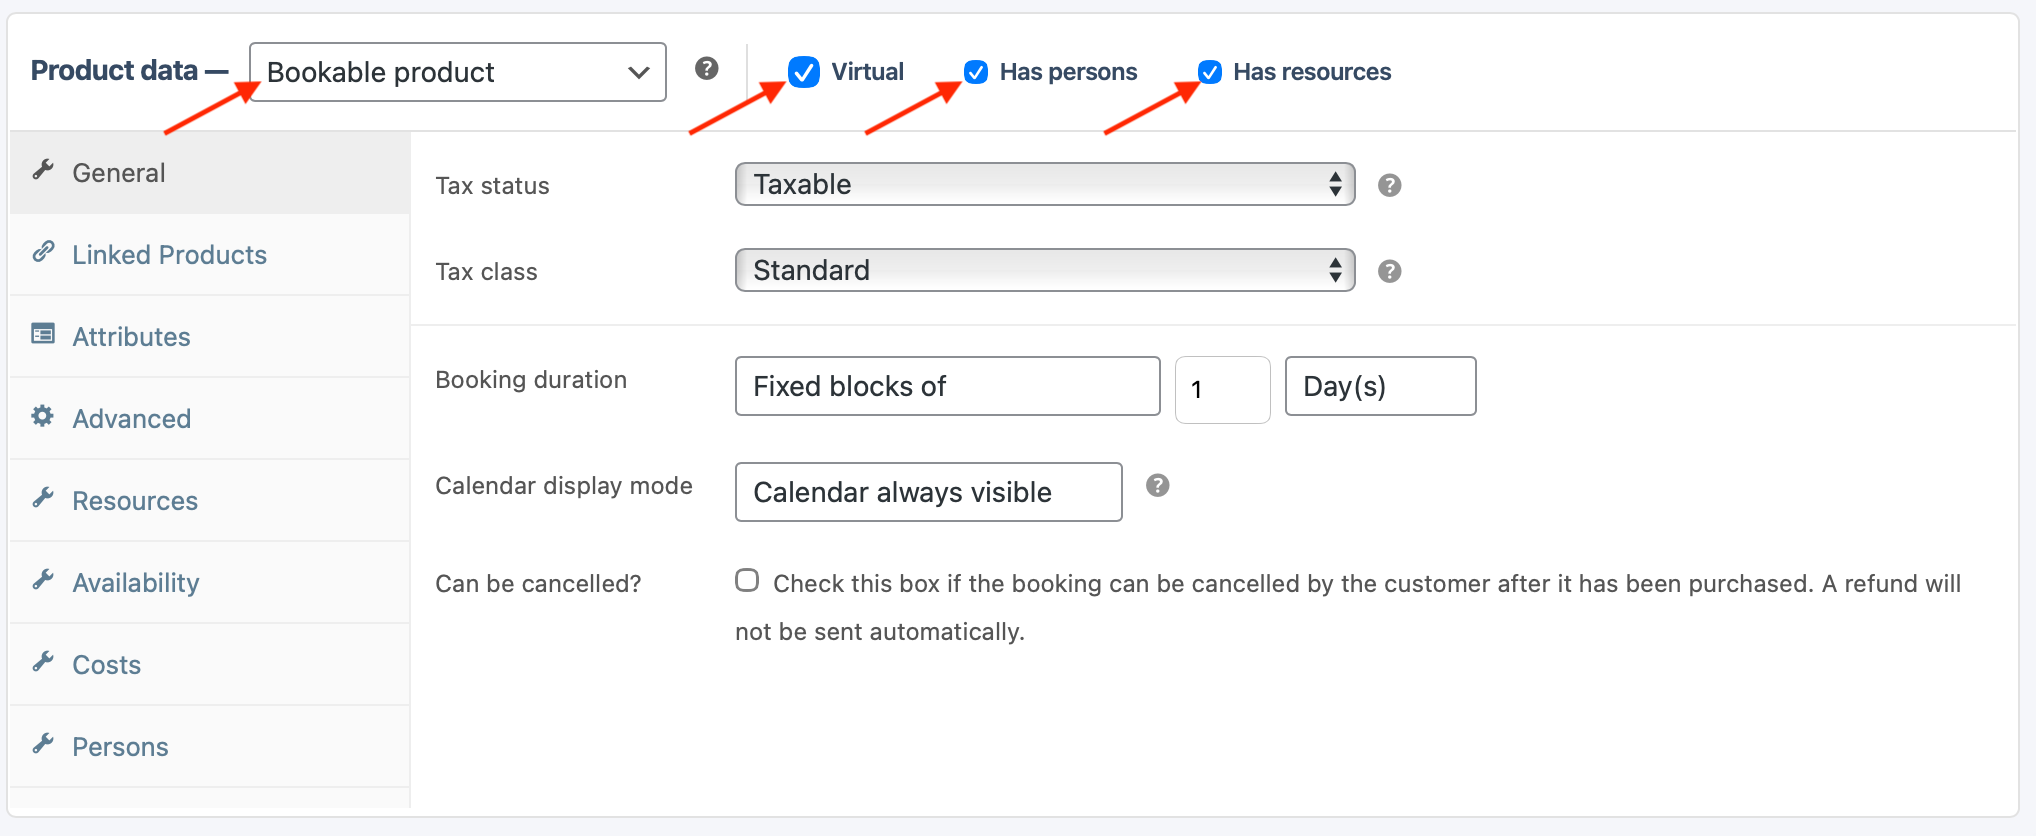
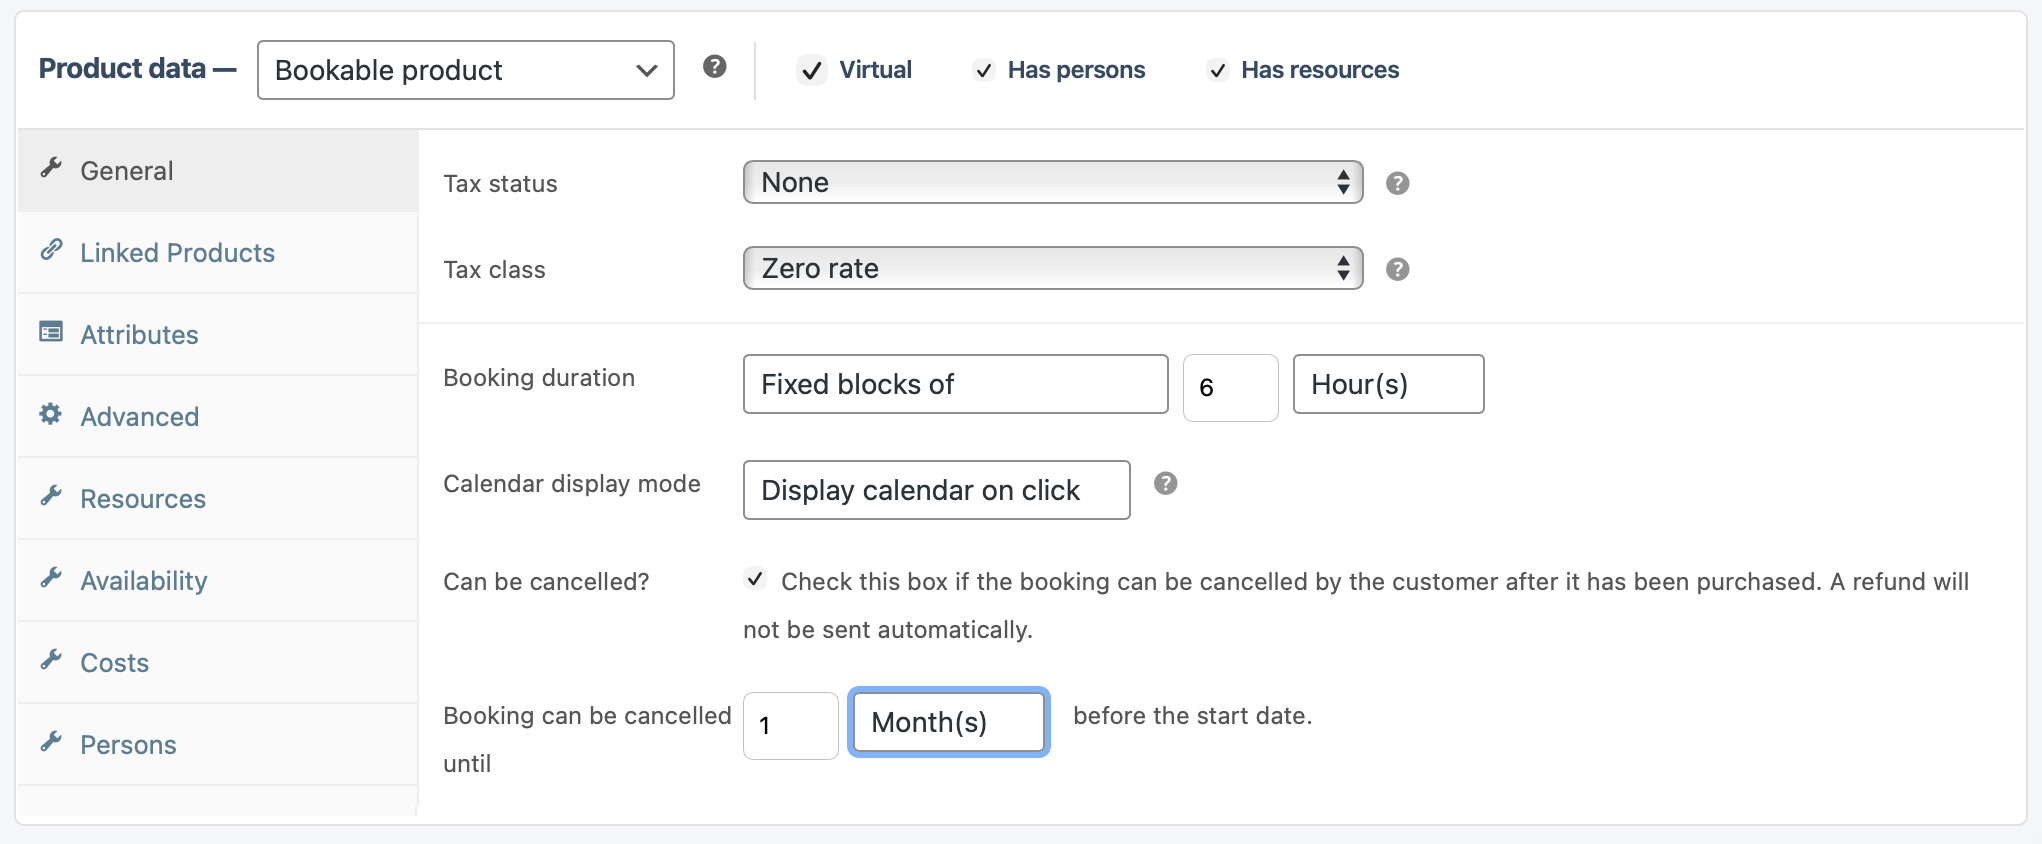
6.2. General:
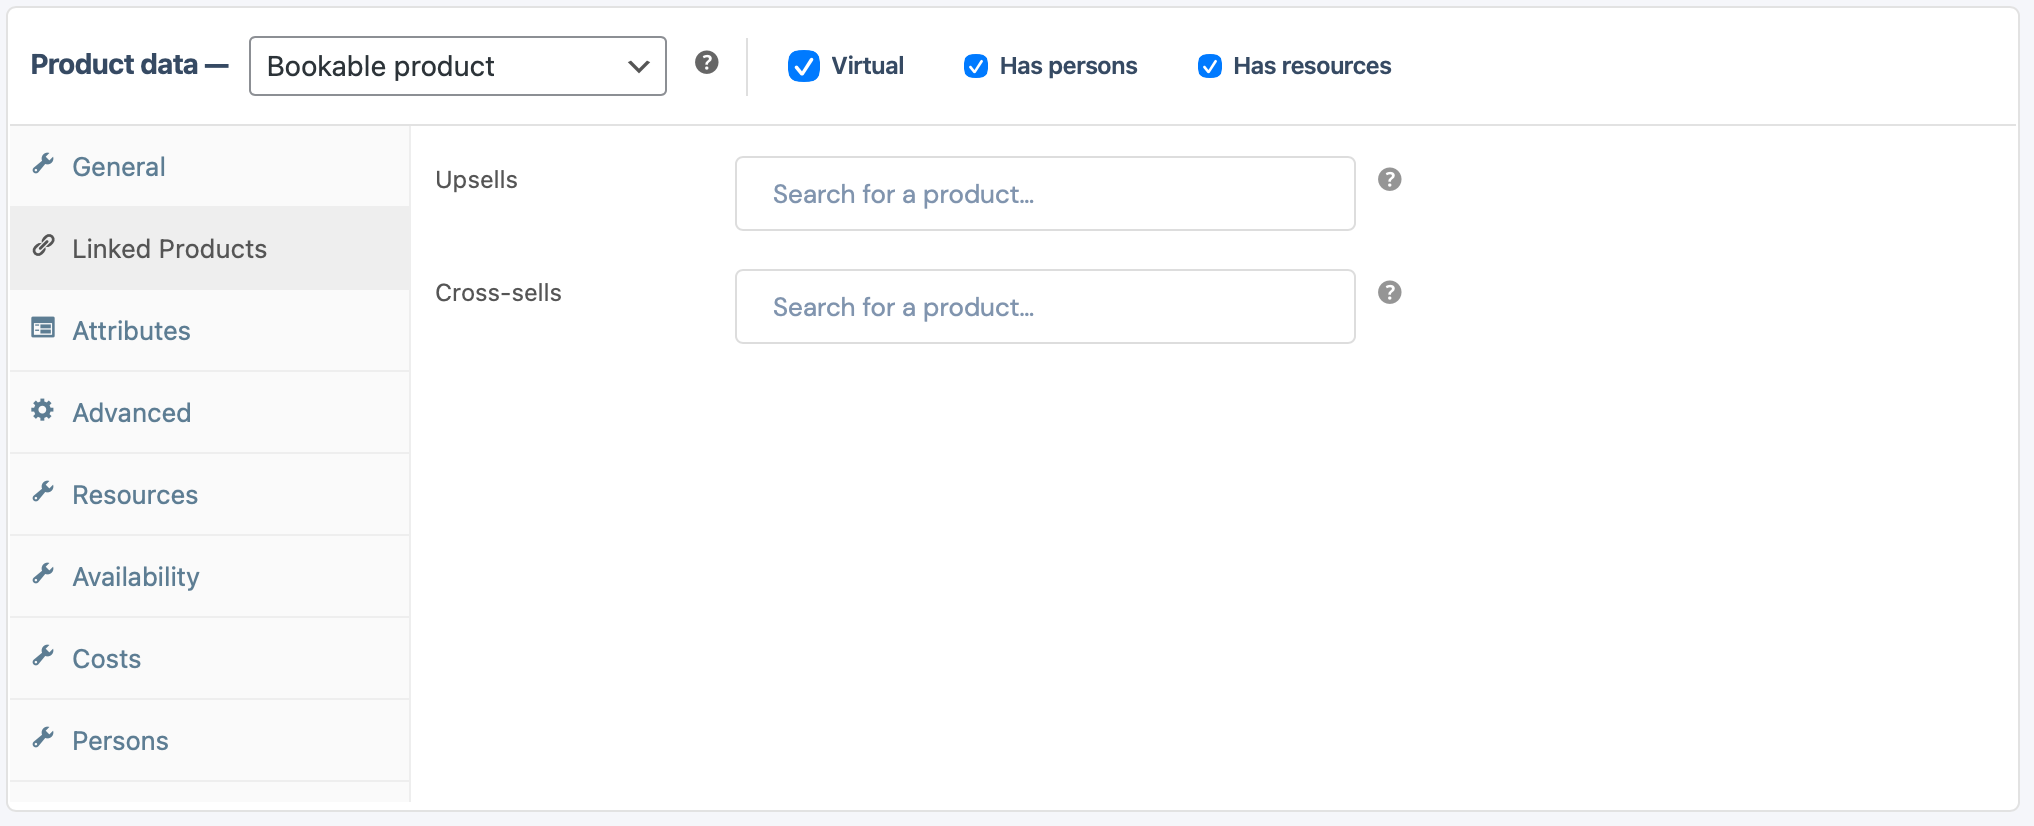
6.3. Linked Products:
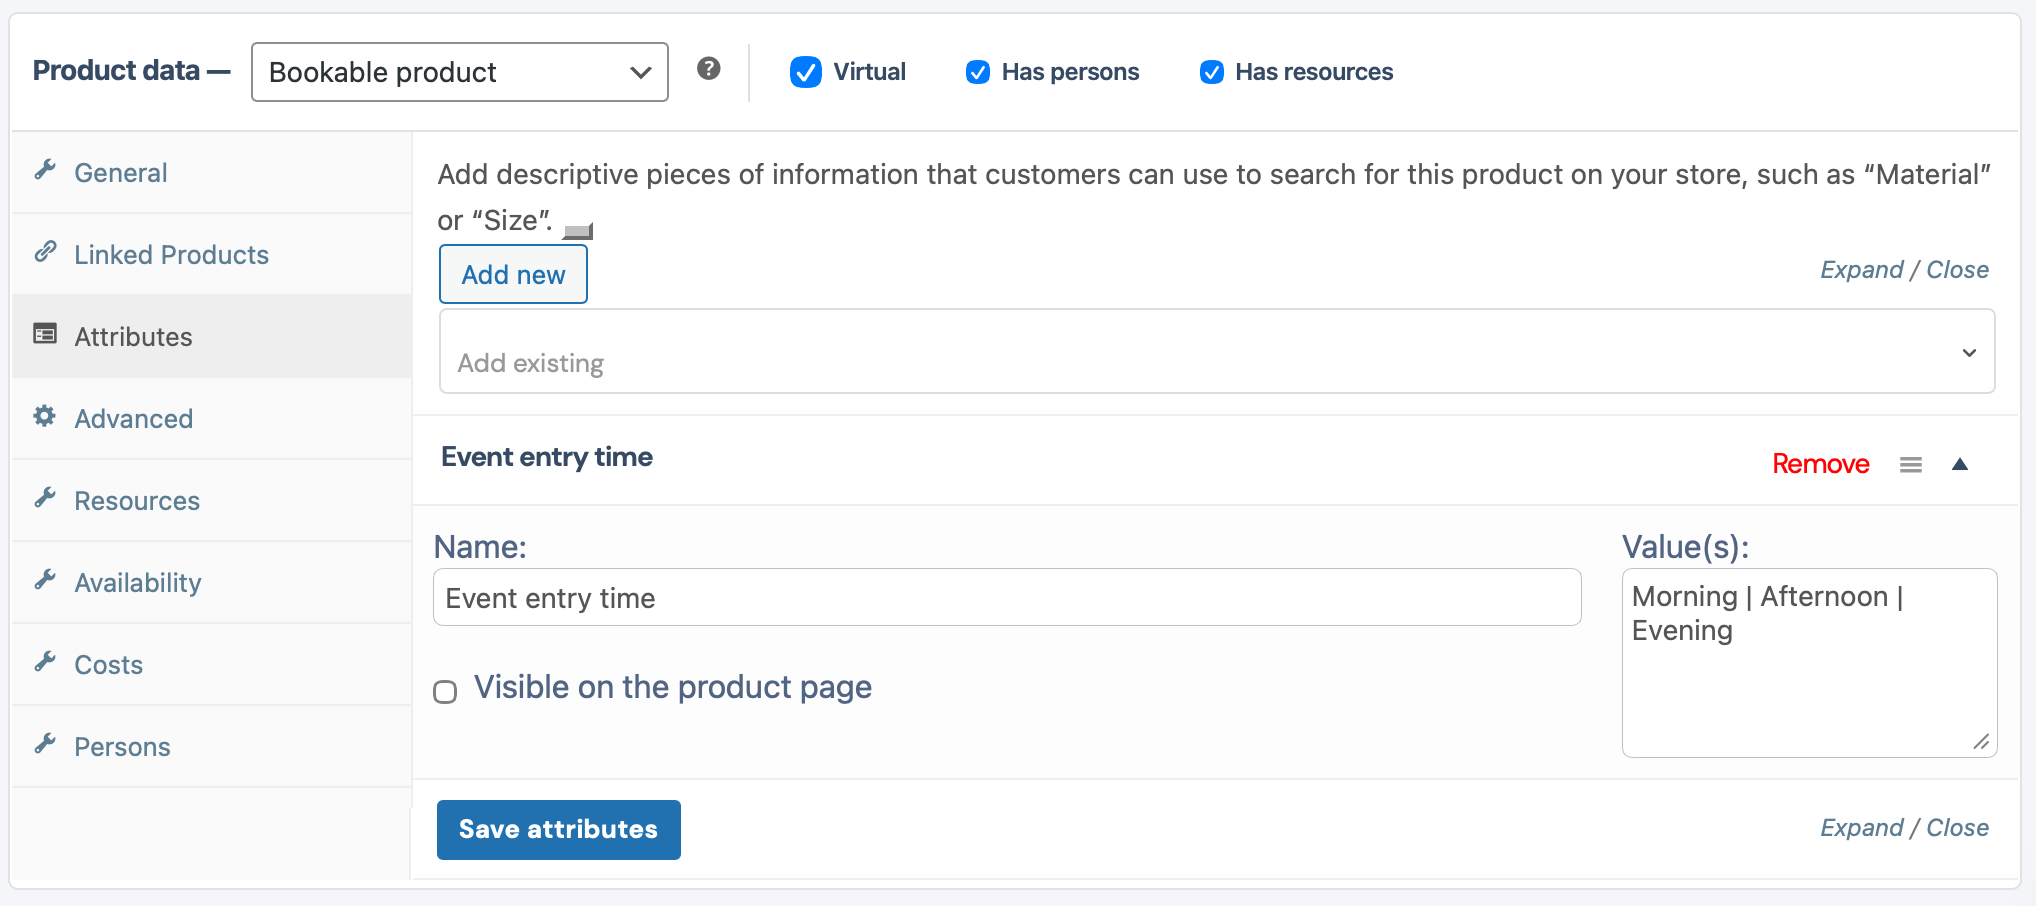
6.4 Attributes:
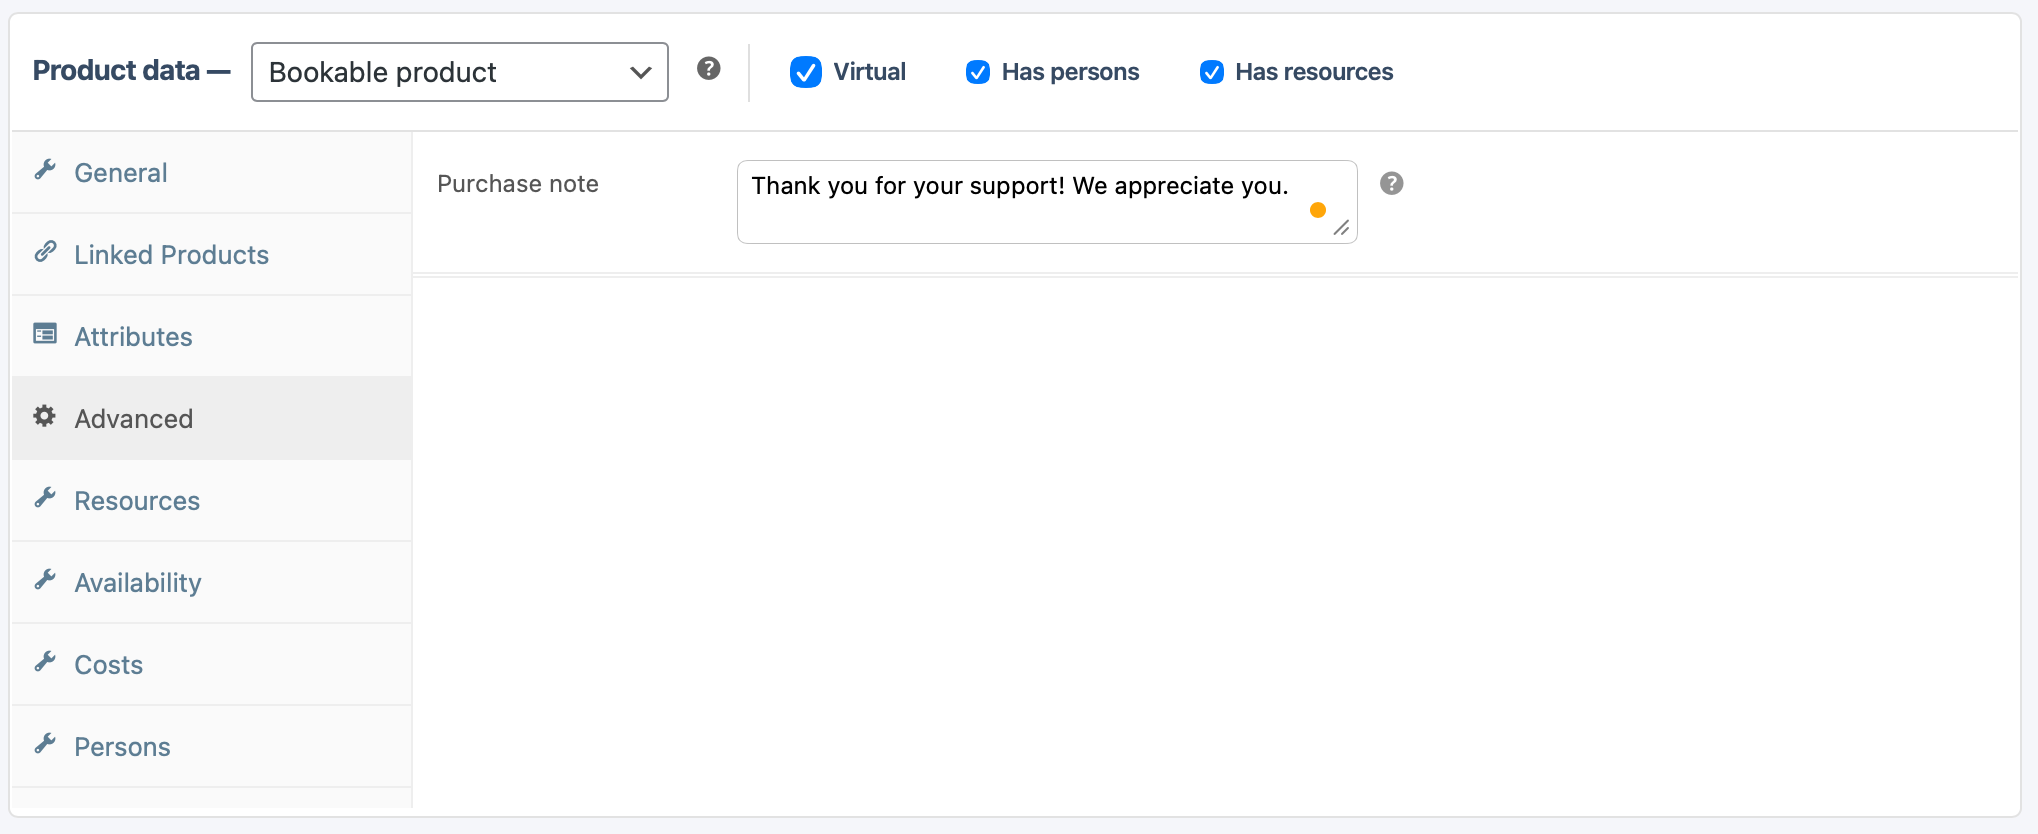
6.5 Advanced:
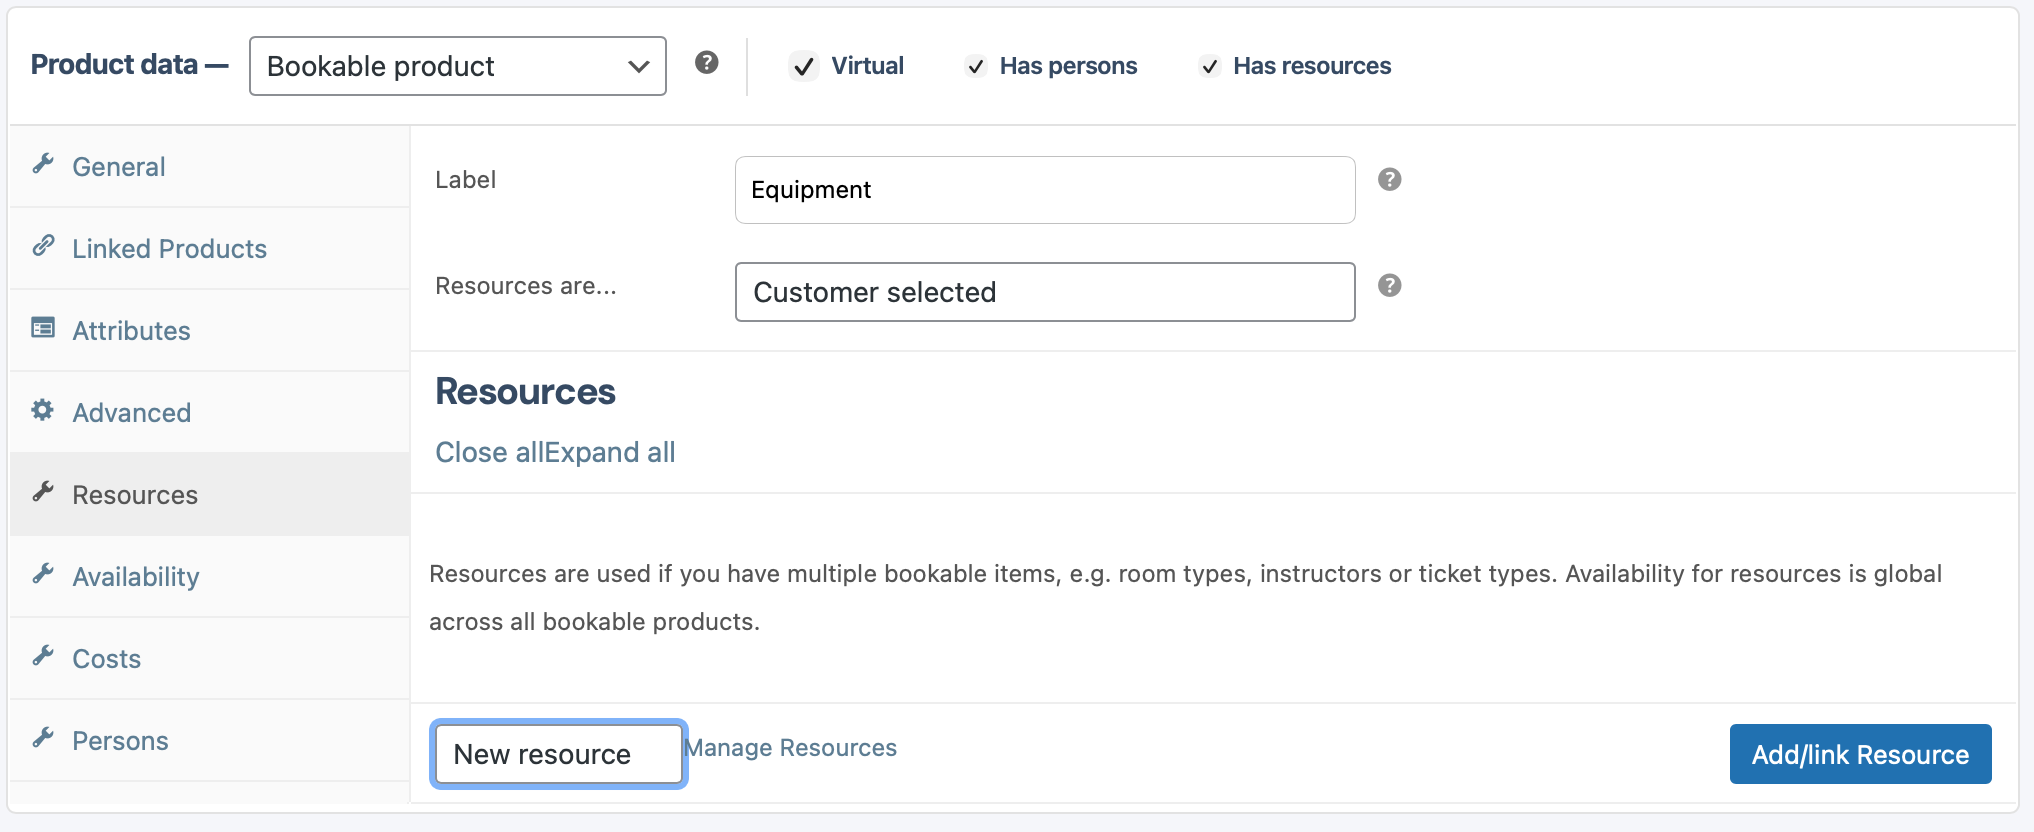
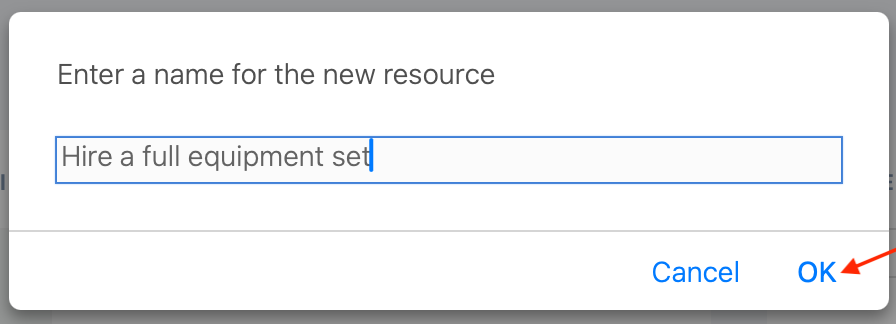
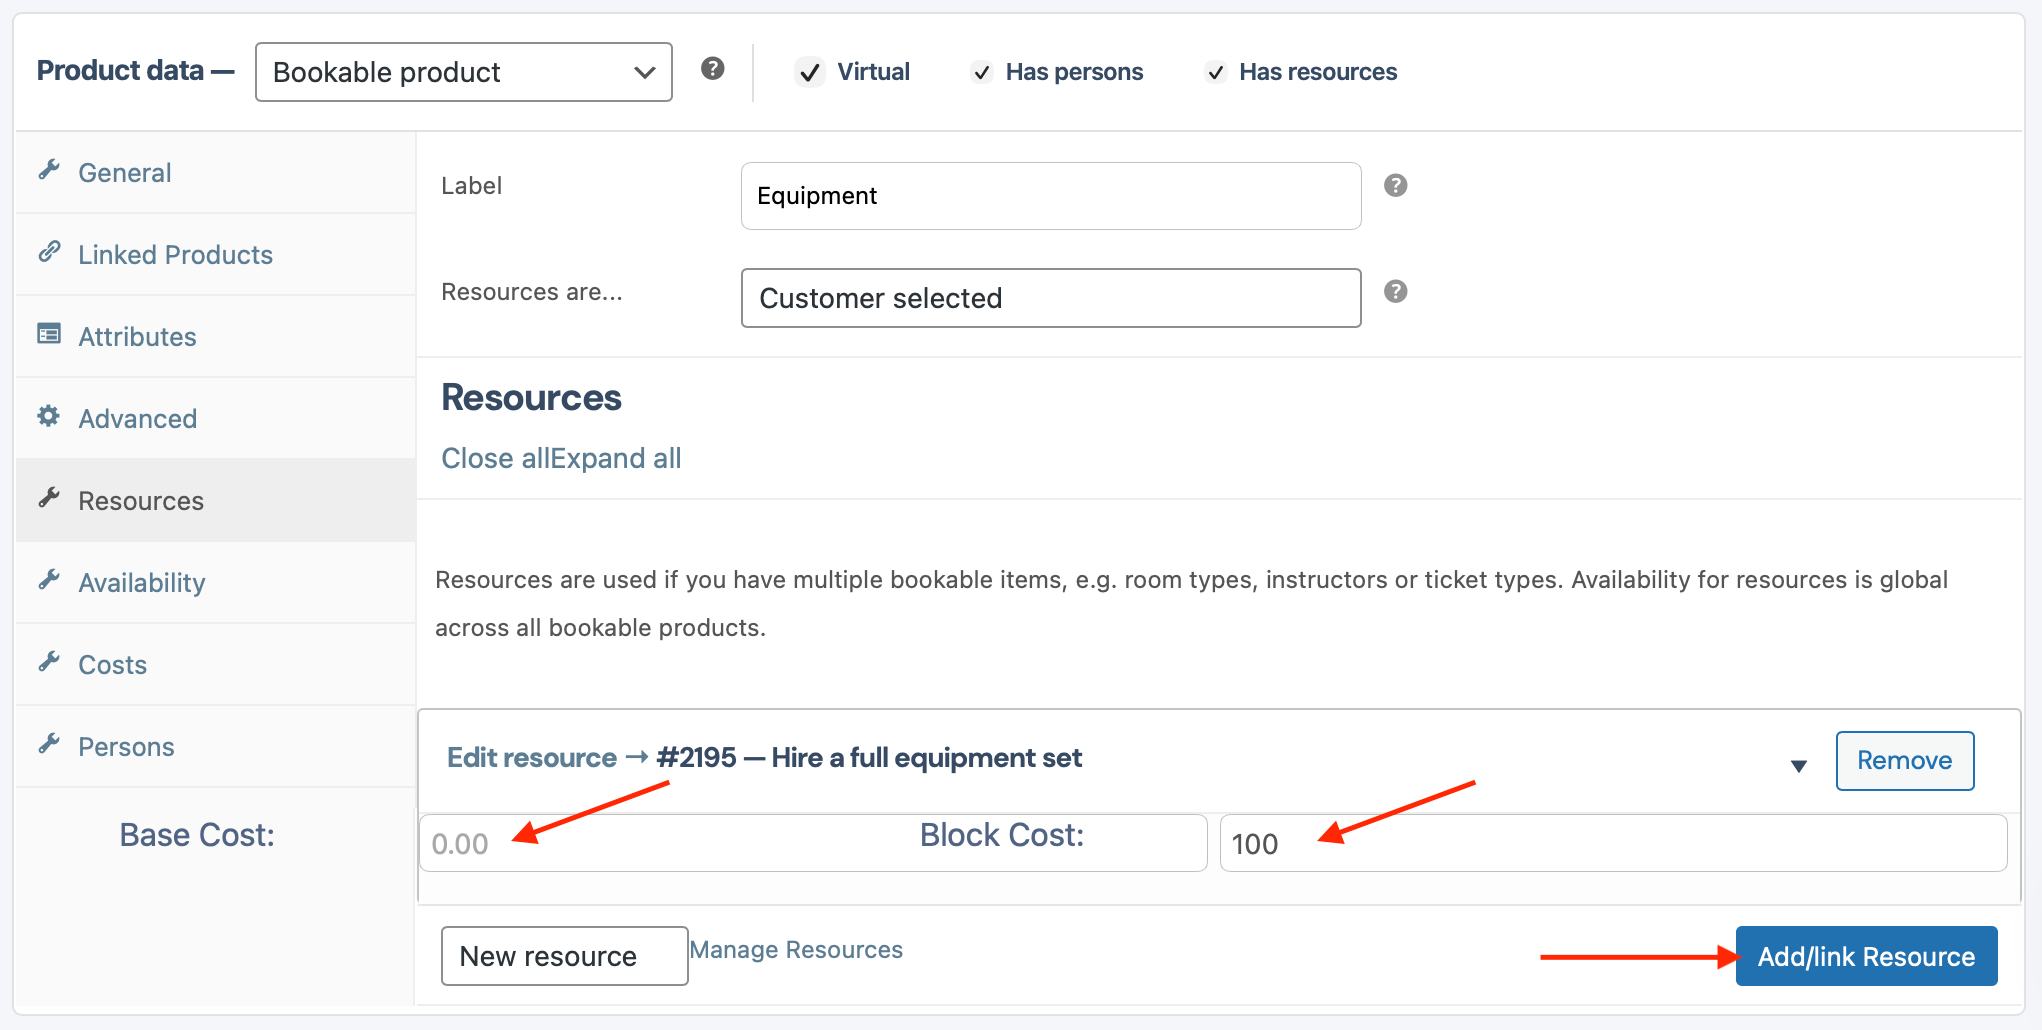
6.6 Resources:
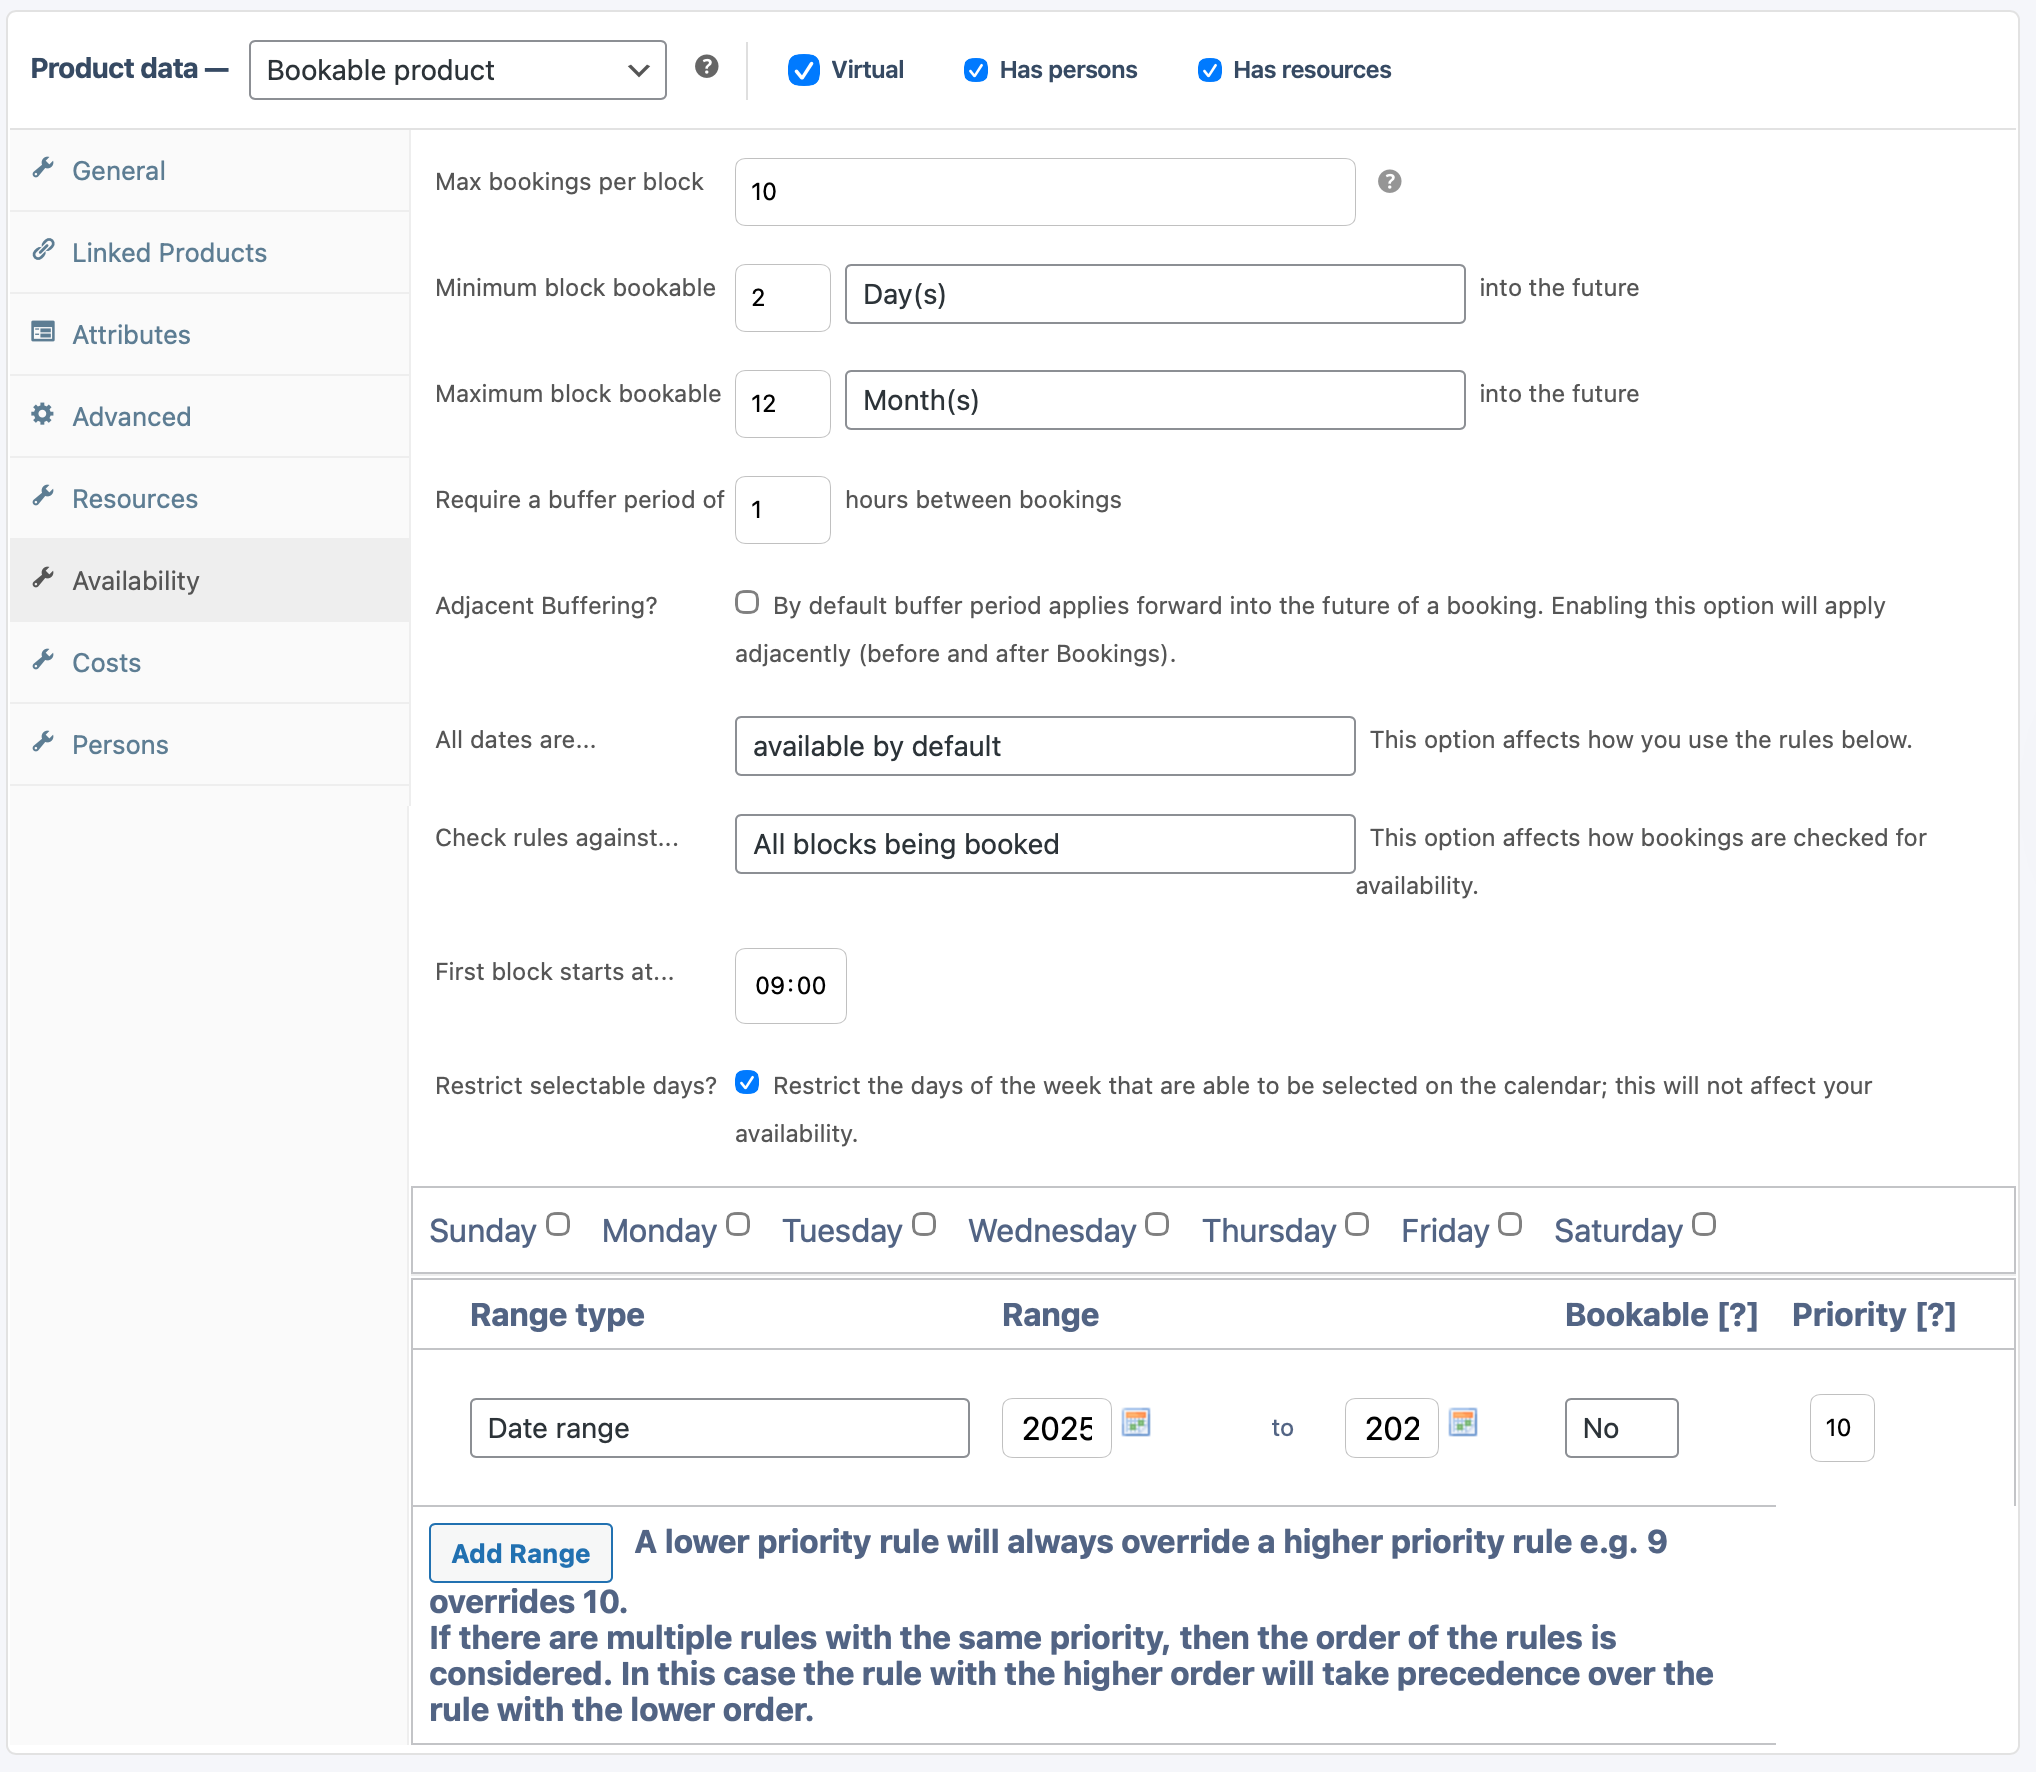
6.7 Availability:
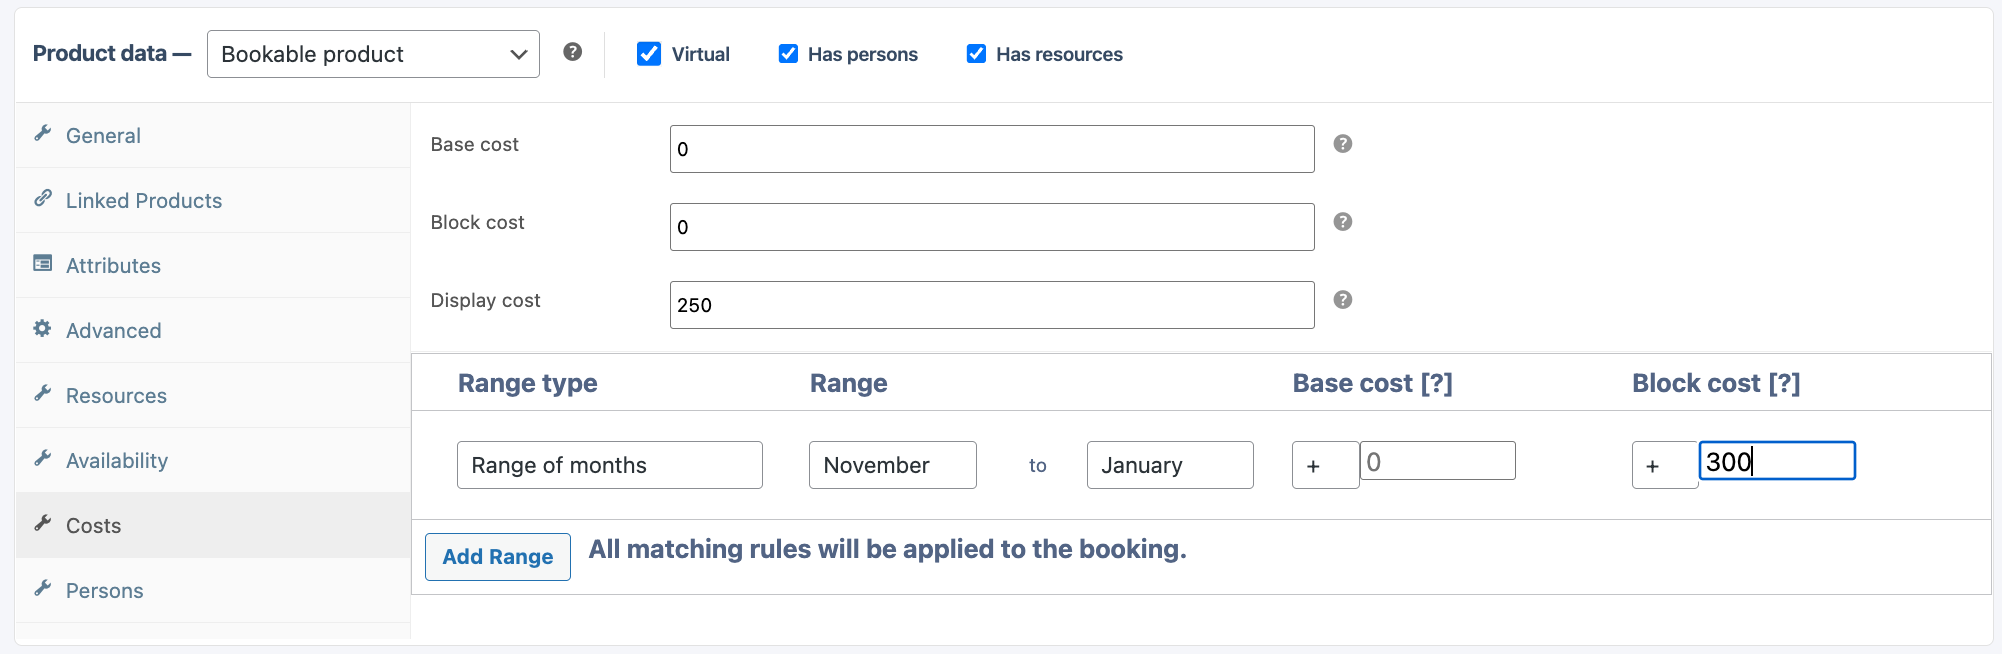
6.8 Cost
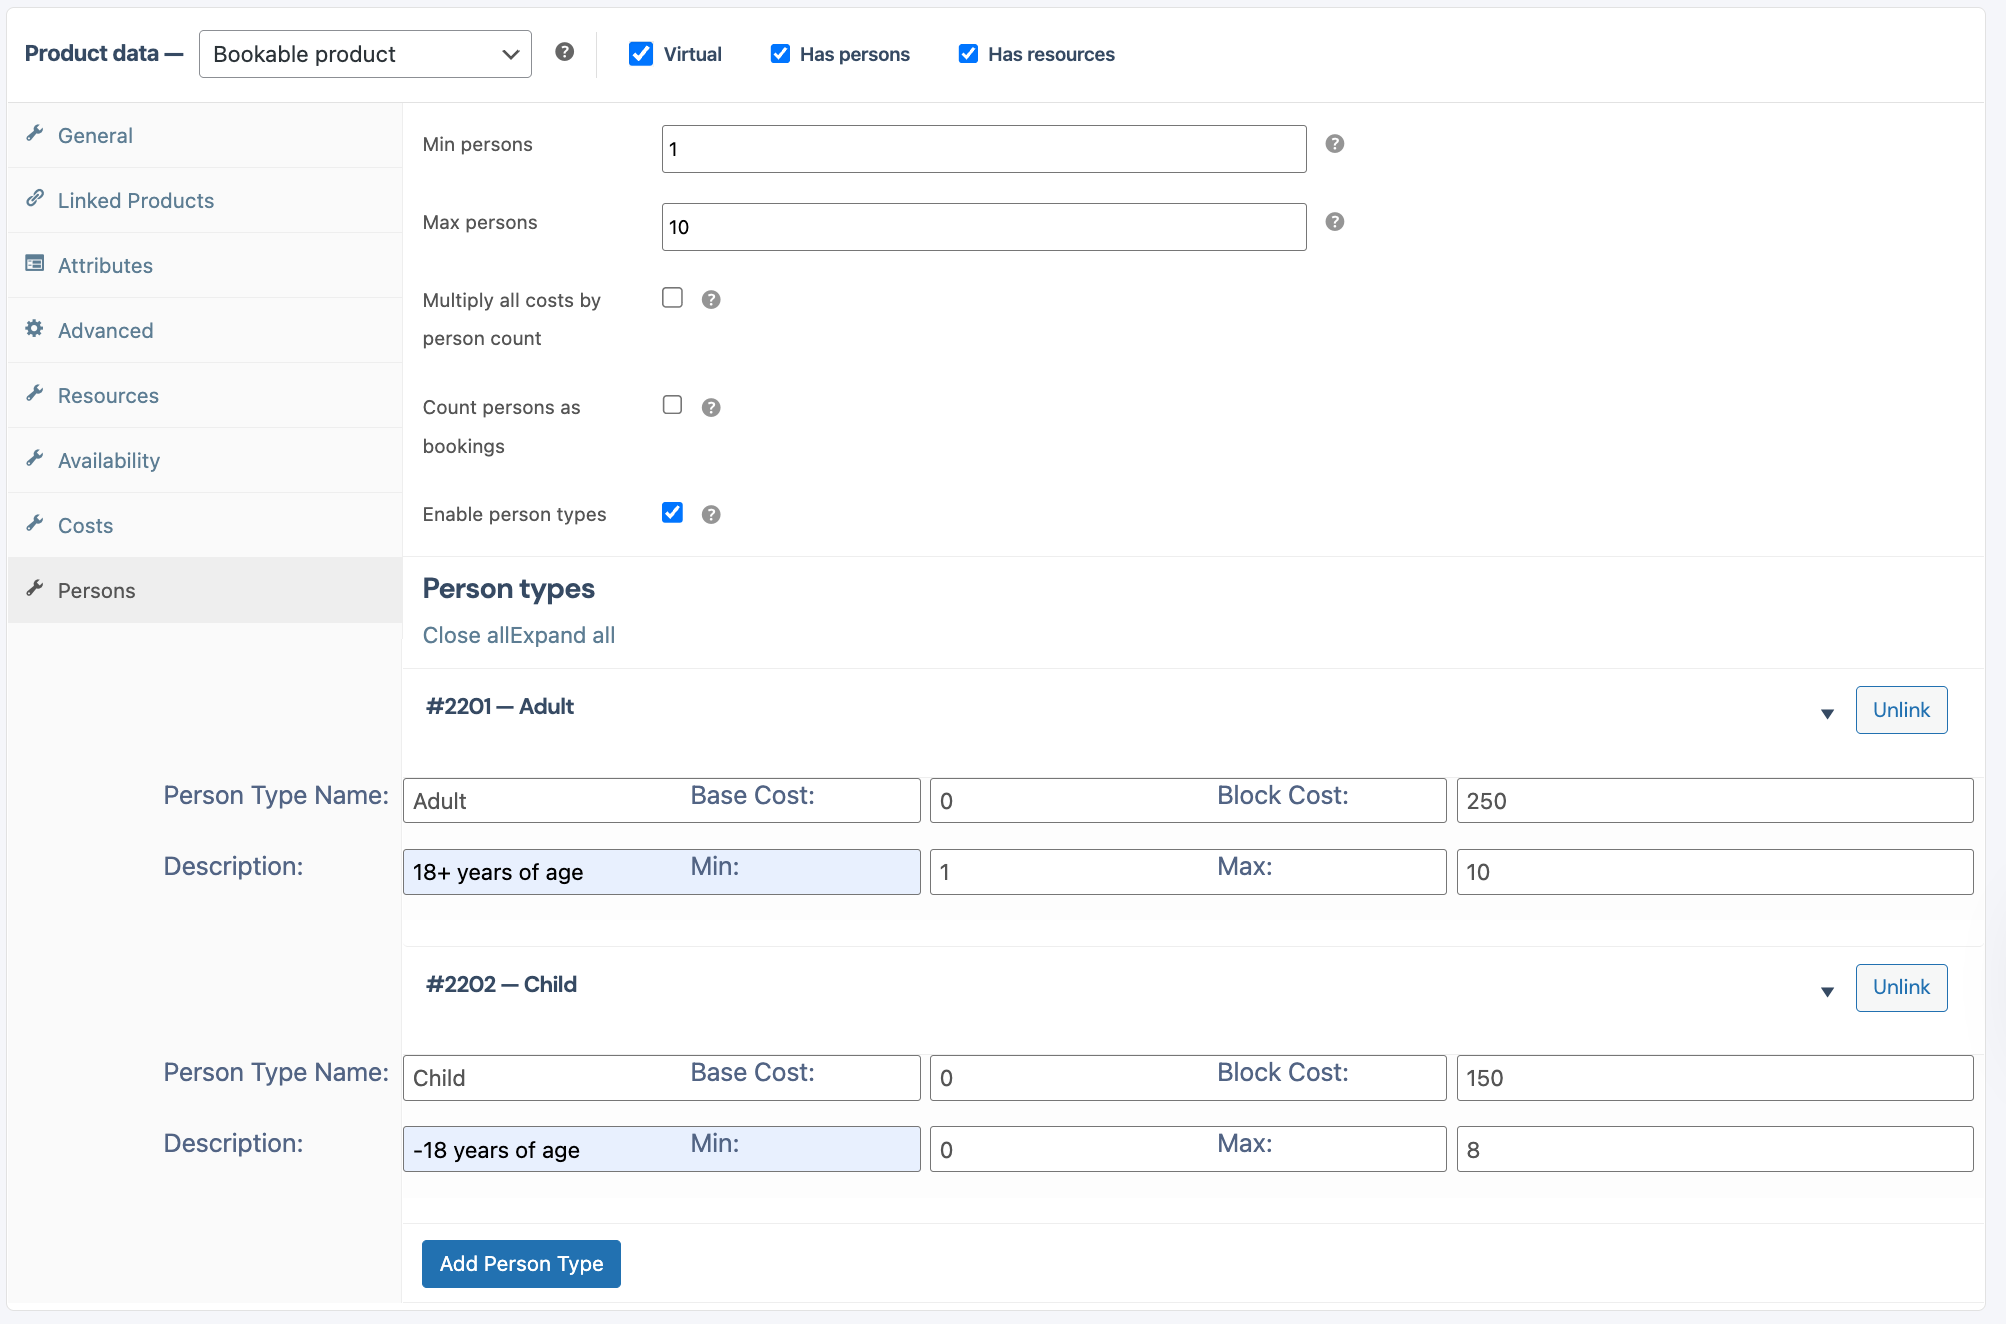
6.9 Persons
1. Go to your Listing Dashboard. Select the Products tab on the left menu.
2. If you would like to edit an existing Product, you can search for the Product Name or find it in the list shown. To edit the Product, click on the 3 dots (…) on the right-hand side of the Product in question. From the Menu that opens, select “Edit Product”.
3. If you are adding a new Product, you will see a button in the top right corner, “Add Product”. Click this button
4. On the Product page, we will be working on the “Product Data”. This is where we set the Pricing for the Product/Listing.
5. The first thing we will need to consider is what type of Product we are adding. There are a few options to consider:
6. Auction – This selection is only suitable for Auction listings.
6.1 Initial settings:

6.2 Auction:
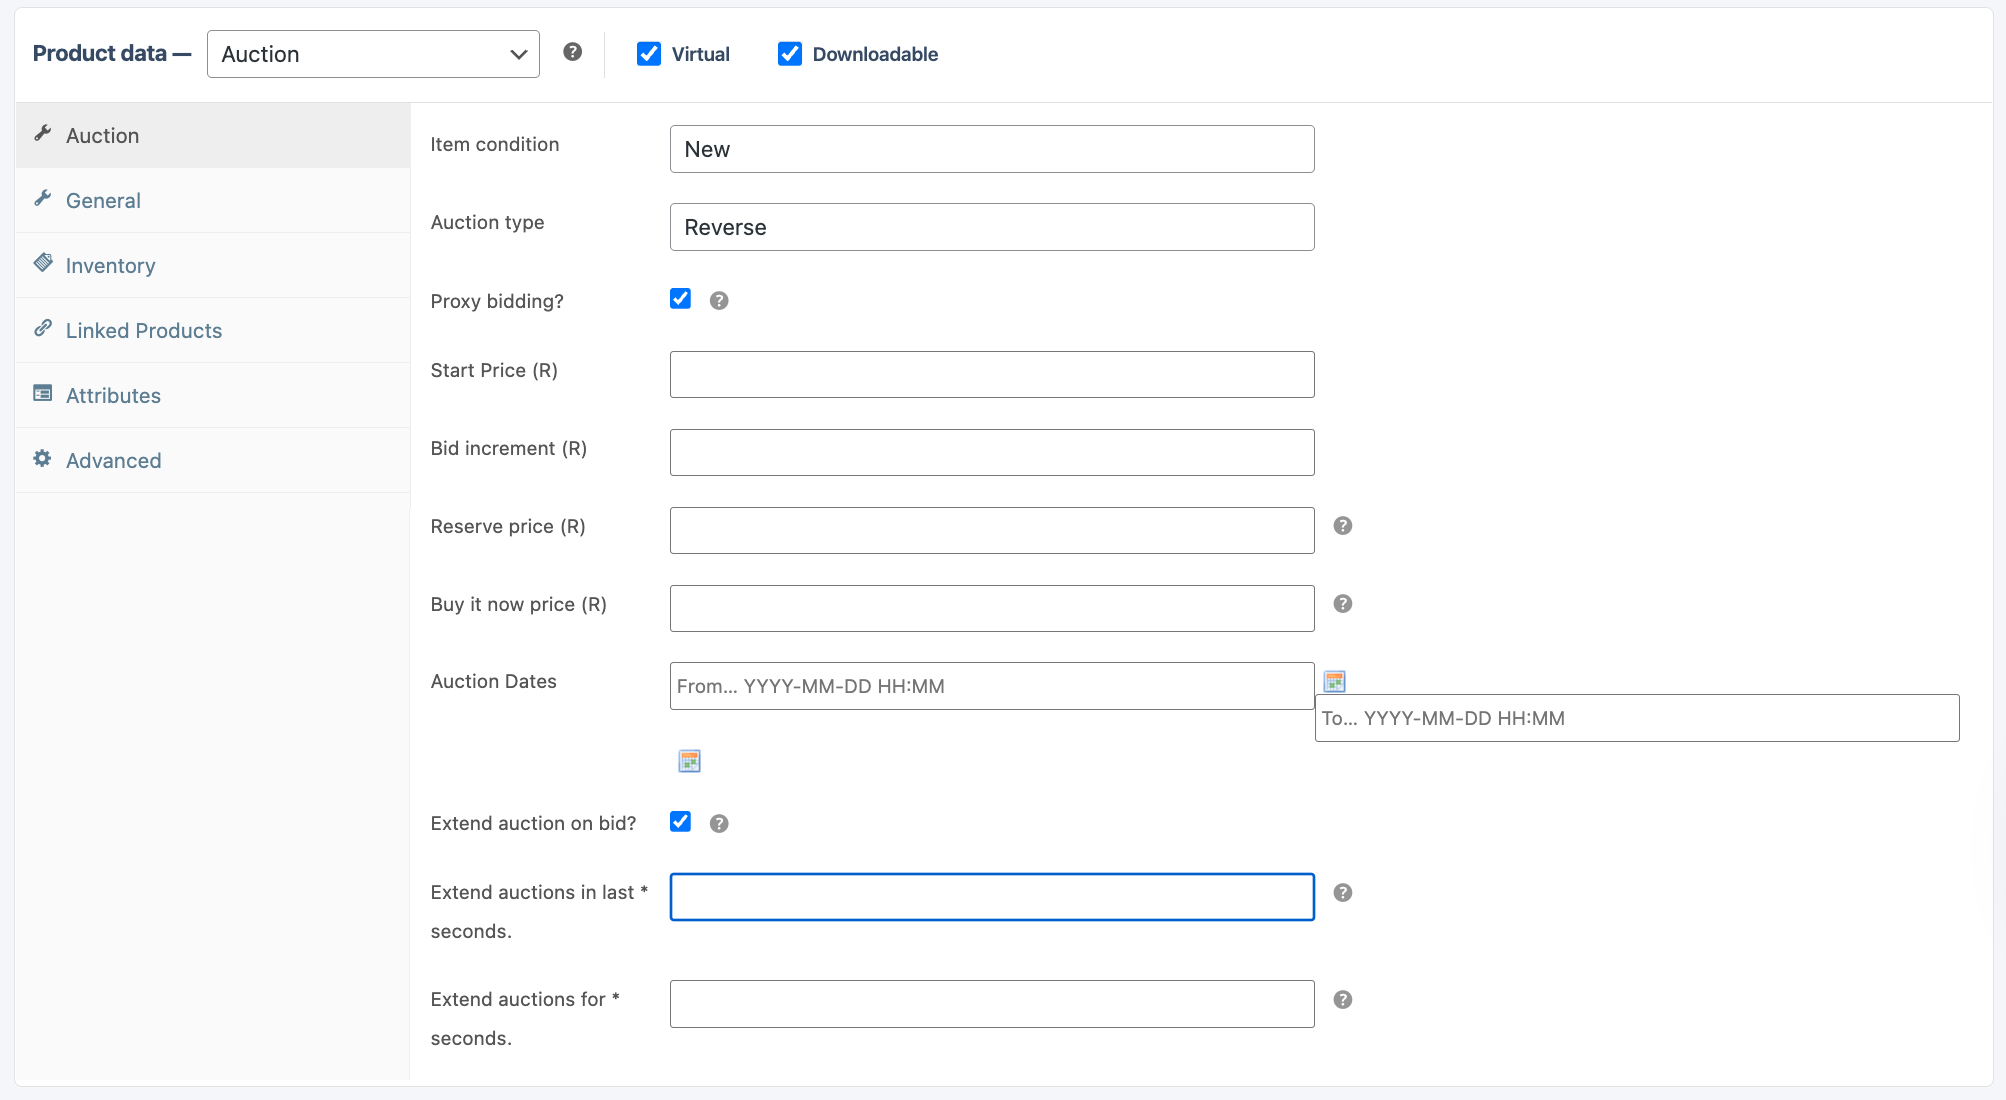
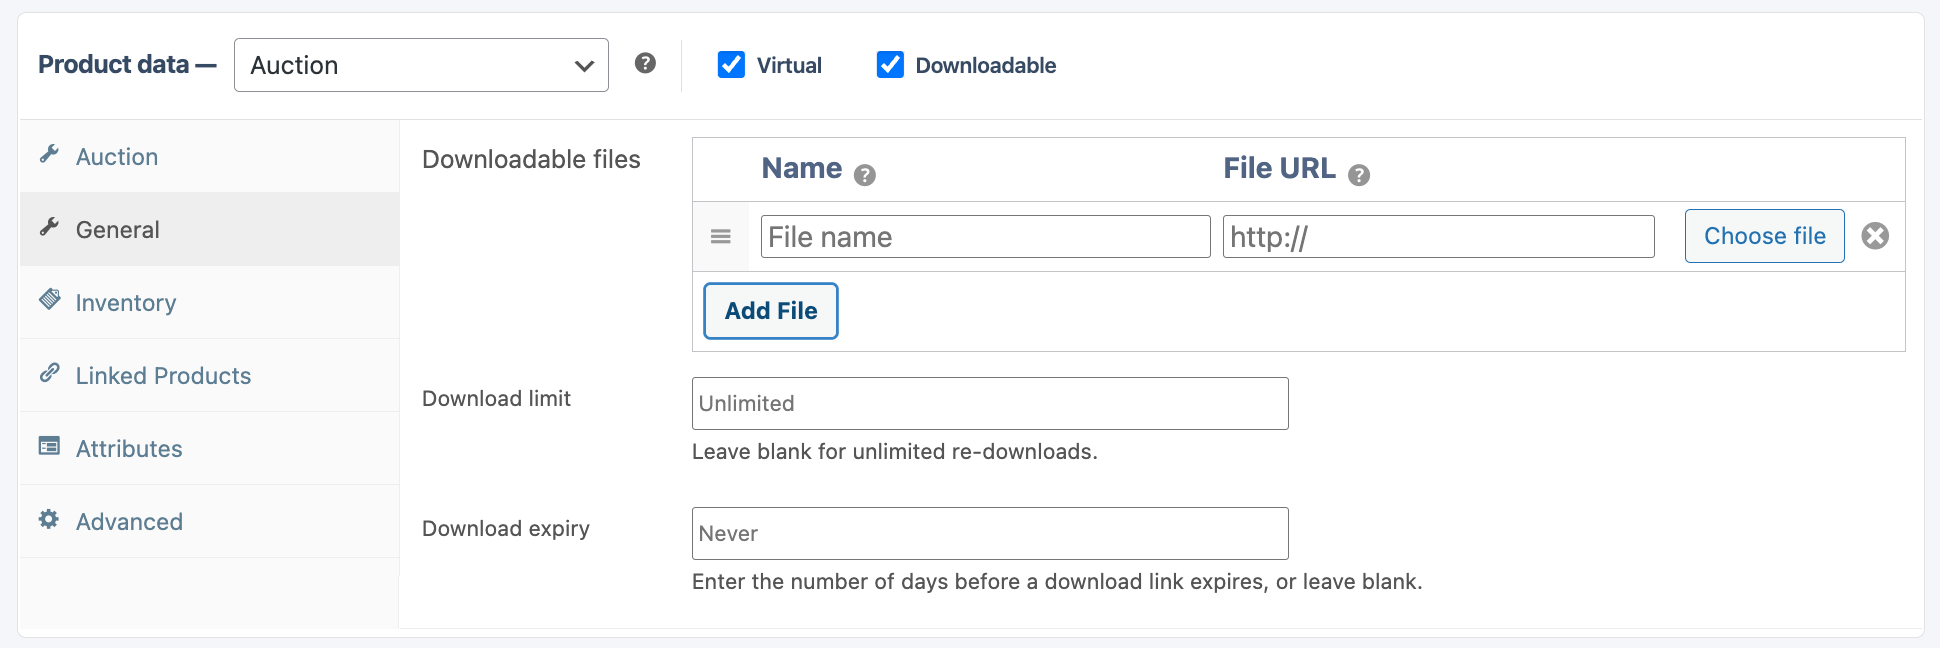
6.3 General:
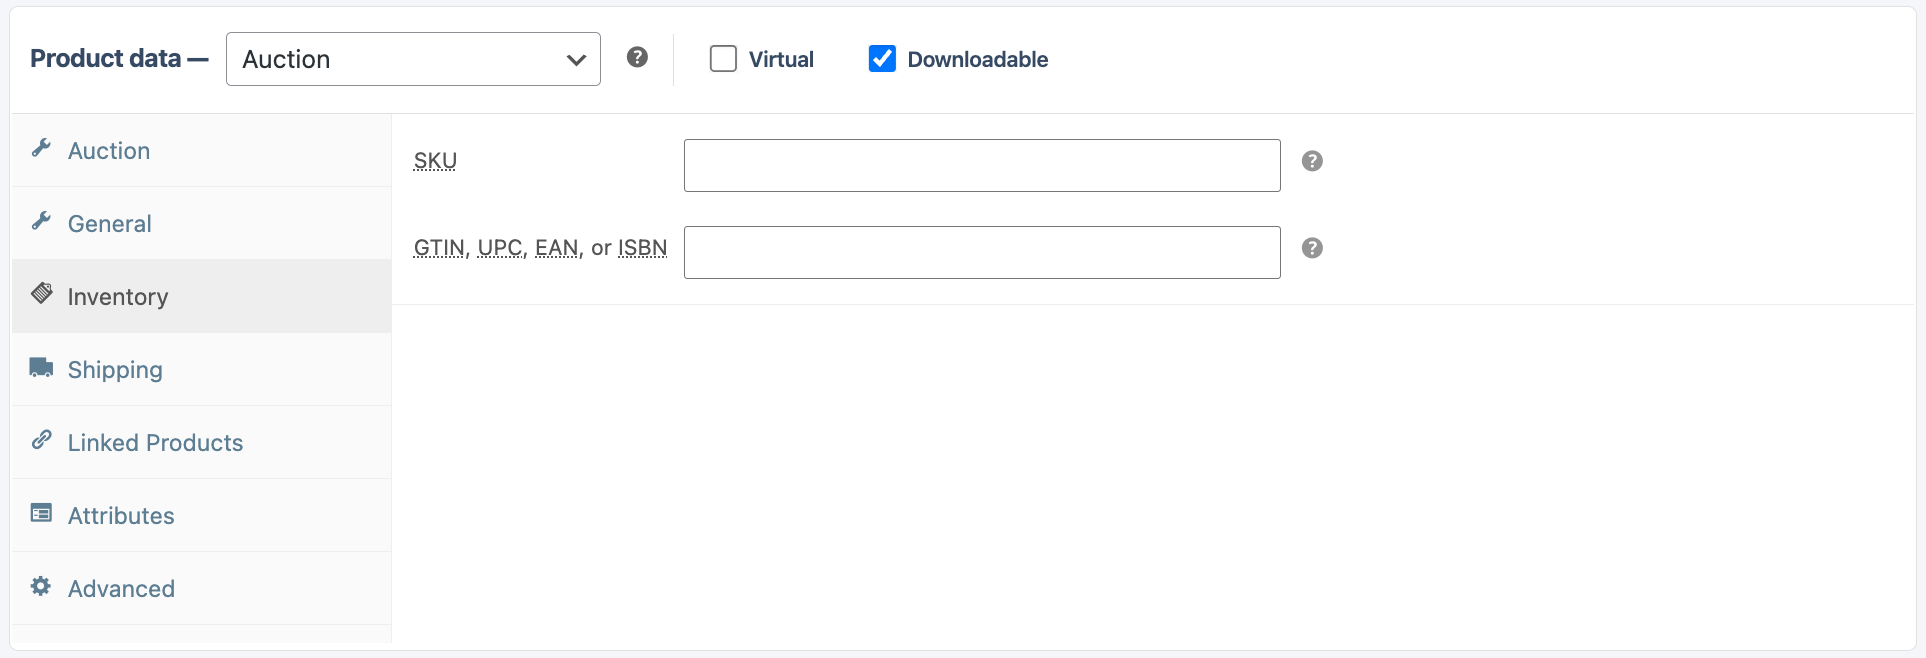
6.4 Inventory:
6.5 Shipping:
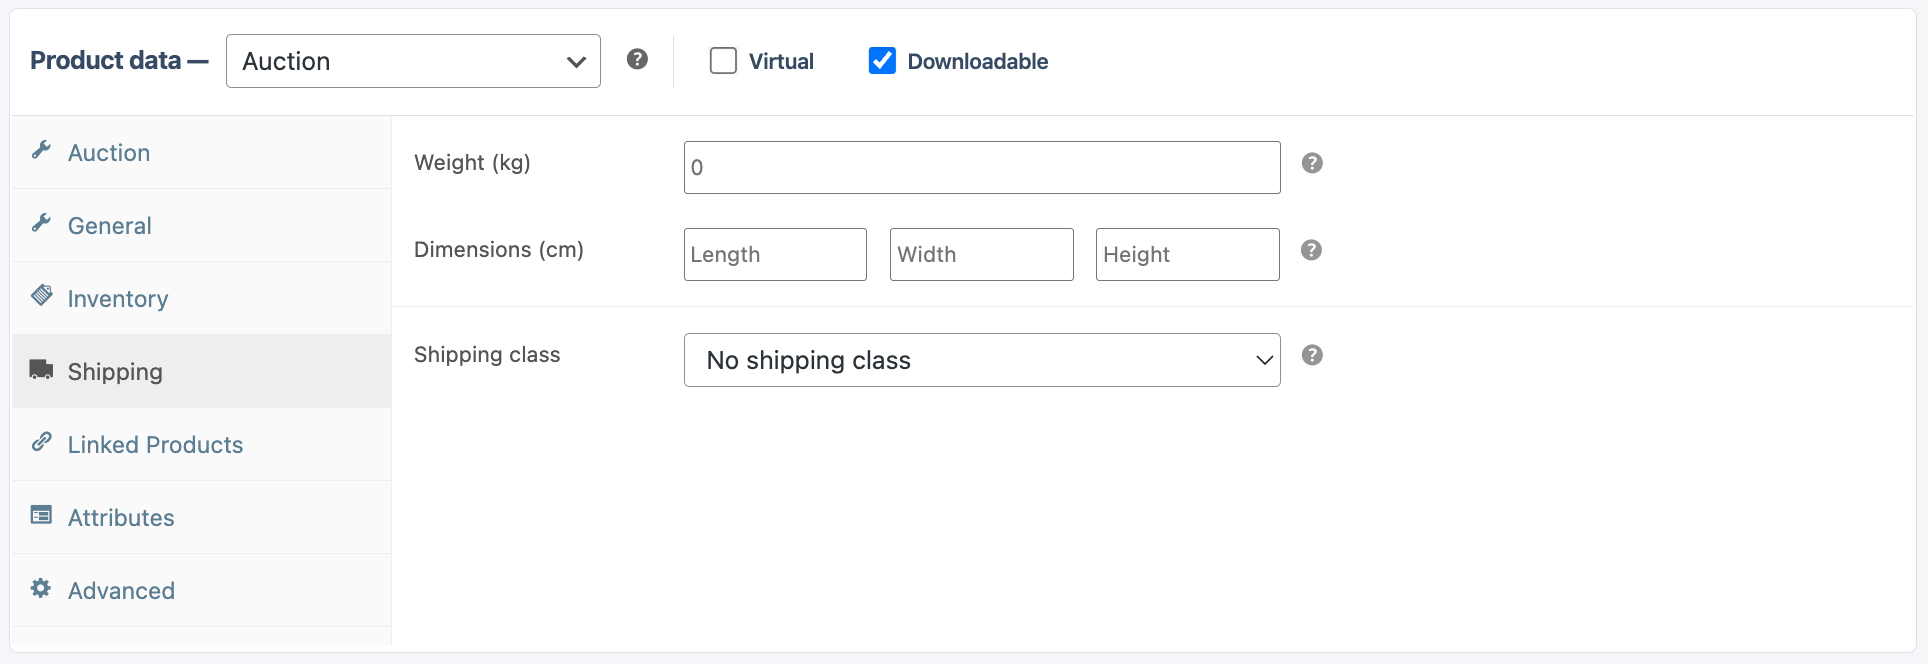
6.6 Linked Products:
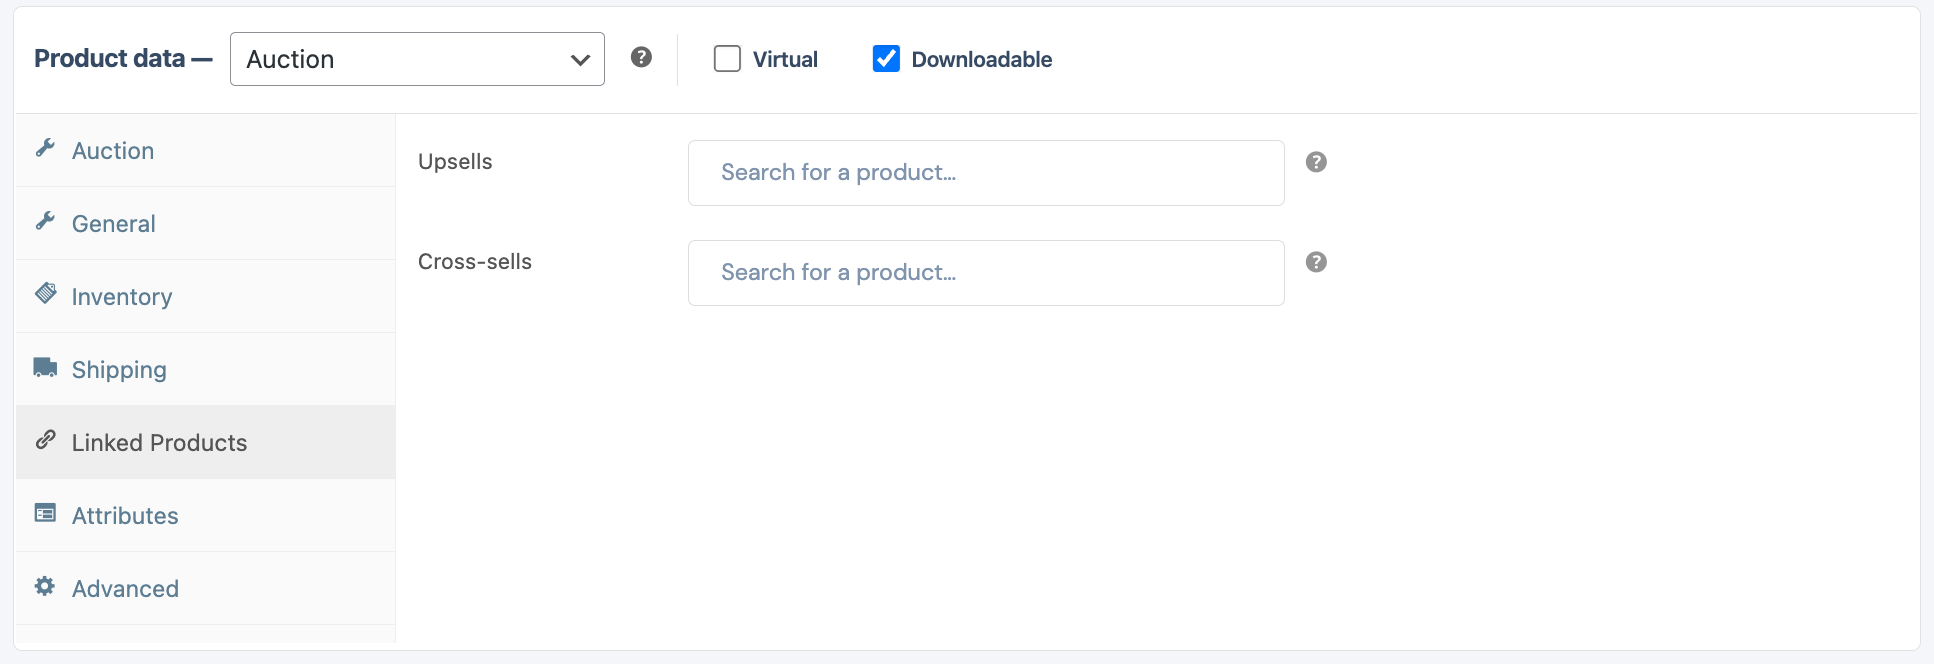
6.7 Attributes:
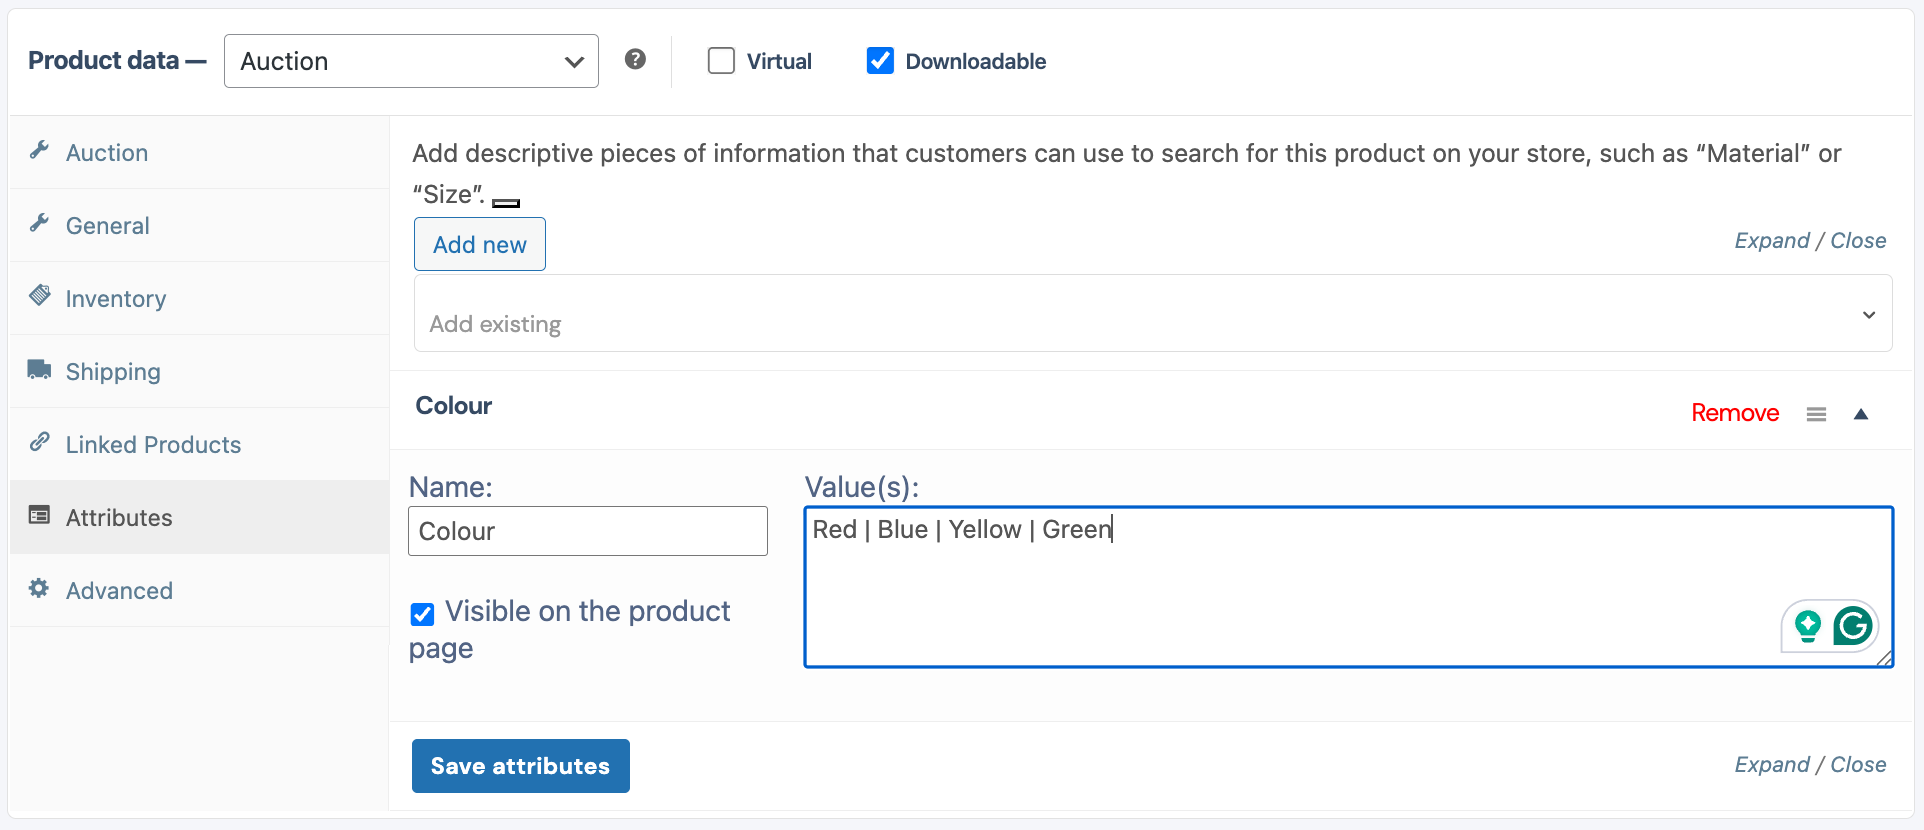
6.8 Advanced:
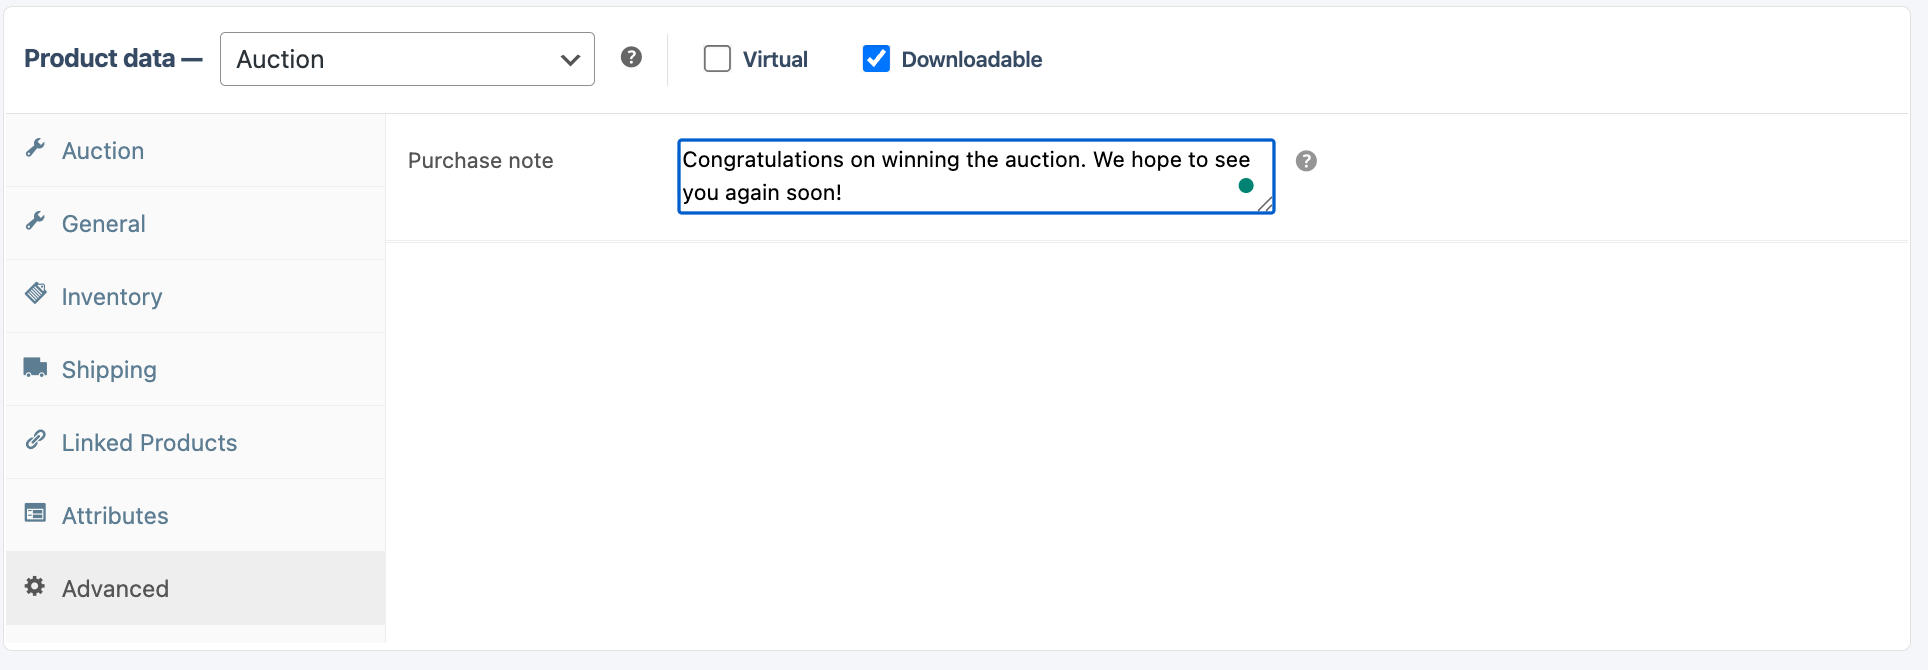
7. Remember to click on “Send Product for Review” or to “Save as Draft” at the top of the form before leaving the page. If you do not save the form, the data you just entered will be lost.
1. Go to your Listing Dashboard. Select the Products tab on the left menu.
2. If you would like to edit an existing Product, you can search for the Product Name or find it in the list shown. To edit the Product, click on the 3 dots (…) on the right-hand side of the Product in question. From the Menu that opens, select “Edit Product”.
3. If you are adding a new Product, you will see a button in the top right corner, “Add Product”. Click this button
4. On the Product page, we will be working on the “Product Data”. This is where we set the Pricing for the Product/Listing.
5. The first thing we will need to consider is what type of Product we are adding. There are a few options to consider:
6. Accommodation product – This selection is only suitable for Accommodation listings.
6.1 Initial settings:

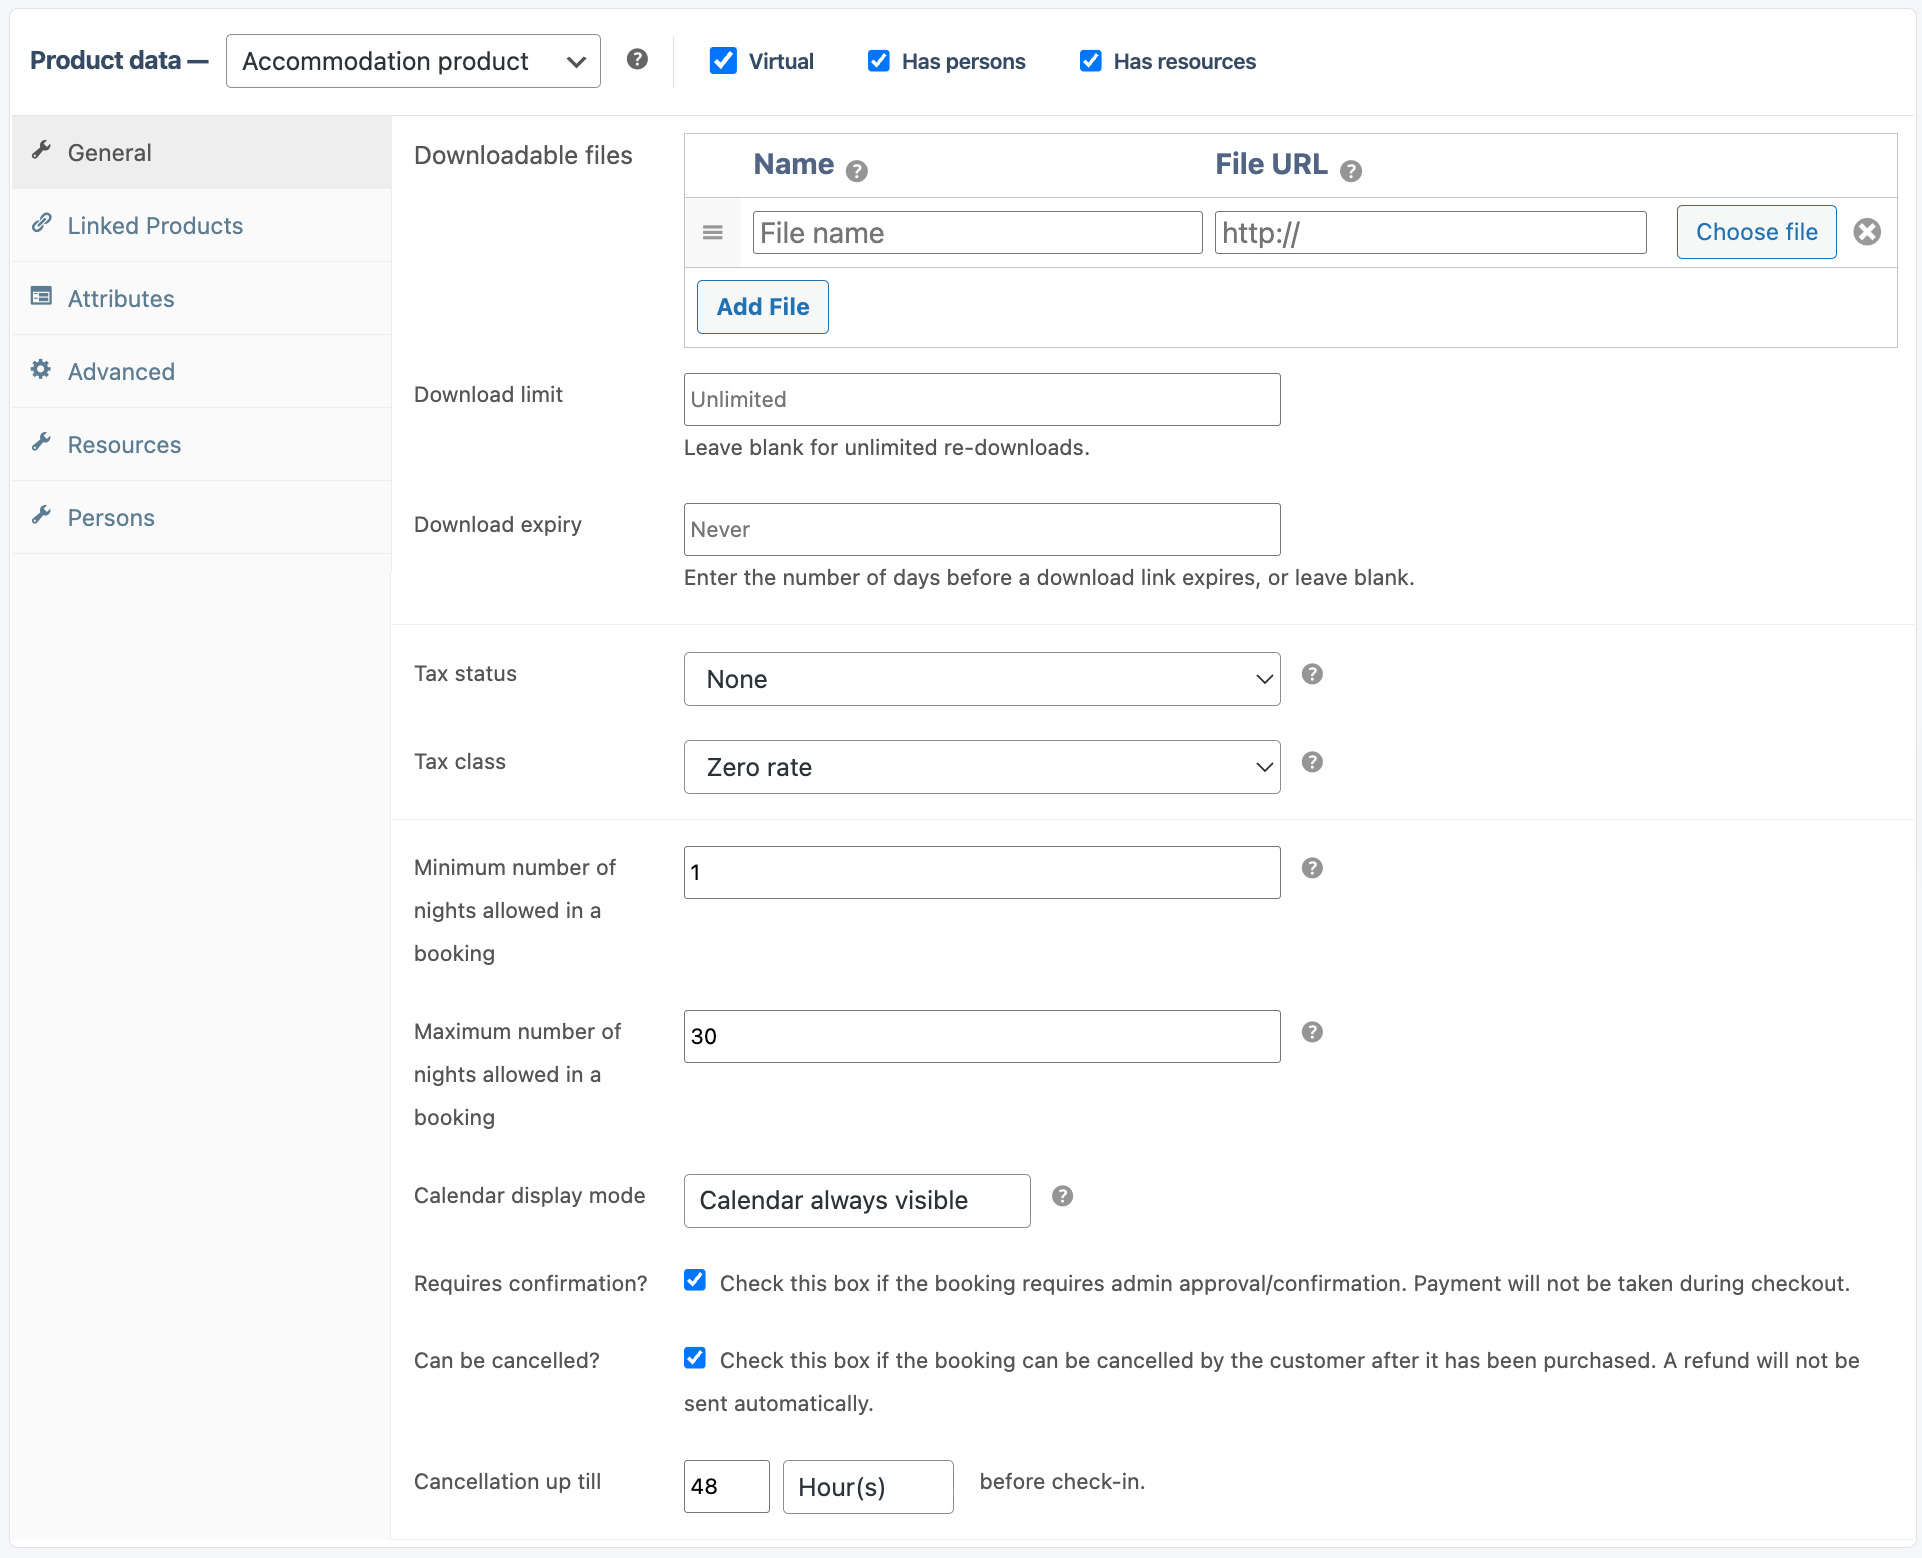
6.2 General:
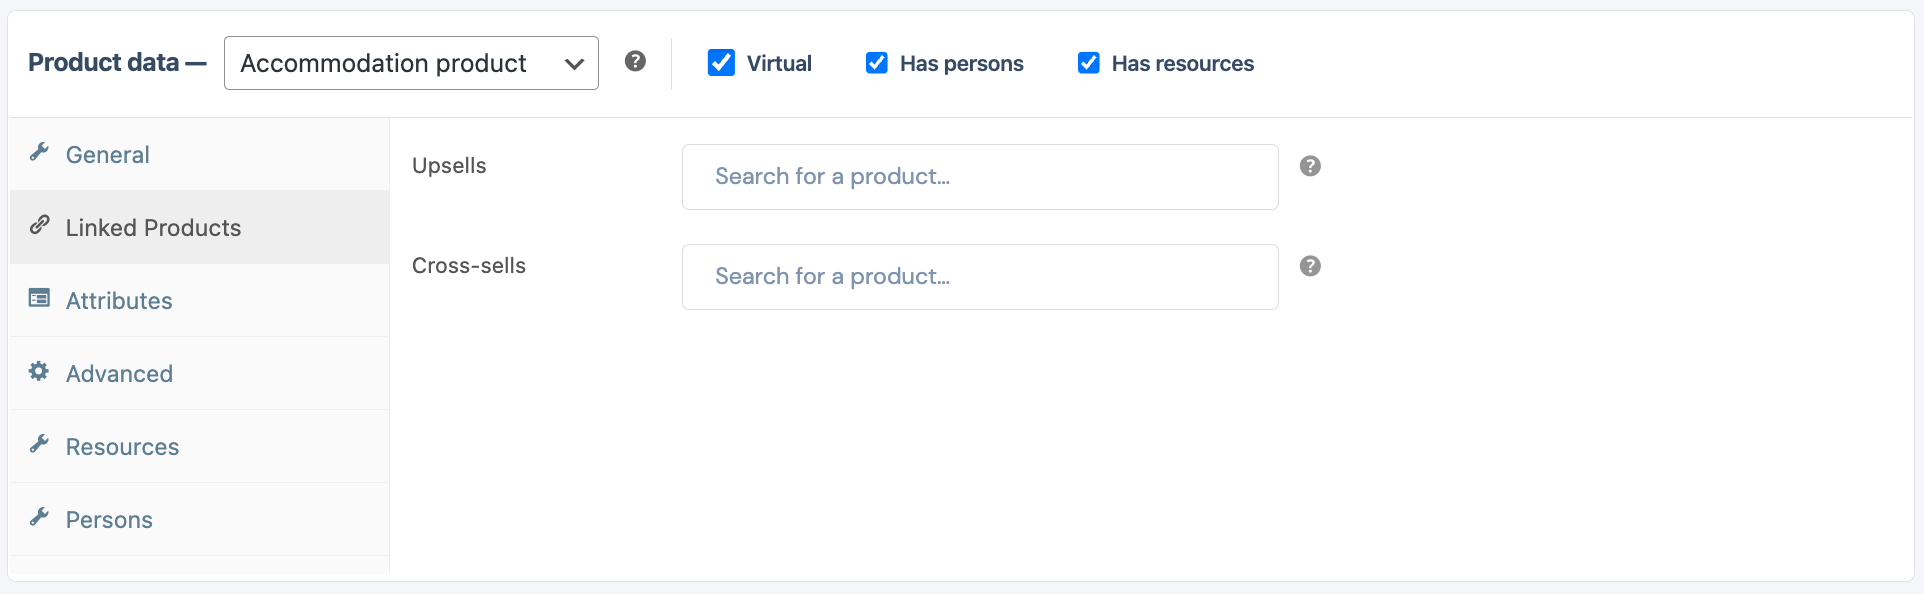
6.3 Linked Products:
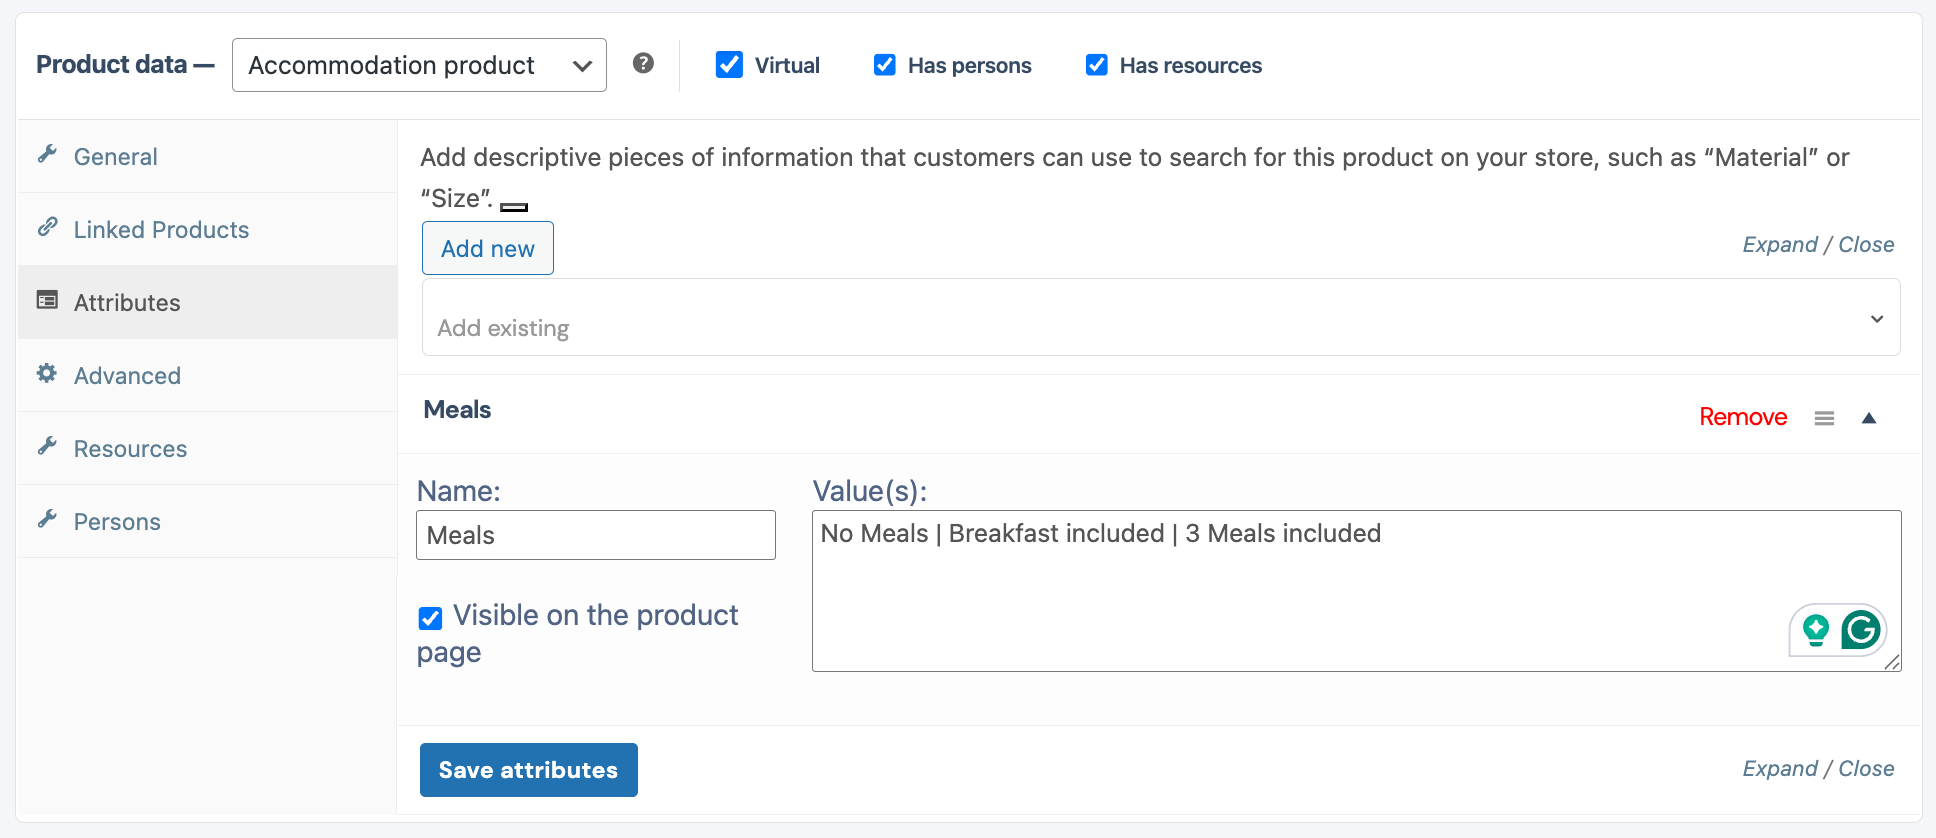
6.4 Attributes:
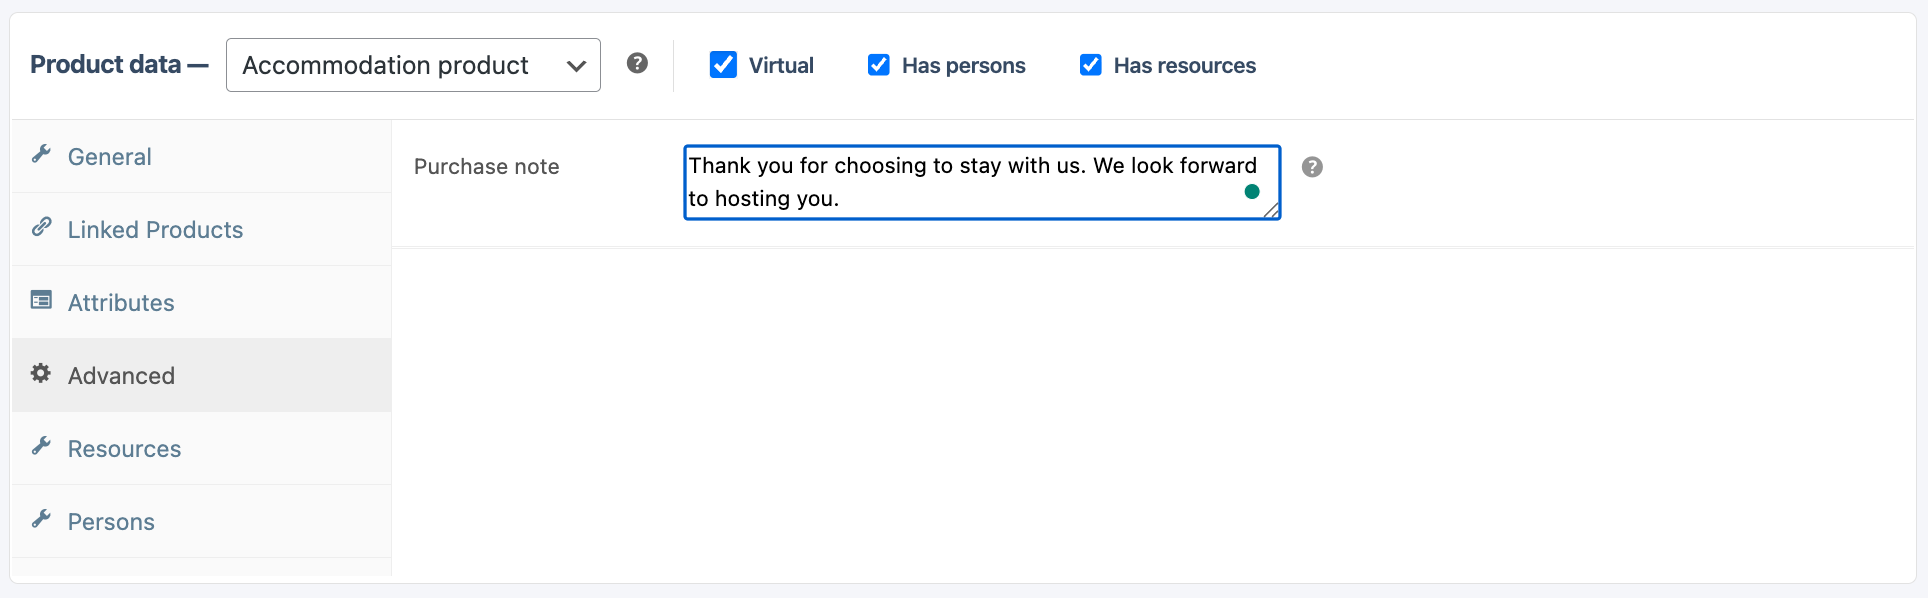
6.5 Advanced:
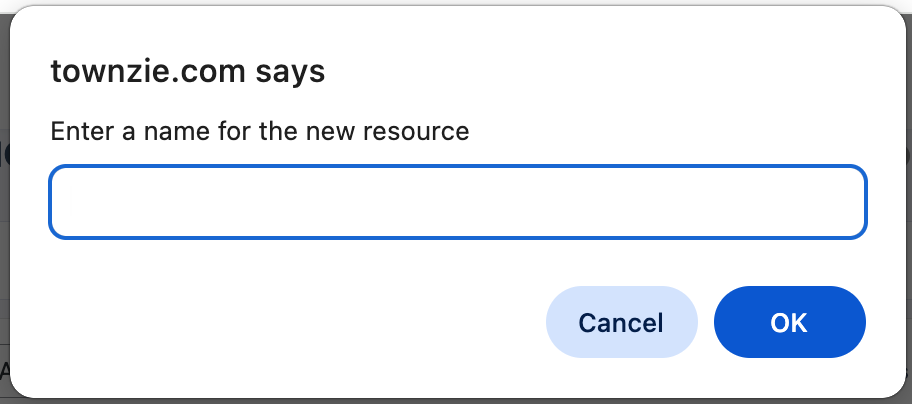
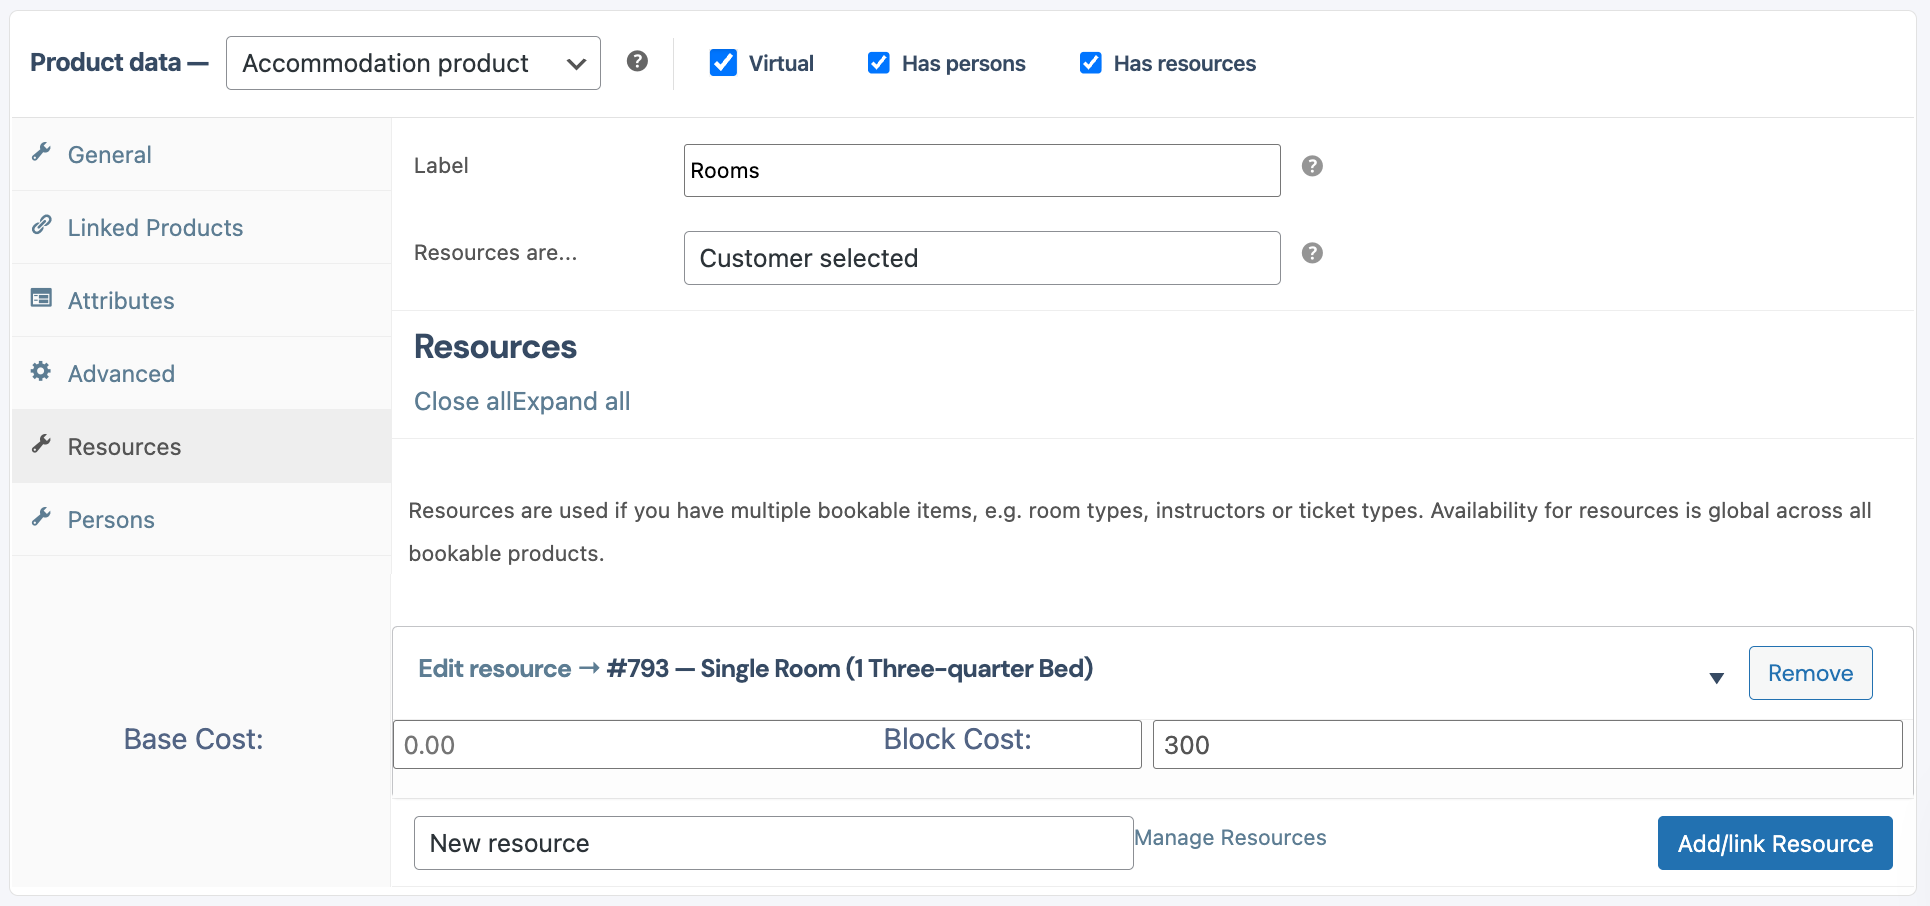
6.6 Resources:
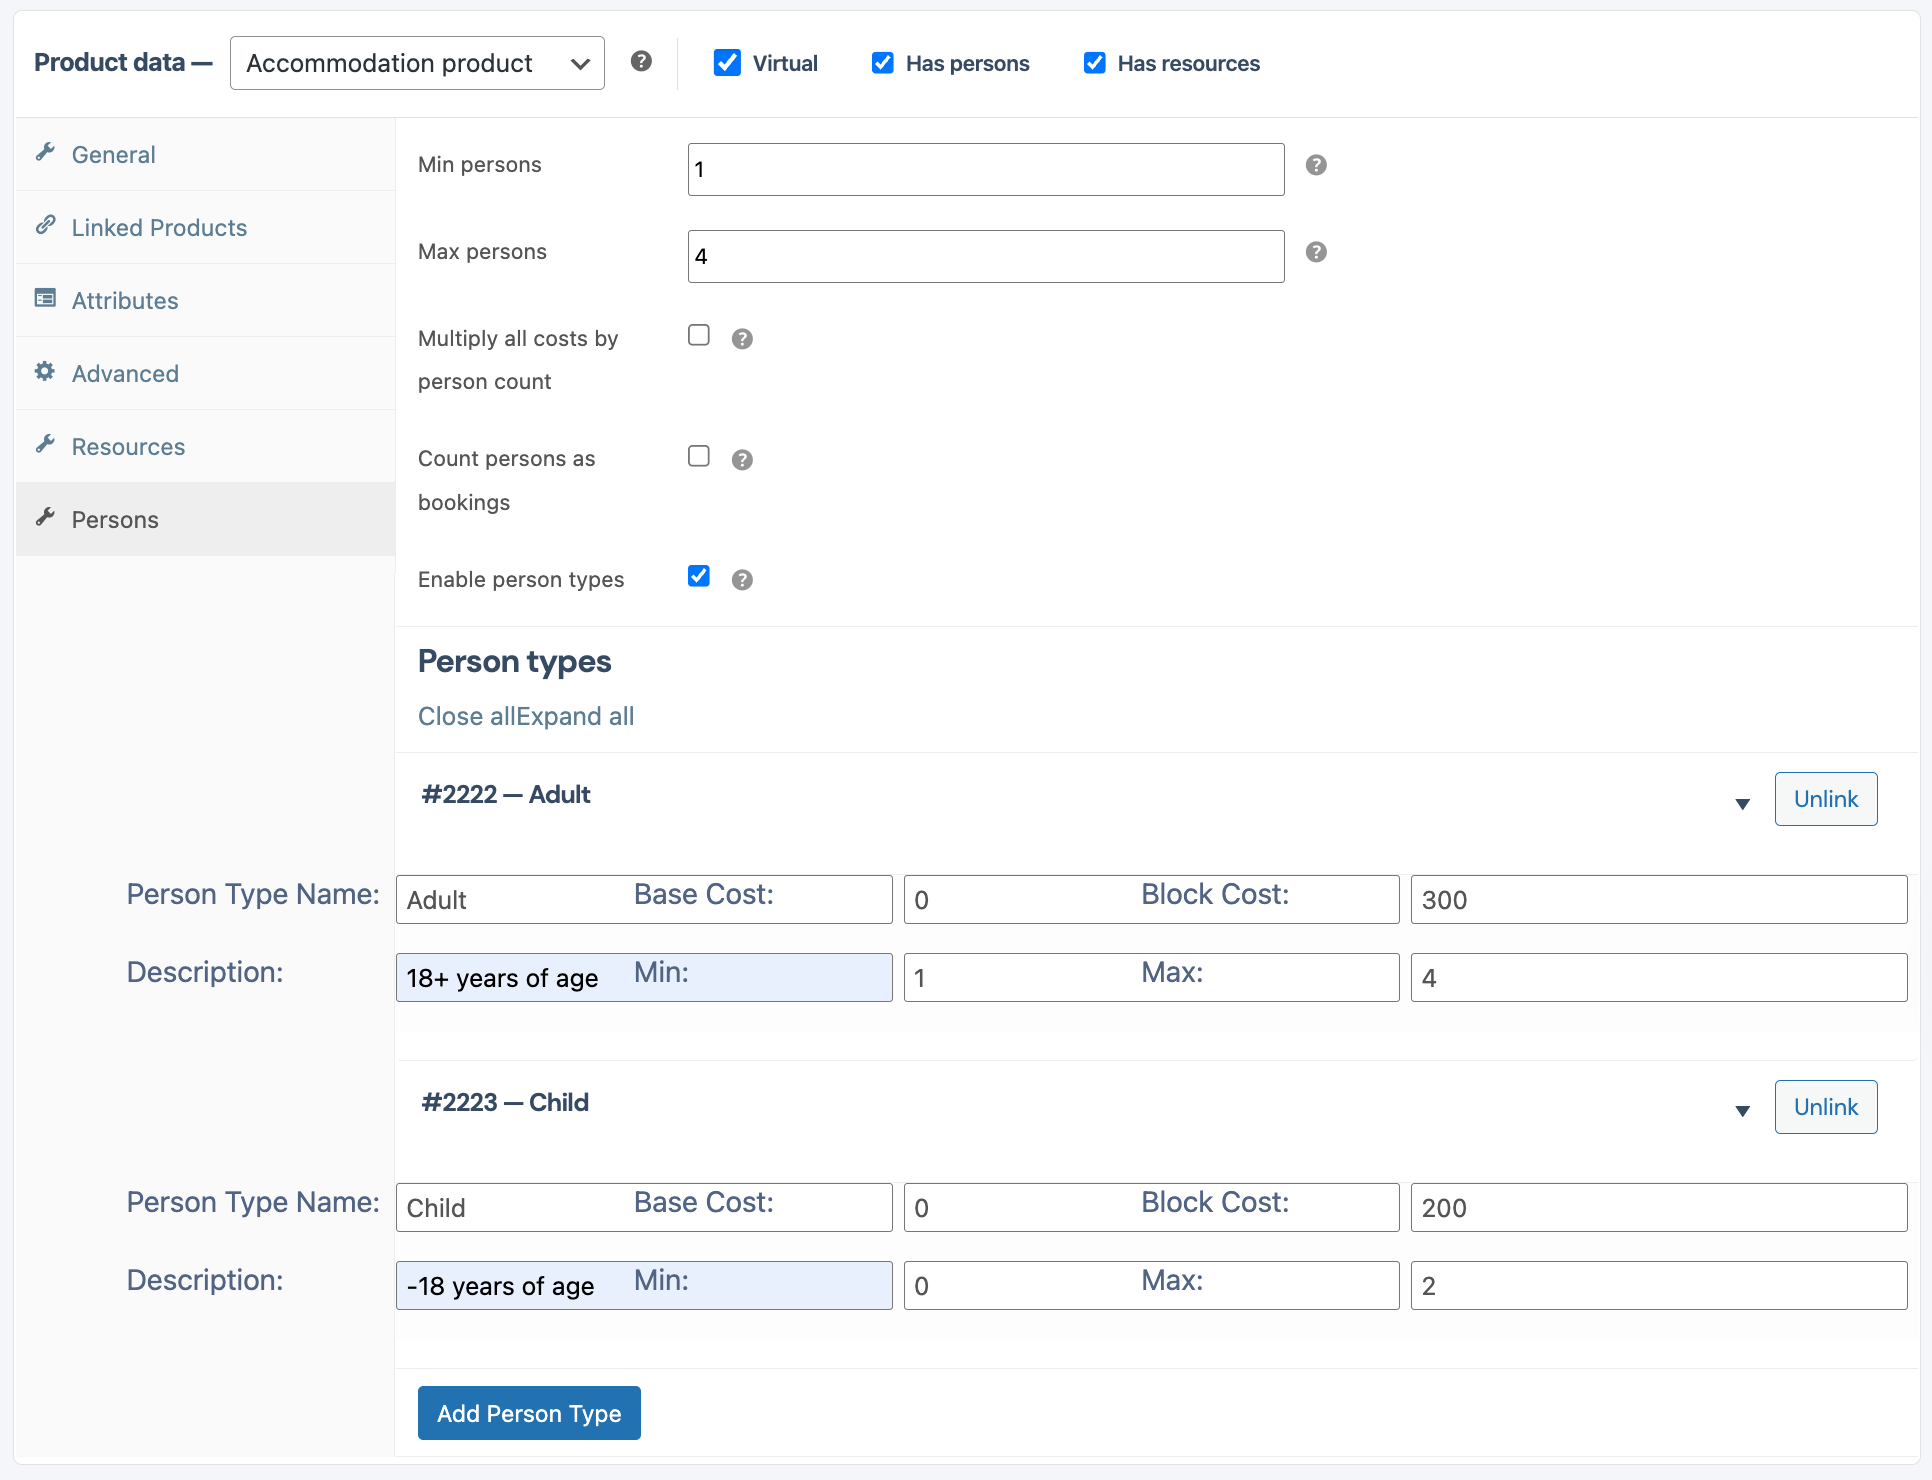
6.7 Persons:
7. Remember to click on “Send Product for Review” or to “Save as Draft” at the top of the form before leaving the page. If you do not save the form, the data you just entered will be lost.
1. Go to your Listing Dashboard. Select the Products tab on the left menu.
2. If you would like to edit an existing Product, you can search for the Product Name or find it in the list shown. To edit the Product, click on the 3 dots (…) on the right-hand side of the Product in question. From the Menu that opens, select “Edit Product”.
3. If you are adding a new Product, you will see a button in the top right corner, “Add Product”. Click this button
4. On the Product page, we will be working on the “Product Data”. This is where we set the Pricing for the Product/Listing.
5. Depending on the type of Product you are working with you will follow the following steps:
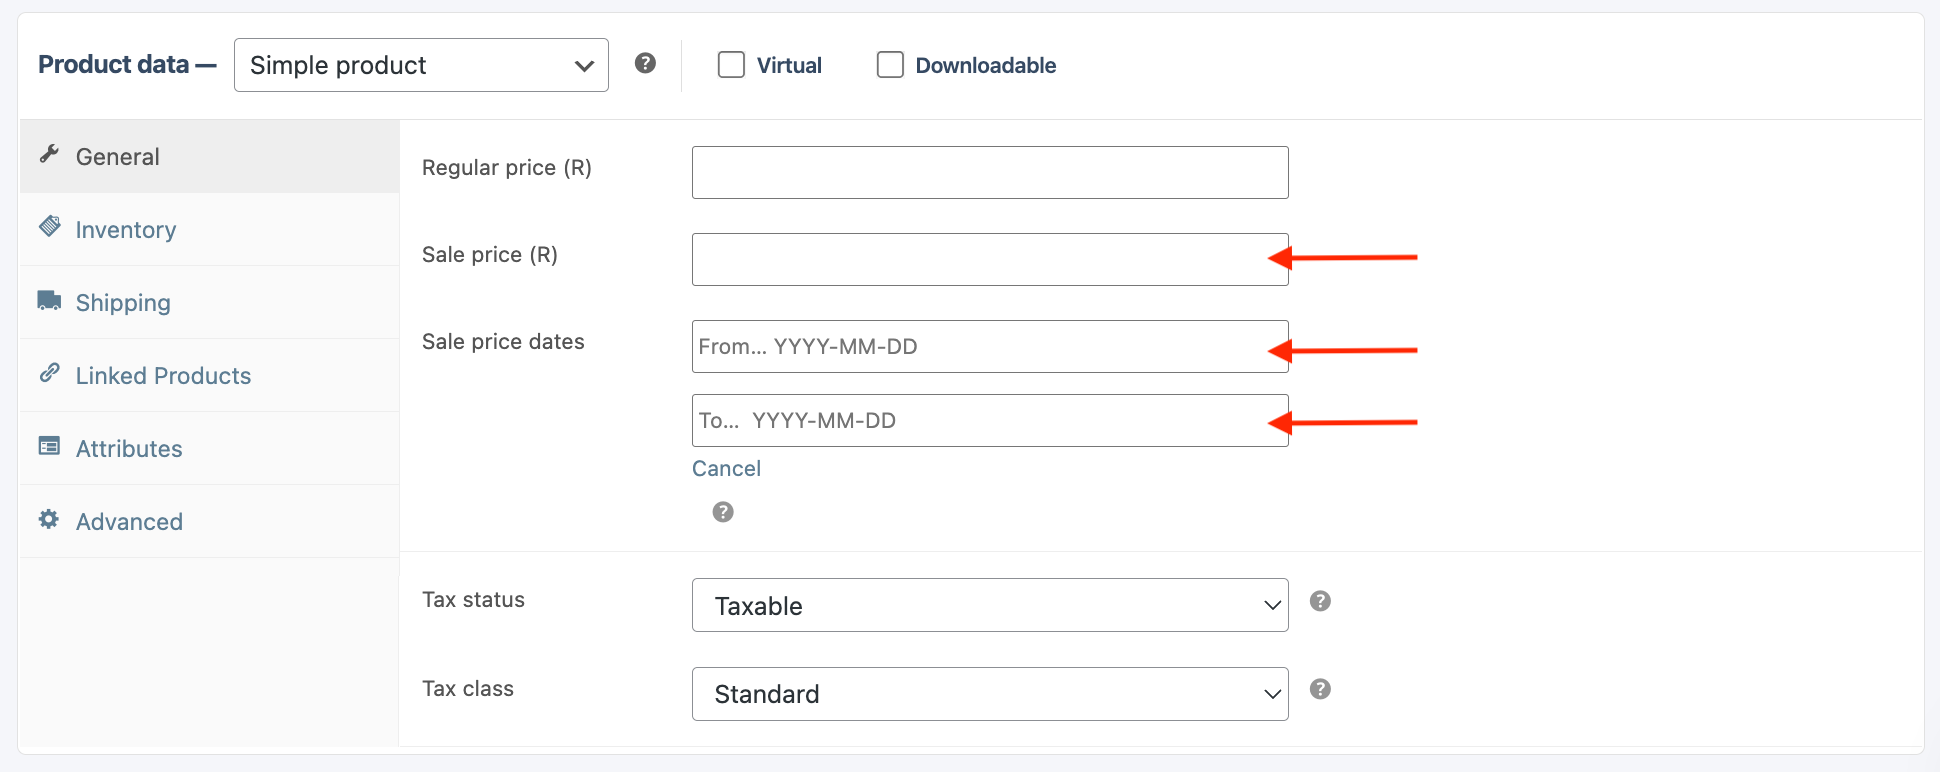
5.1 Simple Product (Local Product / Second Hand / Event). Go to General – Add Sale Price and schedule the dates for when the sale will run.
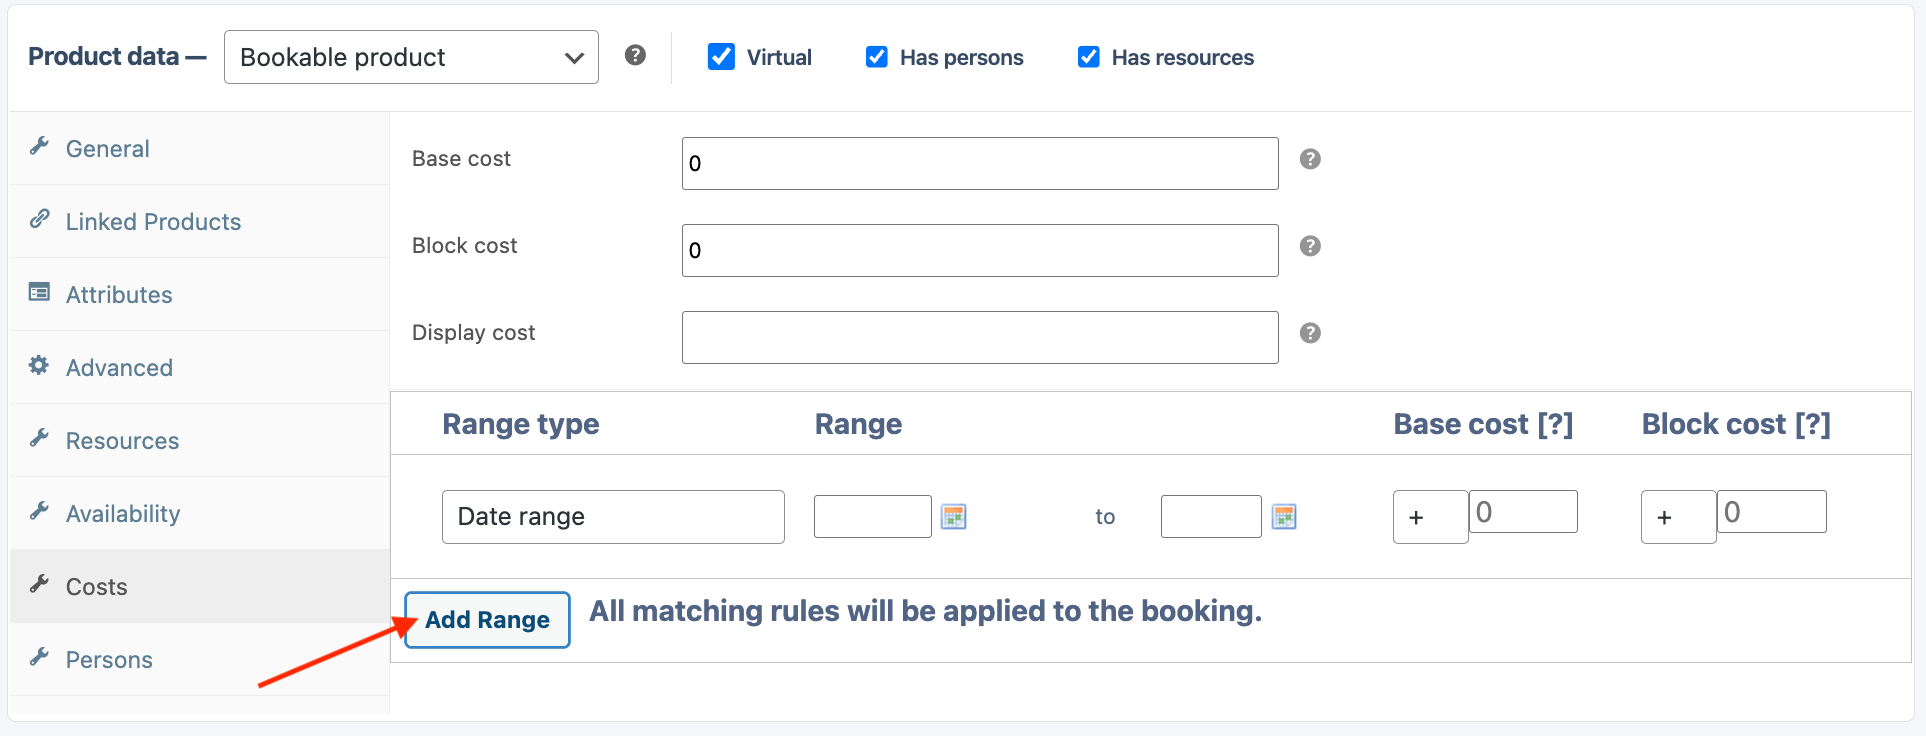
5.2 Bookable Product (Activities / Events). Go to Costs – Add a range with your sale price.
6. Remember to click on “Send Product for Review” or to “Save as Draft” at the top of the form before leaving the page. If you do not save the form, the data you just entered will be lost.
Townzie charges Listing Owners / Vendors a flat fee of 10% commission on any successful sales. There are no upfront fees for adding a Listing to the website.
Townzie doesn’t charge Visitors / Customers to the website any fees for using the website.
For more information on our Fees please visit out Payments Policy.
To request a payout, you can follow these steps:
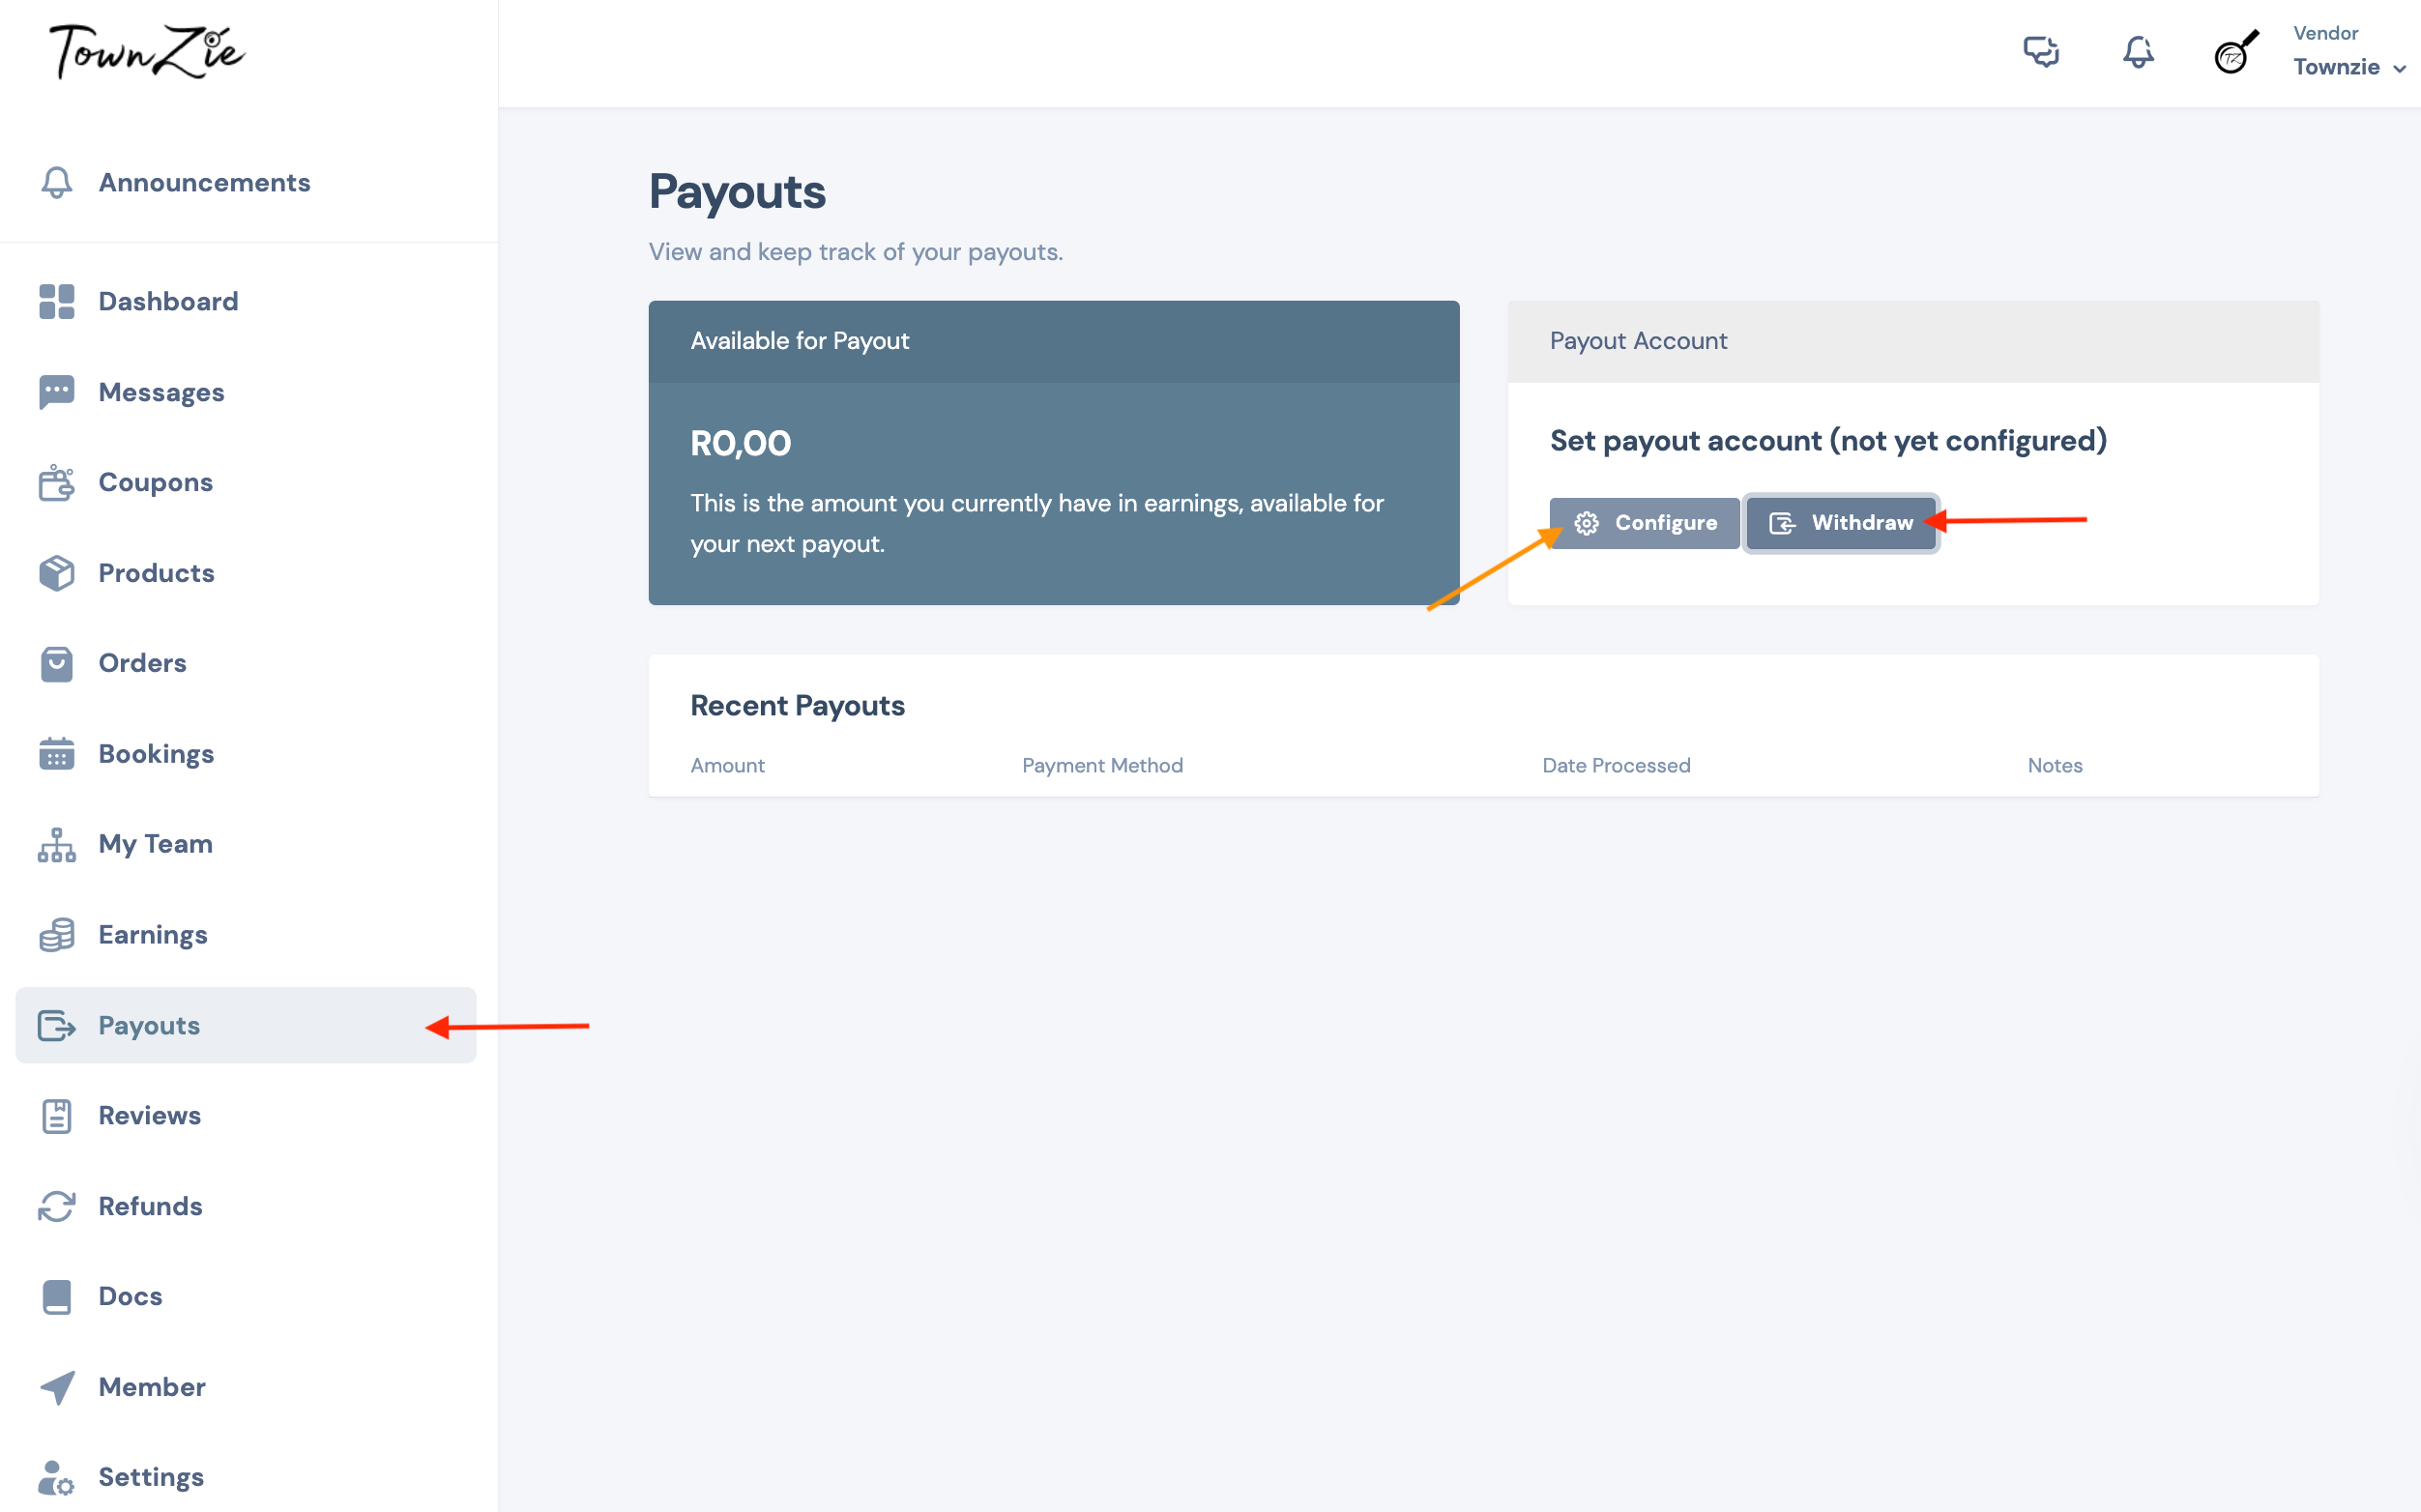
* Payments are made from South Africa, so if your bank account is located outside of South Africa, these payments may take longer to clear. You should be able to confirm the timeline directly with your Bank.
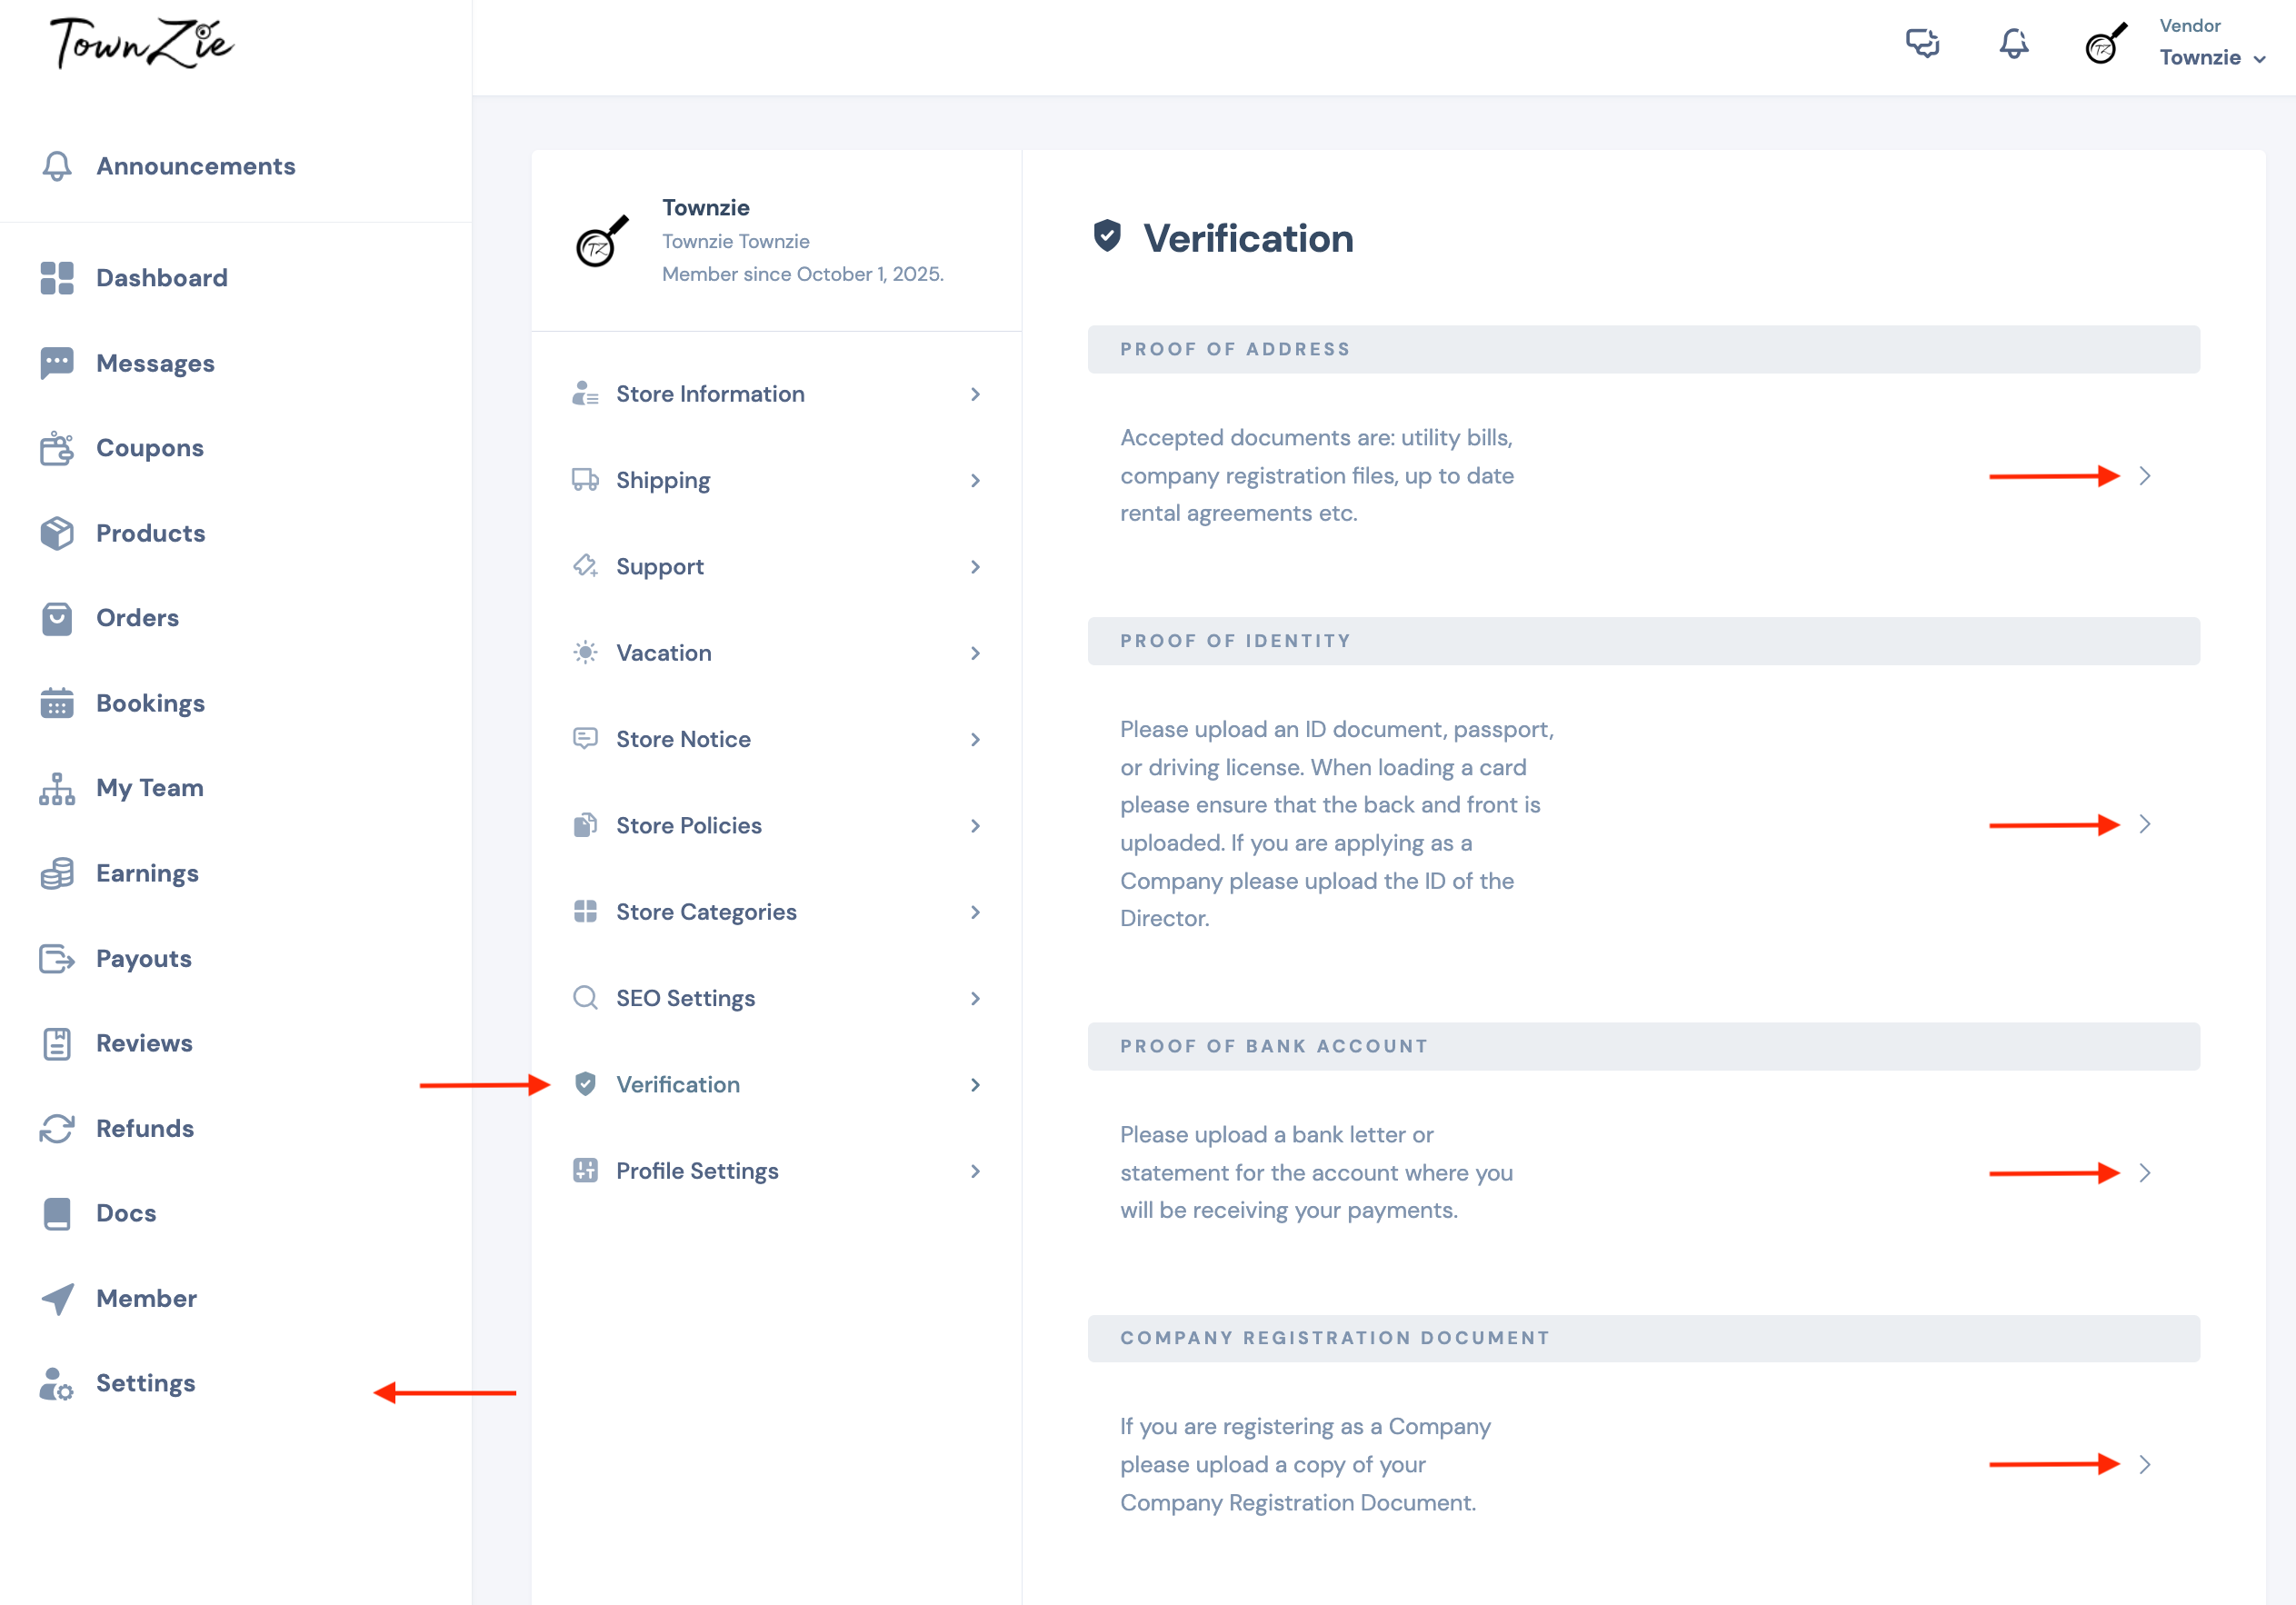
** Payments will only be made once a Vendor has successfully submitted their Verification documents. This is not only to protect the website visitors/customers but also to protect our Vendors from false/fake accounts posing to be a legitimate business that is, in essence, not the real business owner. To become an approved Vendor and to receive your payouts, you can upload your verification documents by going to: Listing Dashboard > Settings > Verification > and then uploading the requested Documents for review.
If you have any questions that were not answered by the FAQs above, you may reach out to us on the Contact Us page.